A clean edge is the cheapest way to make a yard look cared-for. It’s the difference between a flower bed that blends into the lawn in a blurry mess and one that looks like you meant it. The good news: you don’t need a landscaper or a truck full of materials to get there. Every idea below comes in under $50 for a typical front-yard bed, and most can be done in an afternoon with tools you probably already own.
Here are seven ways to edge your front yard on the cheap, from nearly-free to splurge-end-of-fifty-bucks.
1. The spade-cut trench edge (basically free)
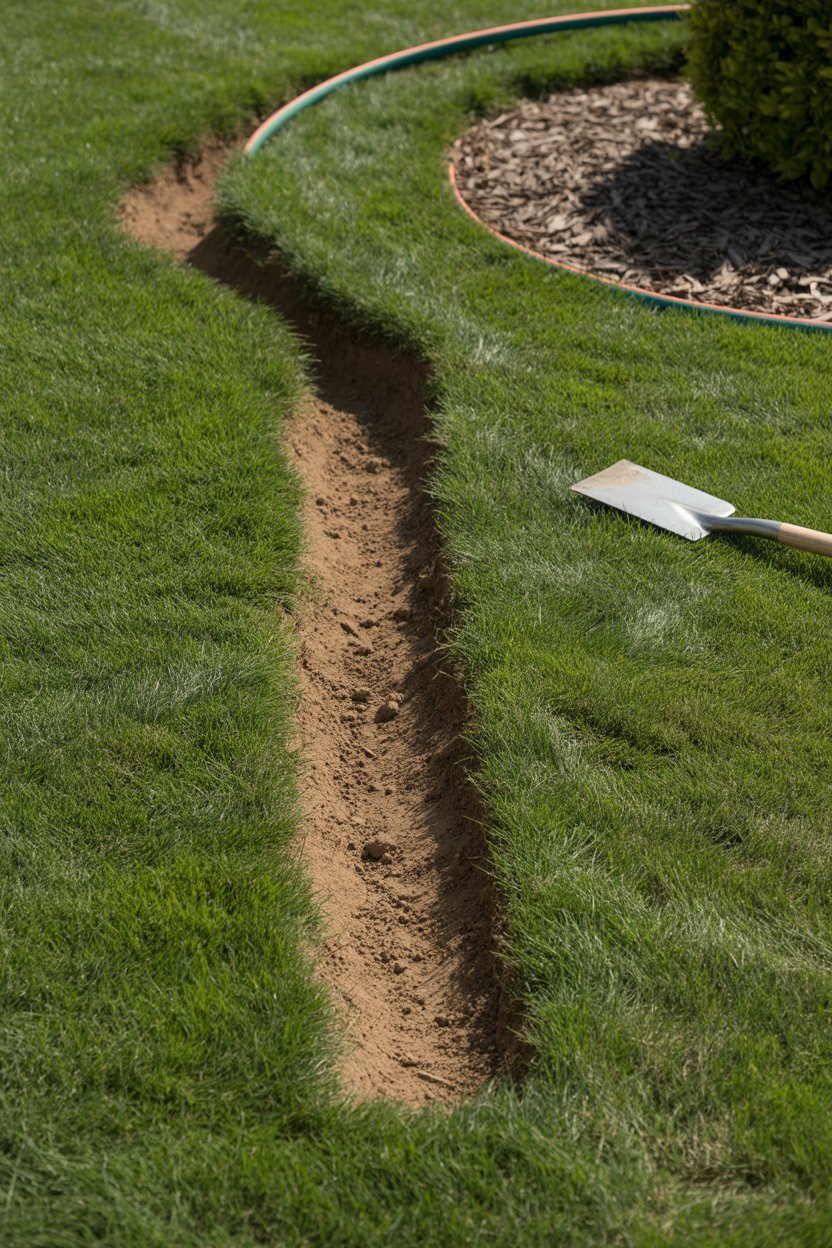
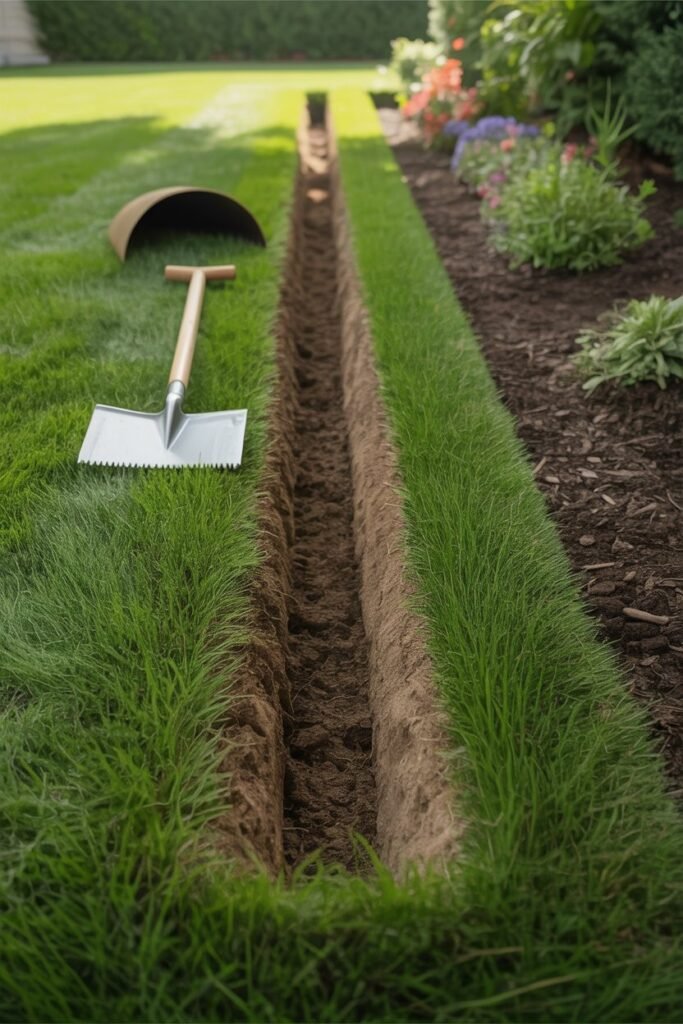
If you do nothing else, do this. A clean trench cut between your lawn and your bed reads as “intentional” from the curb, and it costs nothing but an hour of your time.
You’ll need: a flat spade or half-moon edger (~$25 if you don’t own one, $0 if you do).
How: Lay out a garden hose to mark your line, then push the spade straight down about 3–4 inches along it. Angle a second cut inward to pop out a wedge of soil, leaving a small V-shaped trench. Toss the loose soil back into the bed.
Tip: Re-cut it once a month through summer to keep grass roots from creeping back over the line. This is the foundation under several ideas below, so even if you add brick or stone later, start here.
2. Brick edging laid flat or as a soldier course (~$30–45)

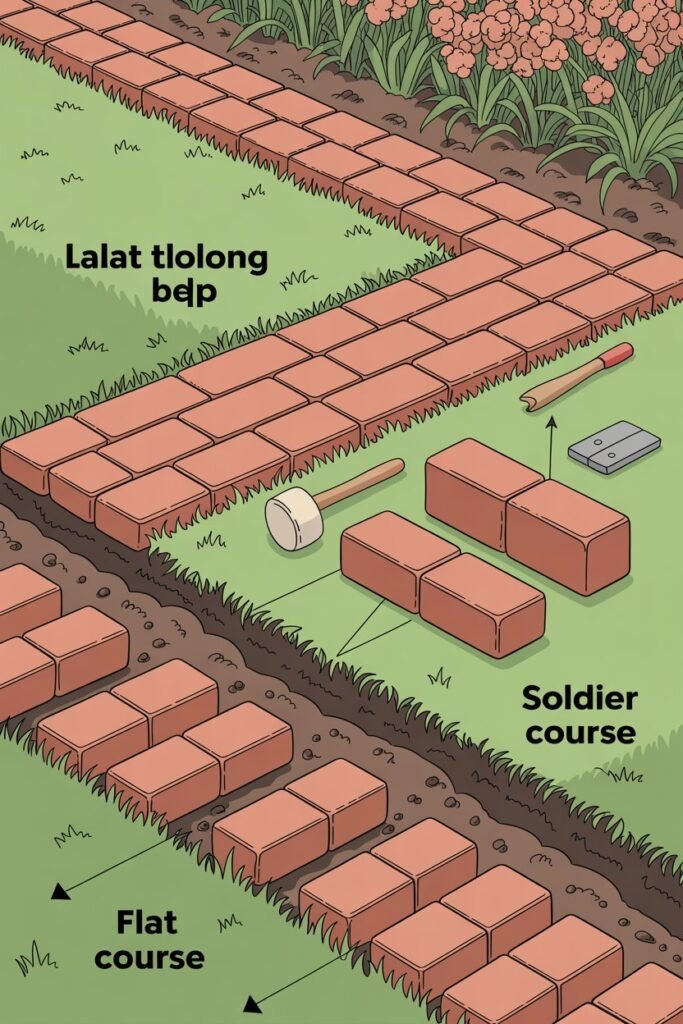
Brick is the workhorse of cheap edging, which is exactly why “lawn edging bricks” keeps trending. Reclaimed or used brick is often free on local marketplace listings, and even new is cheap by the piece.
You’ll need: roughly 20–30 bricks for a small bed (used: free–$0.50 each; new: ~$0.75–1).
How: Cut your trench (idea #1), then set bricks flat end-to-end for a low, mowable border, or stand them at an angle for the classic “soldier” sawtooth look. Tap each one level with a rubber mallet and backfill soil behind them.
Tip: Lay them flat and flush with the lawn if you want to run the mower wheel right over the top — no string-trimming the edge every week.
3. River rock or pea gravel border (~$25–40)

A band of loose stone gives a soft, natural transition and doubles as drainage along the bed.
You’ll need: one or two bags of river rock or pea gravel, plus a strip of landscape fabric (~$10).
How: Dig a shallow channel 4–5 inches wide, line it with fabric so weeds don’t take over, and pour in the stone. Keep the band narrow and consistent — a tidy 4-inch ribbon looks far better than a wide, patchy one.
Tip: Match the stone color to anything else on your exterior (gravel path, roof, stonework) so it looks designed rather than dumped.
4. Recycled materials you already have (free–$15)
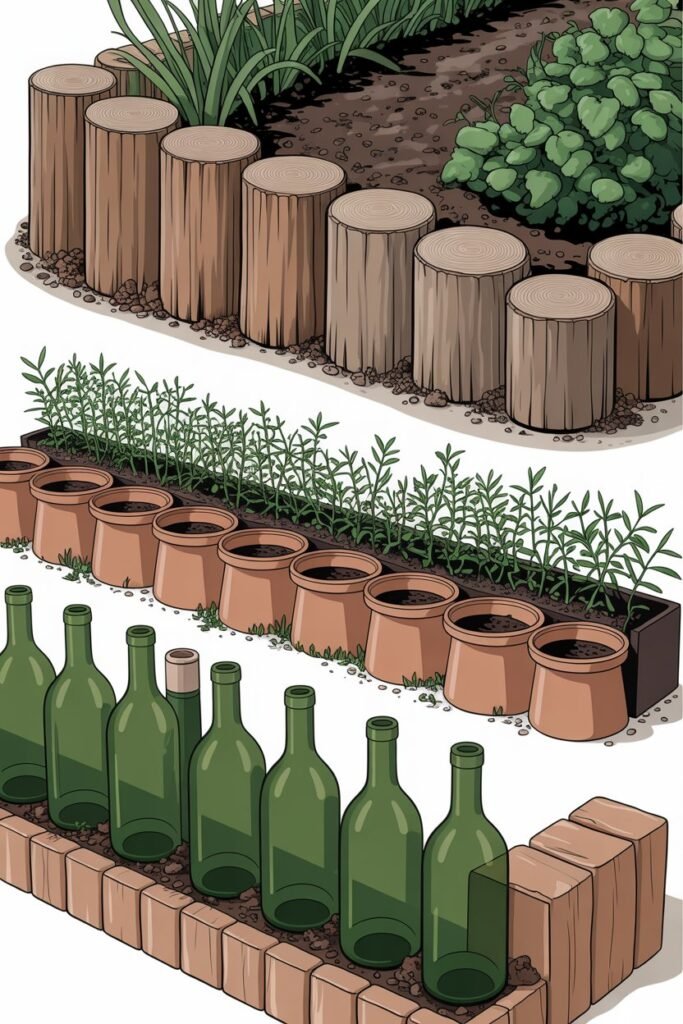
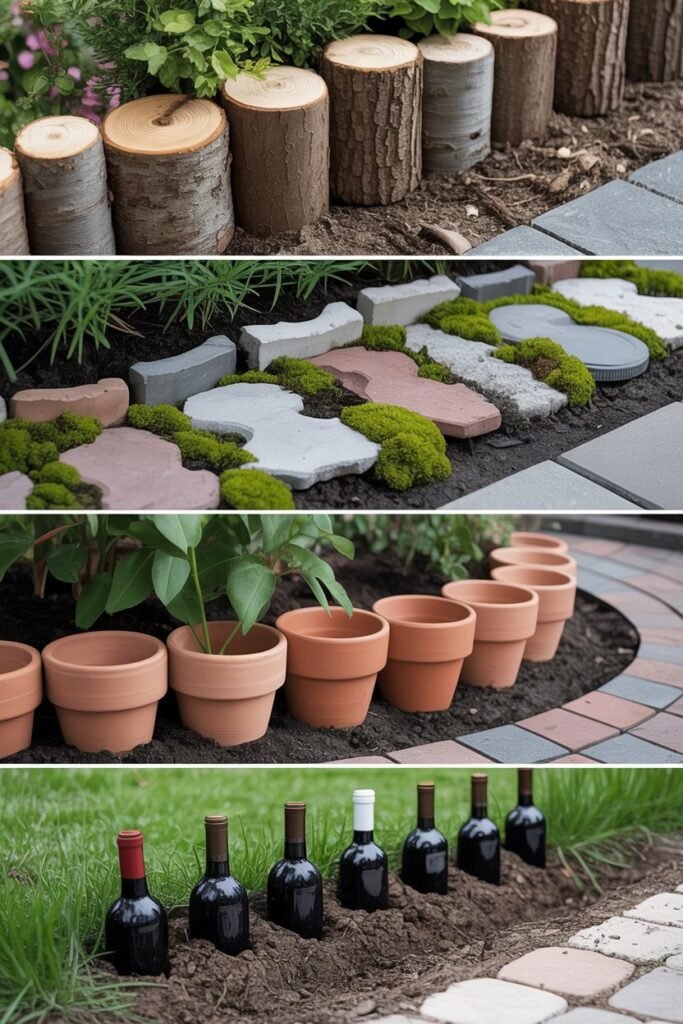
Some of the best-looking edges cost nothing because you’re using what’s lying around. This is where you can have a little fun.
Ideas that work: short log rounds cut from a fallen branch and half-buried upright; leftover pavers or broken concrete set as a flagstone-style border; terracotta pots sunk rim-deep; even wine bottles pushed neck-down into the trench for an old-cottage look.
How: Whatever the material, the method is the same — cut the trench, set the pieces snug against each other, backfill, and tamp.
Tip: Keep one material consistent along a single bed. Mixing brick, bottles, and logs in one stretch reads as cluttered; pick one and commit.
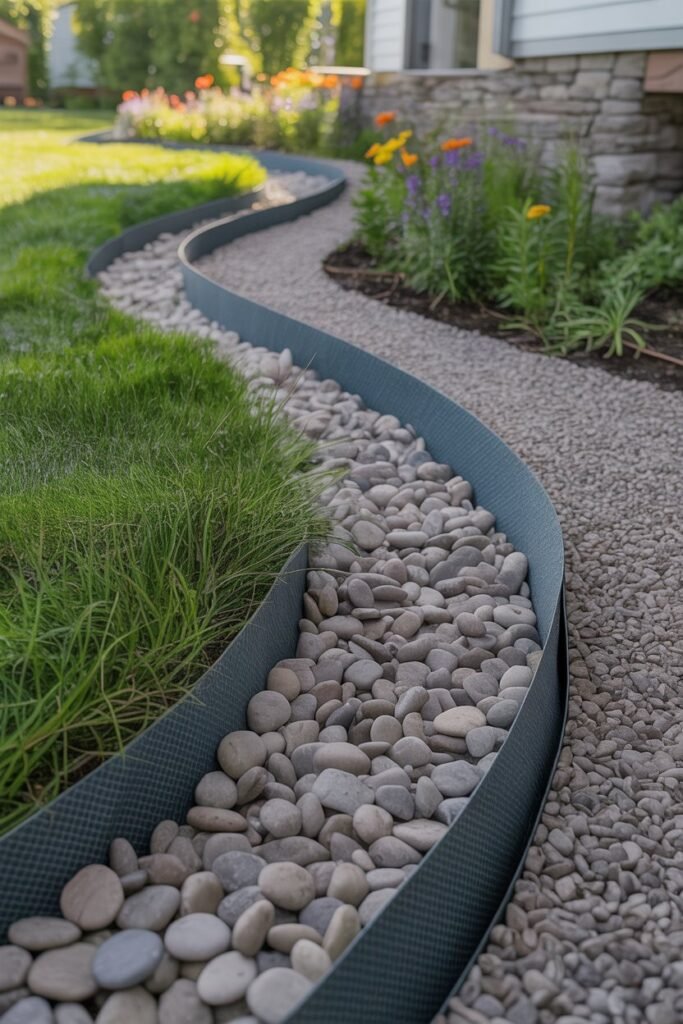
5. Metal edging strip (~$35–50)
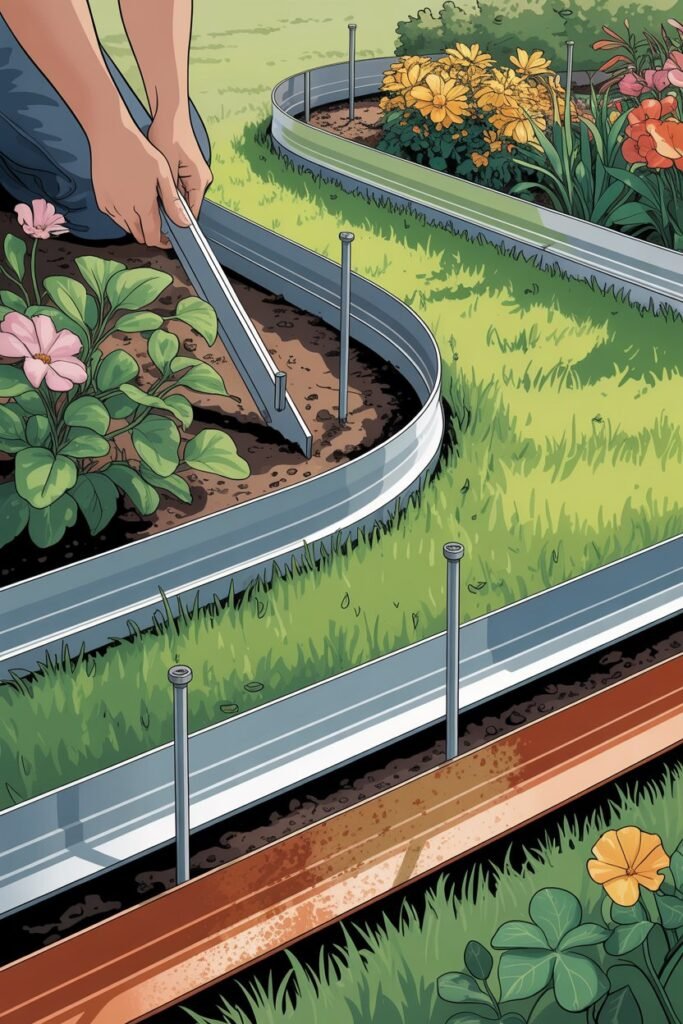
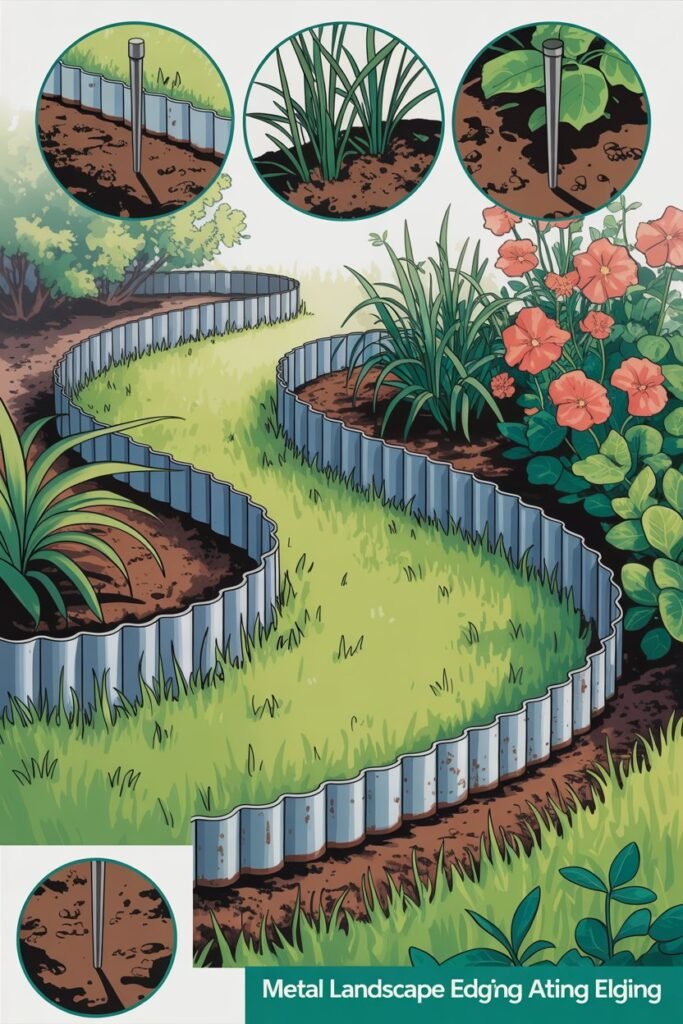
If you want the crispest possible line with almost no maintenance, thin steel or aluminum edging is hard to beat. It nearly disappears, which is the point — it just holds a perfect curve.
You’ll need: a roll or a few strips of landscape edging plus stakes (often sold together).
How: Cut your trench, set the strip so the top sits about half an inch above soil level, and drive the stakes through the built-in slots to anchor it. Steel will weather to a soft rust that looks great against greenery; aluminum stays bright.
Tip: Metal bends easily for curves, so it’s the best choice for rounded beds where rigid brick would force you into awkward angles.
6. Concrete pavers or cinder blocks you can plant (~$20–40)
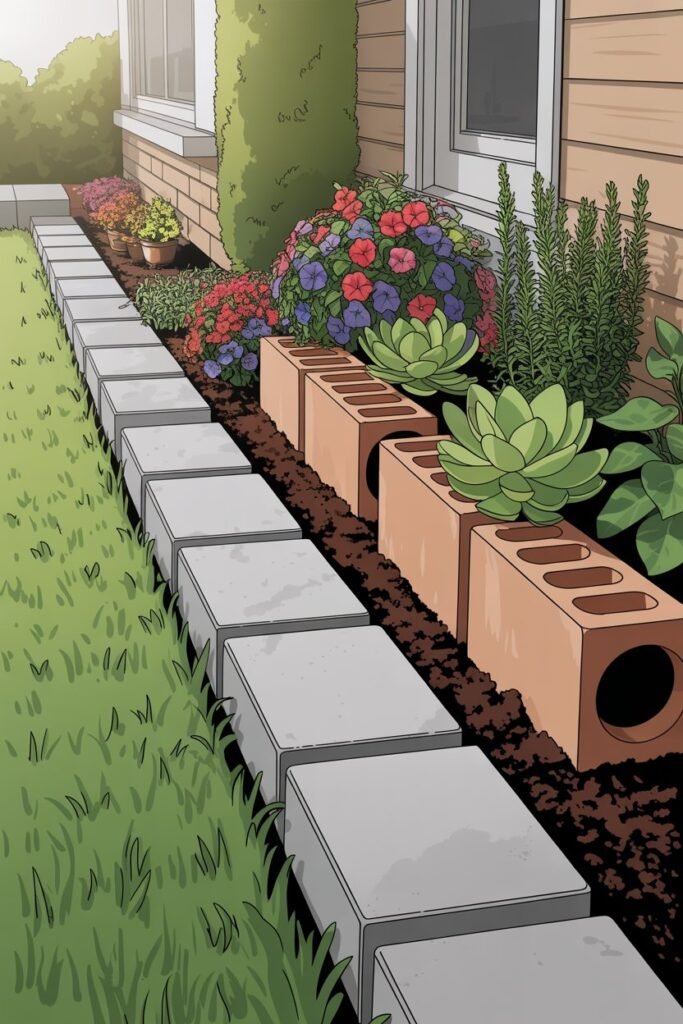
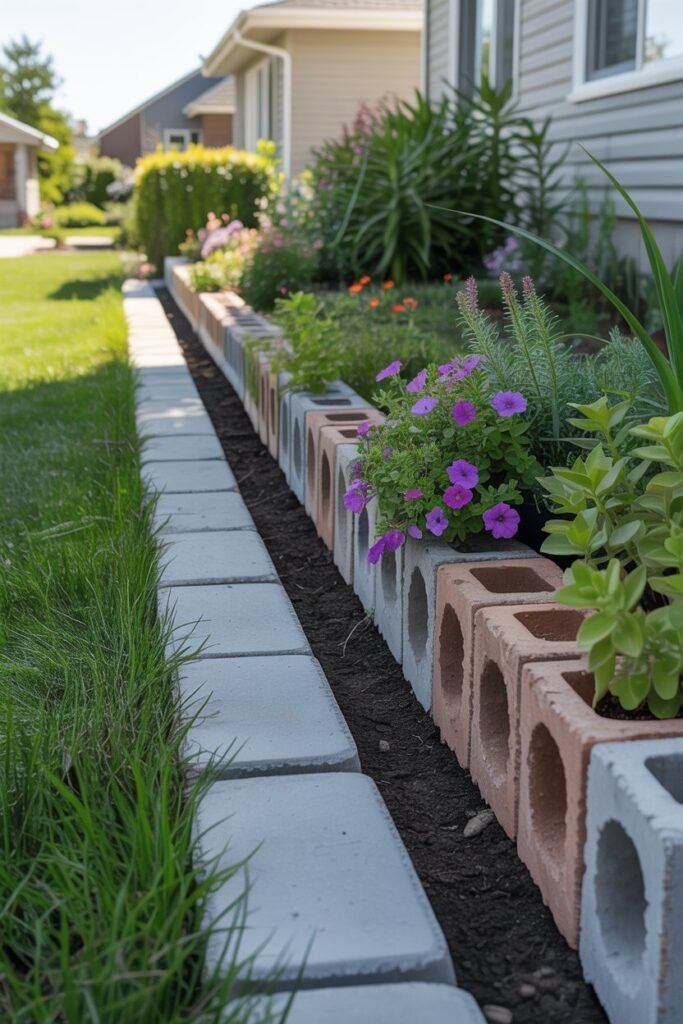
Pavers give you a flat, mow-over border, and cinder blocks turn the edge itself into a planter.
You’ll need: 8–12 pavers or 6–8 cinder blocks (~$1.50–3 each).
How: For pavers, set them flat and flush like flat-laid brick. For cinder blocks, lay them on their sides so the holes face up, level them in your trench, then fill the holes with soil and tuck in low annuals, succulents, or herbs.
Tip: Planted blocks are a quiet way to squeeze more color into a small front yard without a separate bed. Trailing plants will soften the gray concrete within a season.
7. Mulch-and-trench “no-build” edge (~$15)
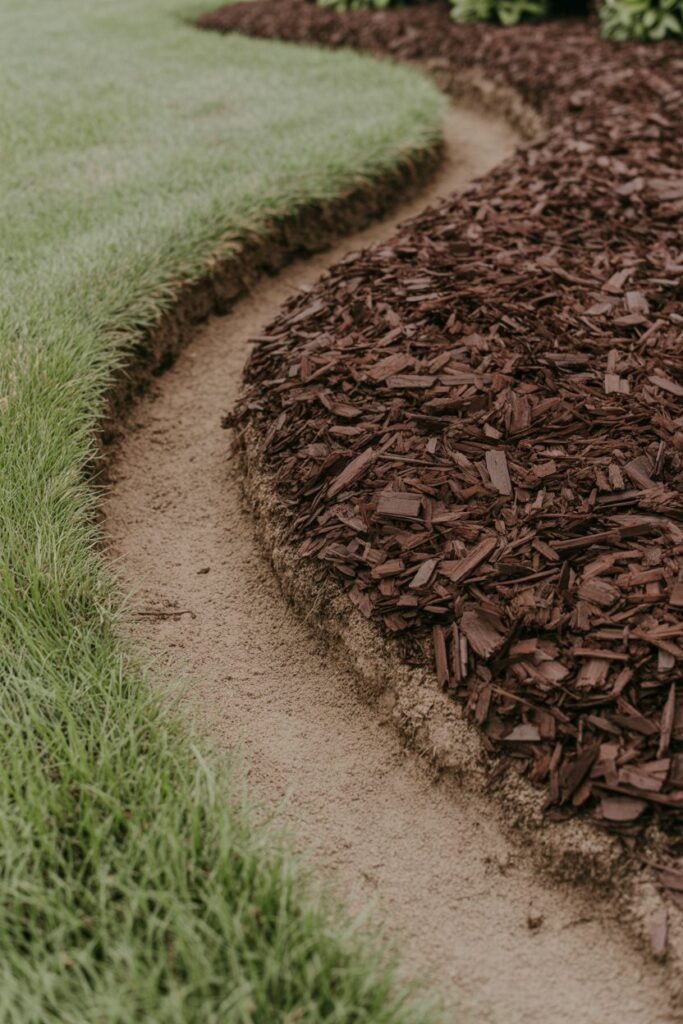
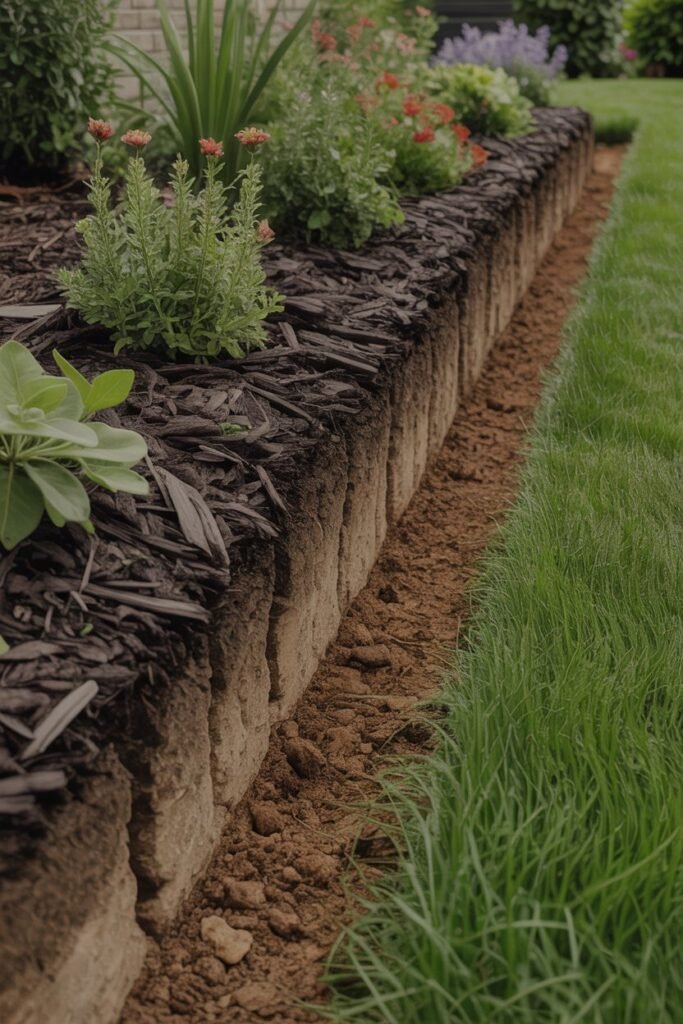
When you want a finished look today and have no patience for hauling stone, a deep mulch edge over a fresh trench does the job.
You’ll need: one or two bags of dark hardwood mulch.
How: Cut a clean, deep trench (idea #1 again), then mound mulch up to the trench line inside the bed. The dark mulch against the trench’s bare soil creates a sharp visual edge with zero hardscaping.
Tip: This is the fastest of the seven and the easiest to redo each spring. It pairs well with any of the others later — think of it as the starter version.
Which one should you pick?
If you want it done today for almost nothing, go with the spade-cut trench (#1) or the mulch edge (#7). If you want it to last for years with no upkeep, metal (#5) or flat-laid brick (#2) are your best value. And if you like a weekend project with personality, the recycled-materials edge (#4) or planted cinder blocks (#6) give you the most character per dollar.
Start with one short bed along the front of the house where it’s most visible from the street. Get that one stretch looking sharp, and the rest of the yard tends to follow.