Hardware is where gates die. The wood on a neglected cedar gate will outlast the hinges by a decade, and I’ve replaced far more latches than pickets.
Five parts carry the whole gate. Here’s what to buy for each and, more importantly, what finish to insist on, because the finish is the entire story and it’s the thing nobody reads on the package.
First, the finish rules, because everything below depends on them
Skip this and the rest of the article is useless.
Zinc plated (also sold as “bright” or “electro-galvanized”). The default in the hardware aisle. The coating is a few microns thick and outdoors it’s gone in one to three years. This is the shiny silver stuff. Don’t buy it for anything exposed.
Hot-dip galvanized (HDG). The part is dunked in molten zinc, so the coating is thick, slightly rough, and dull grey. Fifteen to forty years outdoors. This is the correct default for gate hardware and it’s usually only a few dollars more.
Stainless 304. Excellent inland. Within a few miles of salt water it pits and streaks rust. People are always surprised by this.
Stainless 316. Marine grade, has molybdenum in it, handles salt. Costs noticeably more. Worth it on the coast and nowhere else.
Powder coat over galvanized. Good, as long as the coating stays unbroken. Every scratch is a corrosion start. Touch up chips the same week you make them.
“Black” finish. Frequently just paint over zinc plate. If a black hinge is suspiciously cheap, that’s why. Look for “powder coated over hot-dip” or “black oxide over stainless” in the spec, and if the listing won’t say, assume the worst.
The one that catches everyone: pressure-treated lumber eats steel
Modern pressure-treated lumber is copper-based (ACQ or CA). Copper against plain or electroplated steel sets up a galvanic reaction, and the fastener corrodes fast. Fast as in visible rust bleeding down the wood in a single wet season, and a fastener with half its shank left in three or four years.
Anything going into PT lumber has to be hot-dip galvanized, stainless, or explicitly labeled for ACQ compatibility. The coated deck screws with the brown or tan polymer coating are usually rated for it, and the box will say so.
Cedar and redwood have their own tannins that stain badly against uncoated steel, though they aren’t as aggressive as copper treatment. Same rule applies for a different reason.
1. Hinges
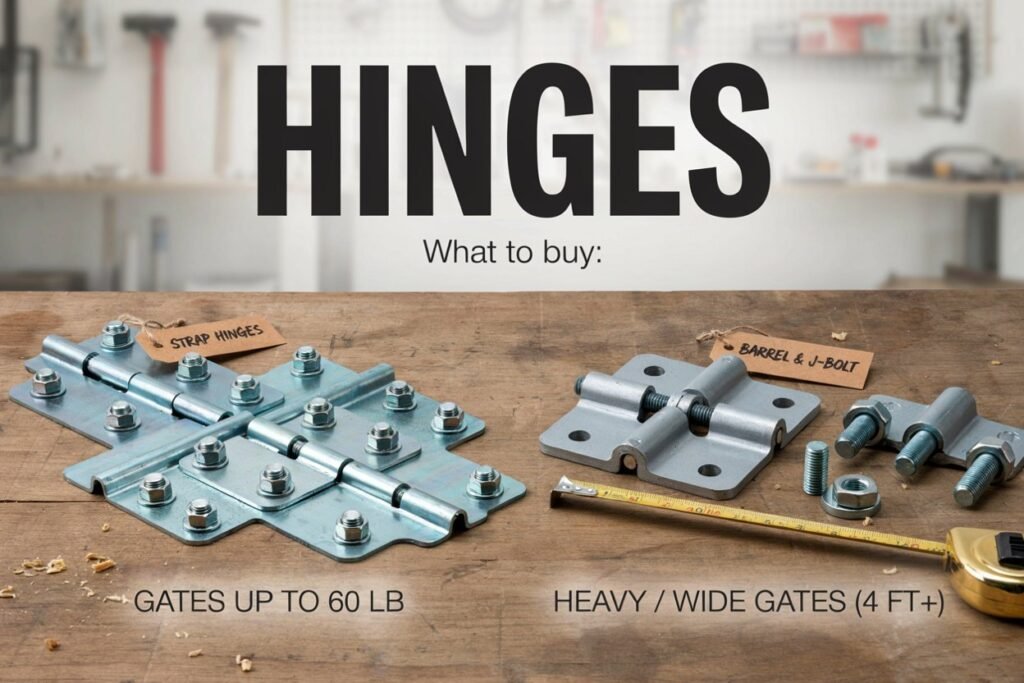
What to buy: hot-dip galvanized strap hinges for gates up to about 60 pounds. Barrel or J-bolt hinges for anything heavier or wider than four feet.
How many: two below 50 pounds and under 4 feet tall. Three above either threshold. Three is cheap insurance and there’s no such thing as a gate that failed from too many hinges.
Why J-bolt hinges are worth the upgrade: they thread into the post, so you can adjust the gate’s position after it’s hung by turning the bolt. Every gate settles in its first year. A strap hinge gives you no recourse; a J-bolt gives you a wrench and ten minutes.
Self-closing hinges if this is a pool gate, and check your local code for what else it requires. Spring hinges with adjustable tension are the usual answer. Test the closing force in cold weather, because springs stiffen and a hinge tuned in August can fail to latch in January.
Winter failure mode: water gets into the knuckle, freezes, and either seizes the hinge or wedges it apart. Hinges with a grease fitting are worth seeking out on heavy gates. On lighter ones, a shot of dry PTFE lubricant in October does the job.
2. The latch
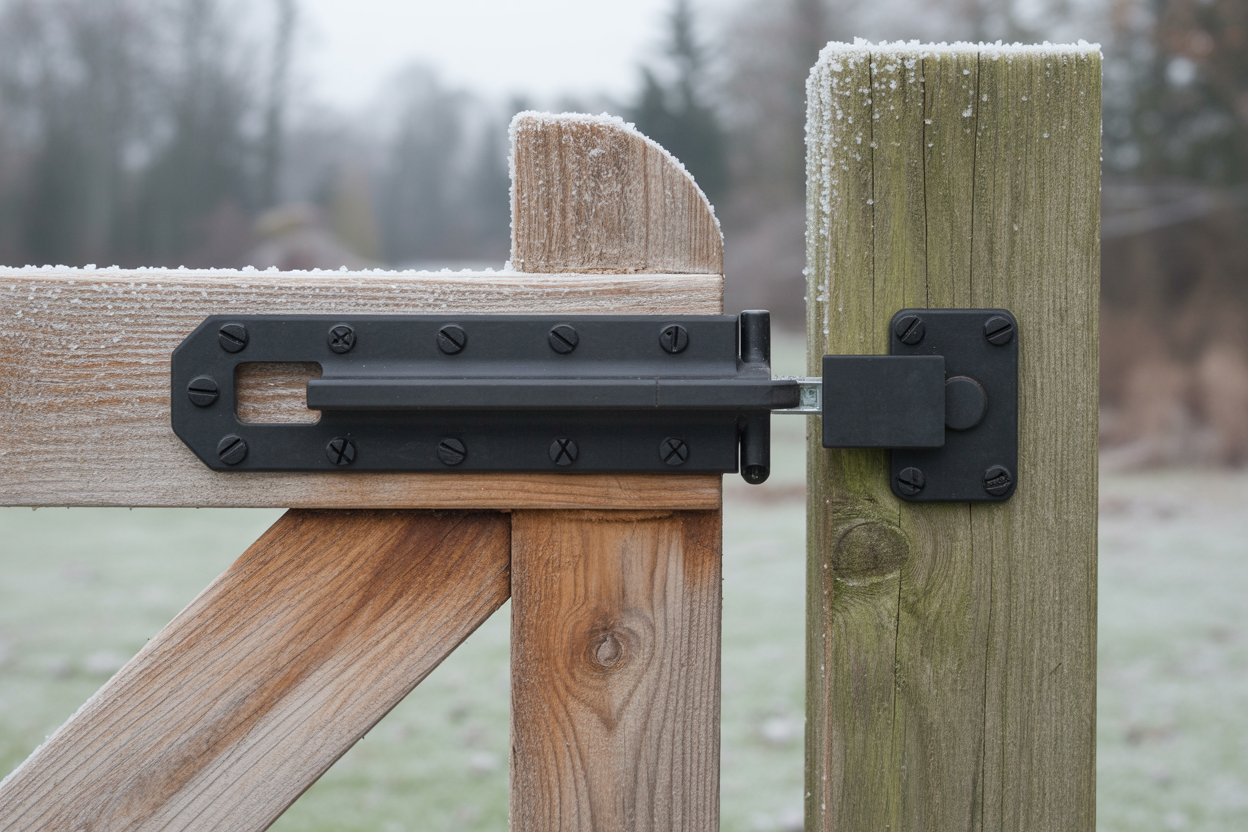
What to buy: a gravity latch with slotted mounting holes, in HDG or powder-coated over HDG.
The slots matter more than the brand. Wood swells and shrinks across the year, and a latch you can only mount in one position will bind for four months and rattle for four more. Slots let you chase the movement with a screwdriver instead of redrilling.
Avoid thumb latches on exterior gates unless the gate is under cover. The mechanism has tight tolerances, the linkage passes through the gate, and ice does not care about your design intent.
Lockable latches: buy one where the lock cylinder is replaceable. The cylinder is always the first thing to fail and having to replace the entire latch because a $9 cylinder seized is annoying.
3. Fasteners
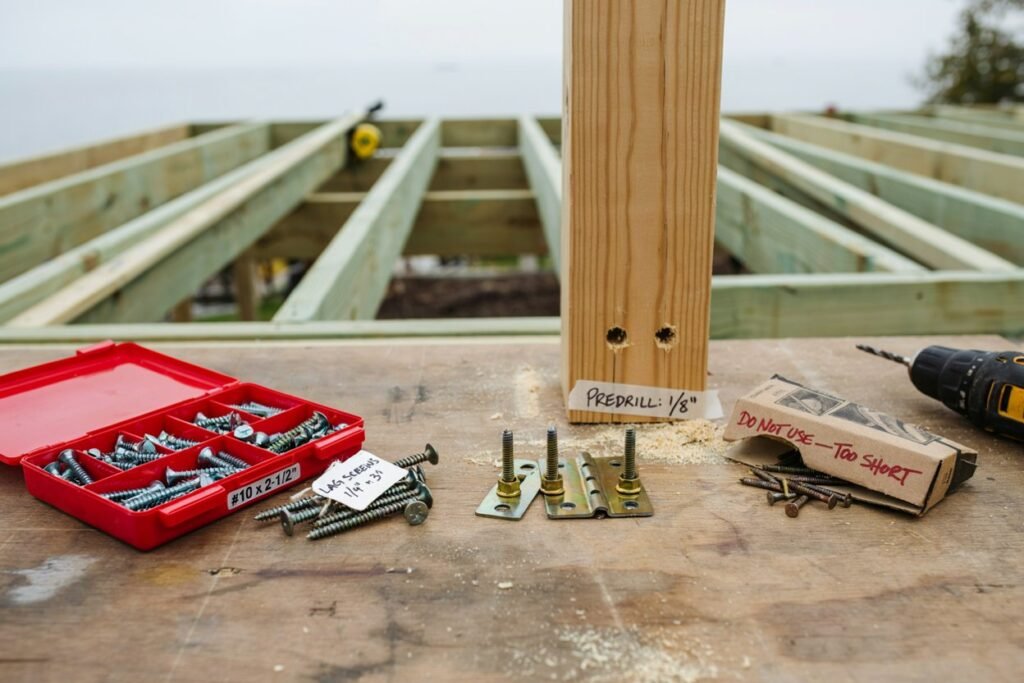
The part people spend nothing on and then wonder about.
For hinges into posts: #10 x 2-1/2 inch exterior structural screws, or 1/4 inch x 3 inch lag screws with washers. Predrill 1/8 inch for the #10s, 5/32 for the lags. The screws that come in the hinge package are almost always too short and should go straight in the bin.
For the gate frame: #9 or #10 exterior screws, 2-1/2 or 3 inch, rated for ACQ if you’re in treated lumber.
Do not mix stainless fasteners with galvanized hardware where you can avoid it. Stainless is cathodic to zinc, so the galvanizing sacrifices itself around the fastener and you get a corrosion halo. Match the family: HDG screws with HDG hardware, stainless with stainless.
Never use drywall screws. They’re brittle, they’re not coated for exterior use, and they snap under shear. A gate is nothing but shear.
4. Anti-sag kit
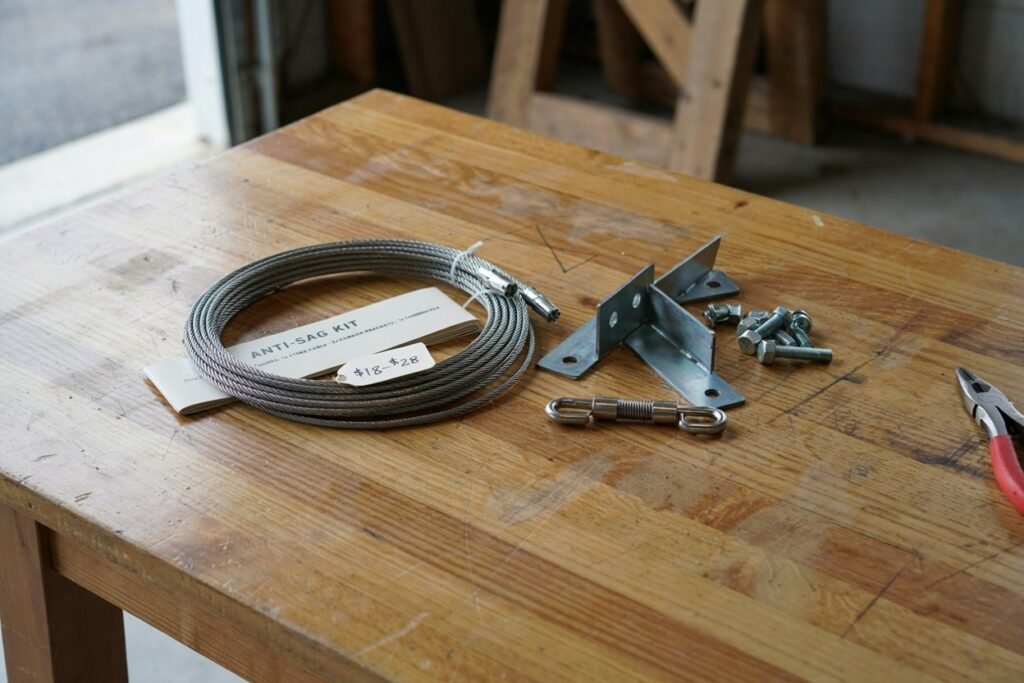
A steel cable, two corner brackets, and a turnbuckle, for $18 to $28.
Buy one even if you built a braced frame. It’s the adjustment you’ll want in year two, and installing the brackets while the gate is on sawhorses is far easier than doing it later on a hung gate in the rain.
Direction matters and it’s the opposite of a wood brace. Cable pulls, so it runs from the top hinge corner down to the bottom latch corner. Tighten the turnbuckle and the latch corner lifts. A wood brace pushes, so it runs the other diagonal, from the bottom hinge corner up to the top latch corner.
If you install a cable on the wood-brace diagonal, tightening it pulls the gate further out of square. I have watched someone crank on a turnbuckle for twenty minutes making their problem worse.
Winter note: back the turnbuckle off a quarter turn before a hard freeze if the gate is tight against its latch. Wet wood swells, the cable doesn’t stretch, and something has to give.
5. Post caps
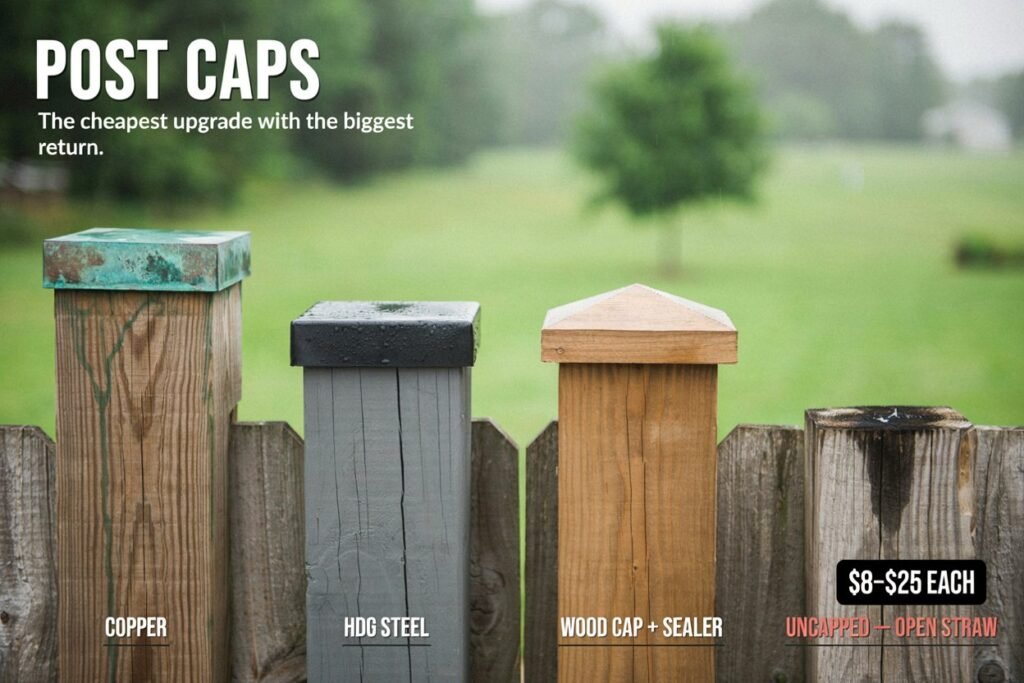
The cheapest part on this list and the one with the best return.
An uncapped post is an open drinking straw. End grain absorbs water at something like ten times the rate of face grain, and it holds it. Water sits in the top of the post, freezes, splits the fibers, and the split lets in more water. Two or three cycles of that and the top six inches of your post are compost.
Copper, HDG steel, or pressure-treated wood caps all work. Copper patinas green, steel stays dark, wood matches the fence. $8 to $25 each.
If you don’t want a visible cap, cut the post top at a slight bevel so water runs off, and seal the end grain with two coats of exterior sealer. It’s not as good, but it’s not nothing.
What this costs together
| Part | Budget | Do it right |
|---|---|---|
| Hinges, qty 3 | $22 | $70 |
| Latch | $14 | $45 |
| Fasteners | $12 | $22 |
| Anti-sag kit | — | $24 |
| Post caps, qty 2 | $16 | $36 |
| Total | $64 | $197 |
The difference is about $130, and it’s the difference between hardware you replace in year four and hardware still working in year twenty.
The fifteen-minute autumn habit
Every October, before it gets unpleasant to be outside:
Run a driver over every hinge screw. Shoot dry PTFE into the hinge knuckles and the latch mechanism, not WD-40, which washes off and then attracts grit. Check the latch still catches cleanly with the gate under its own weight. Touch up any chipped powder coat.
That’s it. Fifteen minutes buys you most of the lifespan difference in the table above, and it’s the maintenance nobody does.