Drying herbs is one of the easiest ways to preserve your garden harvest or use up a bunch from the grocery store before it wilts. Home-dried herbs are more flavorful than most store-bought jars, and you don’t need any special equipment to make them.
This guide covers five simple methods that work without a dehydrator, from slow air drying to quick oven and microwave techniques. You’ll also learn which herbs dry best, how to harvest them for maximum flavor, and how to store them so they stay fresh for months.
Disclosure: As an Amazon Associate we earn from qualifying purchases. If you buy through our links, we may earn a small commission at no extra cost to you.
Which Herbs Dry Best?
Herbs with low moisture content and sturdy leaves dry quickly and keep their flavor well. These include rosemary, thyme, oregano, sage, marjoram, dill, savory and bay leaves. They’re ideal for slow air drying.
Herbs with high moisture and tender leaves, such as basil, mint, parsley, tarragon, cilantro and lemon balm, can mold if they dry too slowly. They do better with faster methods like a drying screen in a warm room, the oven or the microwave.
| Herb type | Examples | Best drying methods |
|---|---|---|
| Low moisture, sturdy | Rosemary, thyme, oregano, sage, dill, bay | Hang drying, paper bag, rack |
| High moisture, tender | Basil, mint, parsley, tarragon, cilantro | Drying rack, oven, microwave |
How to Harvest Herbs for Drying
Harvest herbs in the morning after the dew has dried but before the sun gets hot. That’s when the essential oils, and therefore the flavor, are strongest.
For the best flavor, harvest leafy herbs just before they flower. Cut healthy stems, and avoid any leaves that are yellow, damaged or diseased.
Gently rinse herbs only if they’re dirty, then shake off the water and pat them completely dry with a towel. Any leftover moisture can cause mold during drying.
1. Hang Drying in Bundles
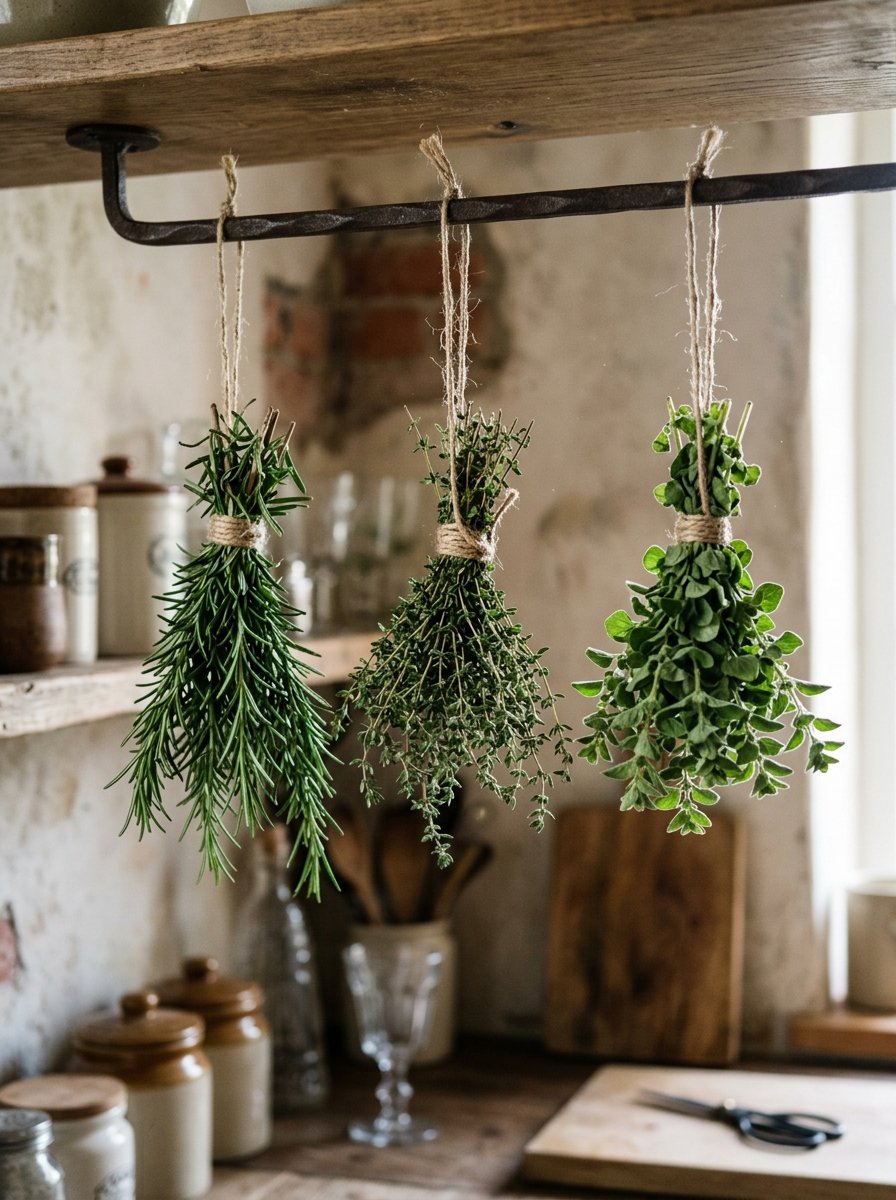
Hang drying is the classic, no-cost method and works especially well for sturdy herbs like rosemary, thyme, oregano and sage.
Gather 5 to 10 stems into a small bundle and tie the ends with string or a rubber band (rubber bands tighten as stems shrink). Hang the bundles upside down in a warm, dry, dark place with good air circulation, such as a pantry, attic or spare room.
Most herbs dry in about one to three weeks. They’re ready when the leaves crumble easily between your fingers. Keep bundles out of direct sunlight, which fades color and flavor.
Best for: rosemary, thyme, oregano, sage, marjoram and savory. Time: 1 to 3 weeks. Pros: free, hands-off and preserves flavor well. Cons: slow, and not ideal in humid climates where tender herbs may mold.
To speed things up, keep bundles small and make sure they don’t touch each other or the wall. A clothes drying rack, a hook on a beam or even a hanger with clothespins can hold several bundles at once. If you see any signs of mold or a musty smell, discard that bundle and make the next ones smaller.
2. The Paper Bag Method
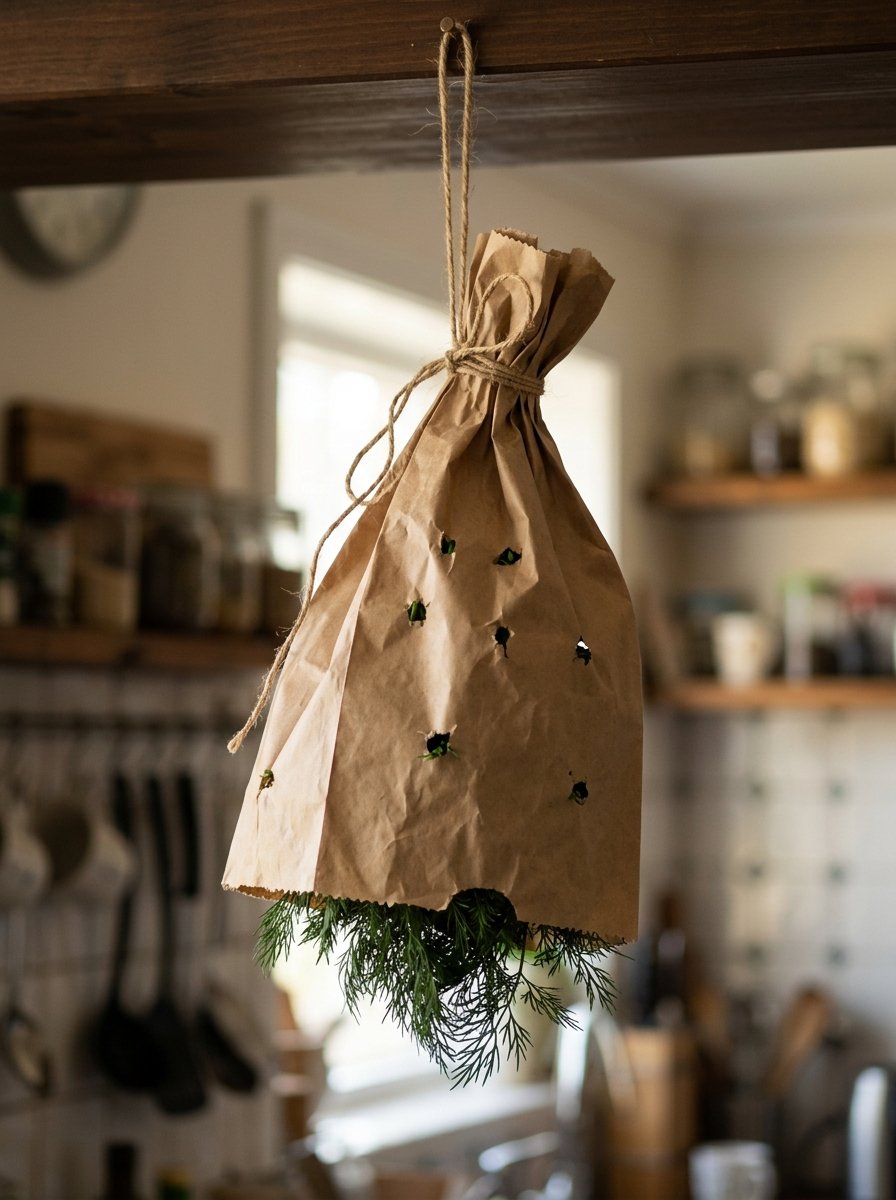
The paper bag method is a variation of hang drying that keeps herbs clean and catches leaves and seeds as they fall.
Place a small bundle of herbs upside down in a paper bag, gather the top around the stems and tie it closed. Punch a few holes in the bag for airflow, then hang it in a warm, dry spot.
This method is perfect for dusty spaces and for herbs grown for seeds, such as dill, fennel and coriander. Check the herbs after one to two weeks.
Best for: dill, fennel, coriander, oregano and any herb you want to save seeds from. Time: 1 to 3 weeks. Pros: keeps herbs dust-free and collects falling leaves and seeds. Cons: slightly slower airflow than open hanging.
Write the herb name and date on each bag with a marker so you can keep track of several batches. When the herbs are dry, simply shake the bag to knock leaves and seeds loose, then remove the stems and pour the contents into a jar.
3. Using a Drying Rack or Screen
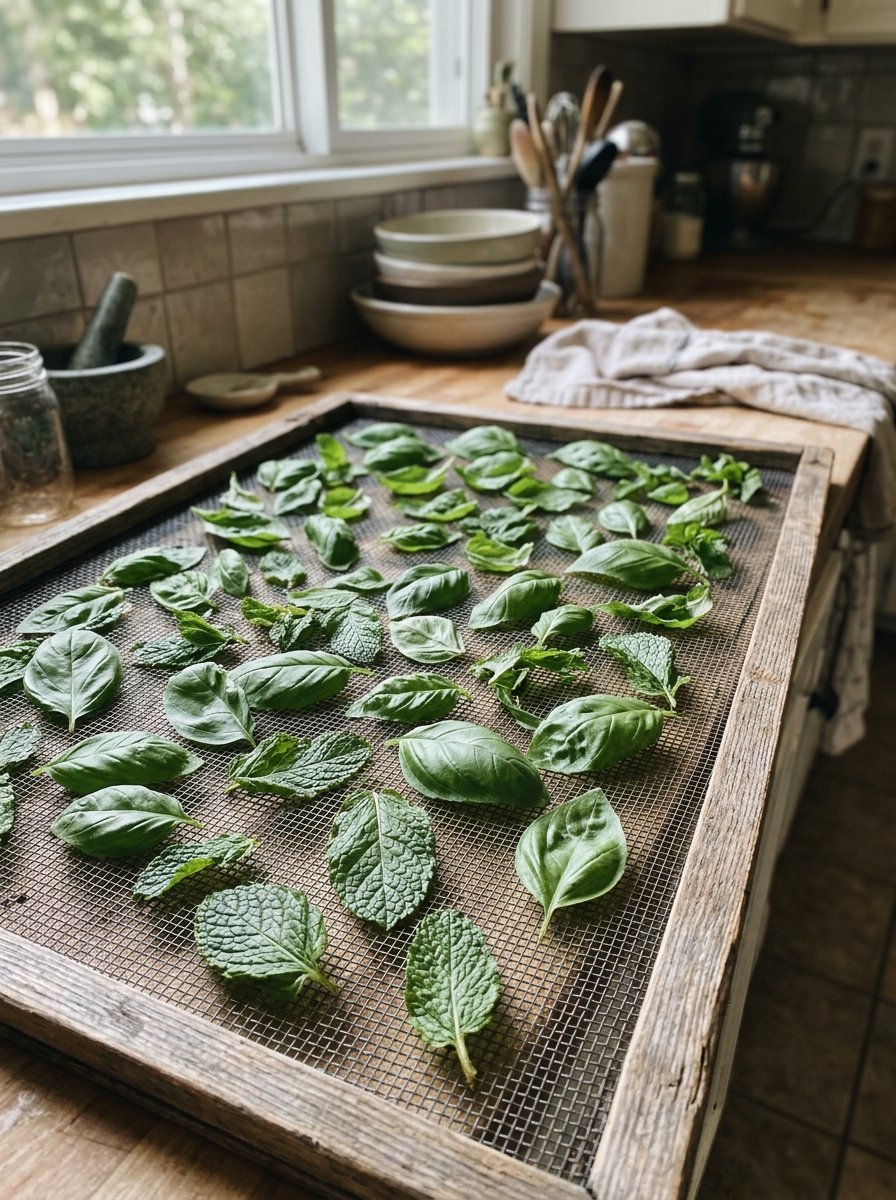
A drying rack or screen lets air circulate around individual leaves, which makes it a good choice for tender, high-moisture herbs like basil and mint.
Remove leaves from the stems and spread them in a single layer on a mesh rack, a window screen or a baking rack covered with paper towels. Place the rack in a warm, dry, airy room out of direct sun.
Turn the leaves every day or two. Most herbs dry in several days to a week. Hanging mesh drying racks hold several tiers and take up very little space.
Best for: basil, mint, lemon balm, parsley, and flowers such as chamomile and calendula. Time: 3 to 7 days. Pros: good airflow, great for large harvests and tender herbs. Cons: takes up flat surface space unless you use a hanging rack.
A small fan on a low setting in the room can improve airflow and speed up drying, especially in humid weather. Avoid stacking leaves on top of each other, which traps moisture and can cause dark spots or mold.
4. Oven Drying
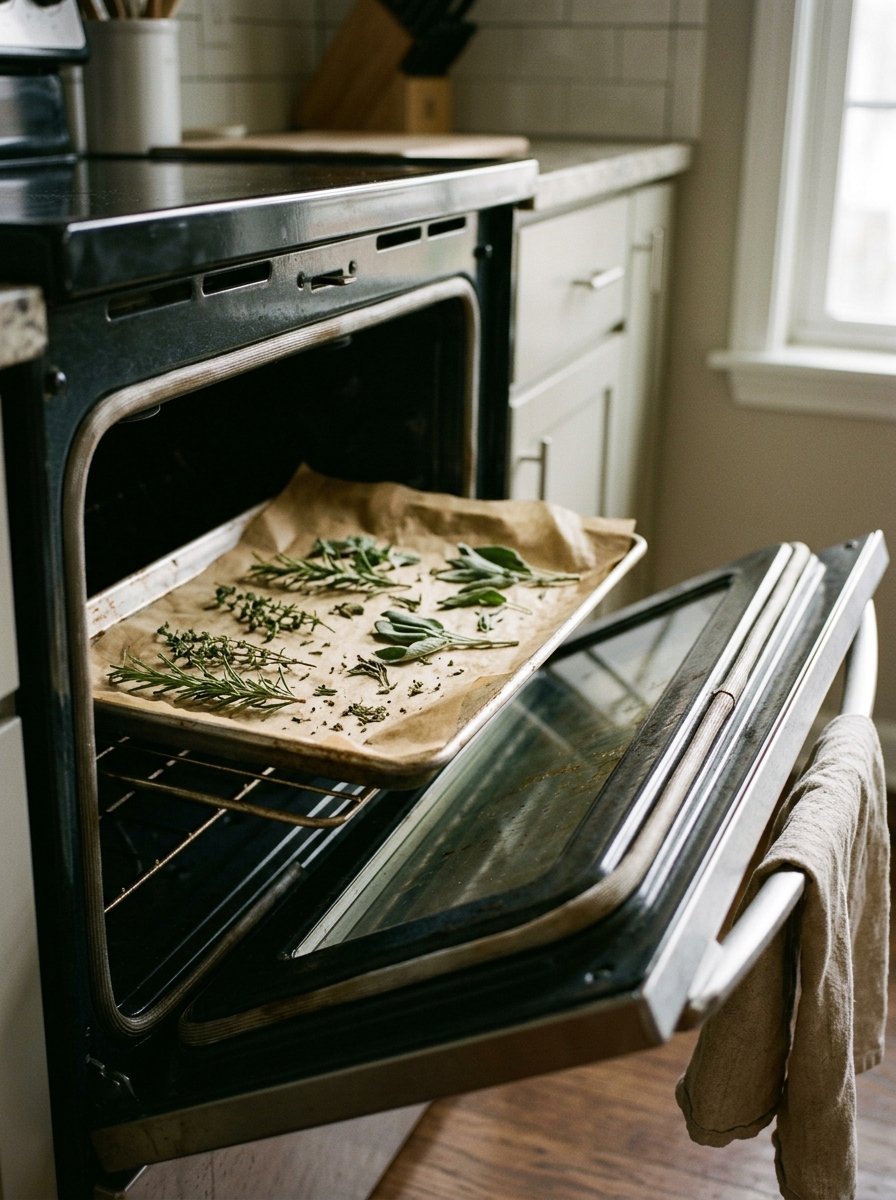
Oven drying is fast and handy when you have a large harvest or live in a humid climate where air drying is slow.
Spread leaves or small sprigs in a single layer on a baking sheet lined with parchment paper. Set the oven to its lowest temperature, ideally below 180°F, and prop the door open slightly so moisture can escape.
Check and turn the herbs every 30 minutes. Most herbs dry in two to four hours. Watch closely, because herbs can scorch quickly, which ruins their flavor.
Best for: large batches, humid climates and sturdy herbs like rosemary and thyme. Time: 2 to 4 hours. Pros: fast and predictable. Cons: higher heat can reduce flavor and color if you’re not careful.
If your oven’s lowest setting is above 180°F, prop the door open wider and check more often. Convection ovens dry herbs faster, so reduce the time. Let the herbs cool completely on the tray before testing for crispness, since warm leaves can feel softer than they really are.
5. Microwave Drying
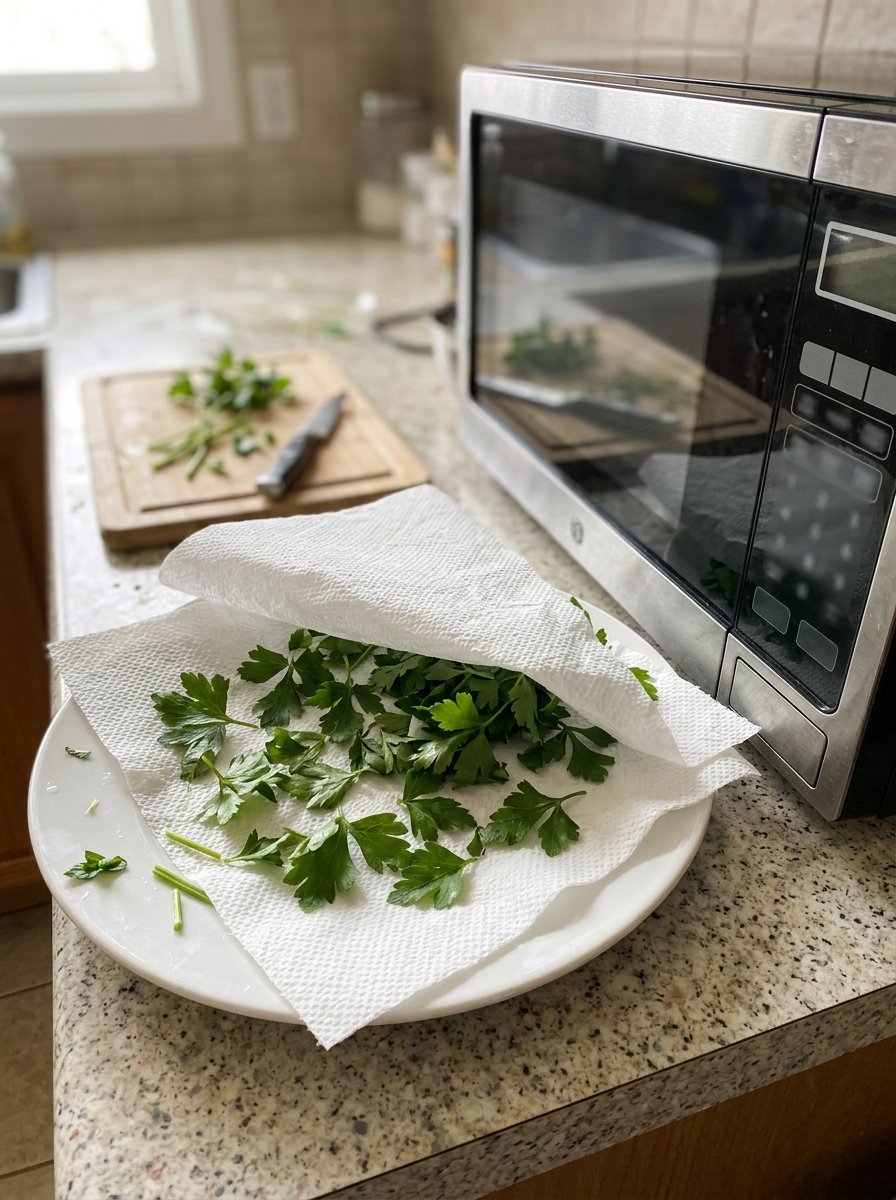
The microwave is the fastest way to dry small batches of herbs, often in just a few minutes.
Place a single layer of leaves between two paper towels on a microwave-safe plate. Microwave on high for 30 seconds, then check. Continue in 15 to 30 second bursts until the leaves are dry and crisp, usually one to three minutes total.
Microwave times vary by oven and herb, so check often. This method works especially well for parsley, mint and other tender herbs.
Best for: small amounts of parsley, mint, basil, oregano and cilantro. Time: 1 to 3 minutes. Pros: extremely fast and keeps a good green color. Cons: only suitable for small batches, and it’s easy to overcook.
Never microwave herbs without paper towels, and don’t leave the microwave unattended, as very dry leaves can scorch. Let the herbs cool for a minute after each burst, since they continue to crisp up as they cool.
How to Tell When Herbs Are Fully Dry
Properly dried herbs feel crisp and crumble easily when rubbed between your fingers. Stems should snap rather than bend.
If herbs feel leathery or soft, they need more time. Storing herbs that aren’t fully dry can lead to mold.
How to Store Dried Herbs
Store dried herbs in airtight glass jars or containers, away from heat, light and moisture. A dark cupboard is ideal.
Keep leaves whole if possible and crush them just before using, which preserves flavor longer.
Label jars with the herb name and date. Most dried herbs keep their best flavor for about a year.
How to Use Dried Herbs
Dried herbs are more concentrated than fresh. As a general rule, use about 1 teaspoon of dried herbs in place of 1 tablespoon of fresh herbs.
Add dried herbs early in cooking so they have time to release their flavor into soups, sauces and stews.
You can also use dried herbs to make herbal teas, seasoning blends, infused oils and homemade gifts.
Tools You’ll Need
The beauty of drying herbs at home is that you probably already have everything you need: kitchen string or rubber bands, paper bags, baking sheets, parchment paper, paper towels and clean glass jars with tight lids.
If you dry herbs often, a hanging mesh drying rack is an inexpensive upgrade. It holds several tiers of leaves, takes up almost no space and gives excellent airflow. Small amber or clear spice jars with labels make storage neat and keep herbs organized.
Common Mistakes to Avoid
Drying wet herbs. Moisture on the leaves leads to mold. Always pat herbs completely dry first.
Using too much heat. High oven temperatures cook herbs rather than dry them, leaving them brown and flavorless.
Drying in direct sun. Sunlight fades color and breaks down the essential oils that give herbs their flavor and aroma.
Making bundles too large. Thick bundles dry unevenly and can mold in the center. Keep them small.
Storing too soon. Herbs that aren’t completely dry can develop mold in the jar. When in doubt, give them another day.
Easy Dried Herb Blends to Make
Once you have a few herbs dried, you can mix them into homemade seasoning blends. An Italian blend combines basil, oregano, thyme and rosemary. Herbes de Provence mixes thyme, savory, rosemary, marjoram and a little lavender.
A simple poultry seasoning blends sage, thyme, marjoram and rosemary, while a soothing tea blend combines mint, lemon balm and chamomile. Store blends in small labeled jars and use them within a year for the best flavor. They also make thoughtful, inexpensive gifts.
Freezing: A Good Alternative for Tender Herbs
Some tender herbs, especially basil, chives and cilantro, lose much of their flavor when dried. Freezing can be a better option for these.
Chop the herbs and pack them into ice cube trays, then cover with olive oil or water and freeze. Pop out a cube whenever you need it for soups, sauces or stir-fries. Frozen herbs keep their flavor for several months.
Frequently Asked Questions
How long does it take to dry herbs?
Air drying takes one to three weeks, a drying rack takes several days to a week, oven drying takes two to four hours, and microwave drying takes just a few minutes.
Should I wash herbs before drying?
Only if they’re dirty. If you do wash them, dry them completely before drying to prevent mold.
Why did my herbs turn brown?
Herbs turn brown when dried with too much heat or in direct sunlight. Use a lower temperature and keep them out of the sun.
Can I dry herbs in an air fryer?
Some air fryers have a low-temperature dehydrate setting that can dry herbs quickly, but the strong fan can blow light leaves around. Use a rack or weigh them down.