
This post contains affiliate links. As an Amazon Associate, I earn from qualifying purchases at no extra cost to you.
Some of the most beautiful Christmas decorations are the ones you make yourself. Handmade decor adds warmth and personality to your home, makes a fun activity for the whole family and saves a lot of money compared to store-bought pieces.
The best part is that most Christmas DIY decorations need only simple, inexpensive supplies like twine, pinecones, paper, felt and a glue gun. Many use things you already have at home, such as mason jars, wine corks, old books and leftover ribbon.
Below are 30 easy Christmas DIY decorations, grouped into garlands, ornaments, wreaths, candles and lights, and table and home decor. Each one includes a supply list, simple step-by-step instructions and a helpful tip, plus links to the supplies you might need.
Basic Supplies for Christmas DIY Decorations
A hot glue gun and glue sticks are the most useful tool for holiday crafts. Add sharp scissors, jute twine, floral wire, acrylic paint and a few brushes, and you can make most of the projects on this list.
Natural materials are free or very cheap. Collect pinecones, twigs, evergreen clippings and cinnamon sticks, and save glass jars, wine corks and cardboard throughout the year.
Tips for Budget-Friendly Crafting
Shop your home first. Old books, leftover ribbon, mason jars and scrap fabric can all become beautiful decorations.
Buy supplies in bulk and share them with friends or family for a crafting night. Set aside an afternoon and make several projects at once.
Choose one color palette, such as red and white, natural and kraft, or gold and green, so all your handmade pieces look cohesive.
30 Easy Christmas DIY Decorations
These Christmas DIY decorations are grouped into garlands, ornaments, wreaths, candles and lights, and table and home decor. Most take under an hour and cost just a few dollars to make.
DIY Garlands
1. Dried Orange Slice Garland
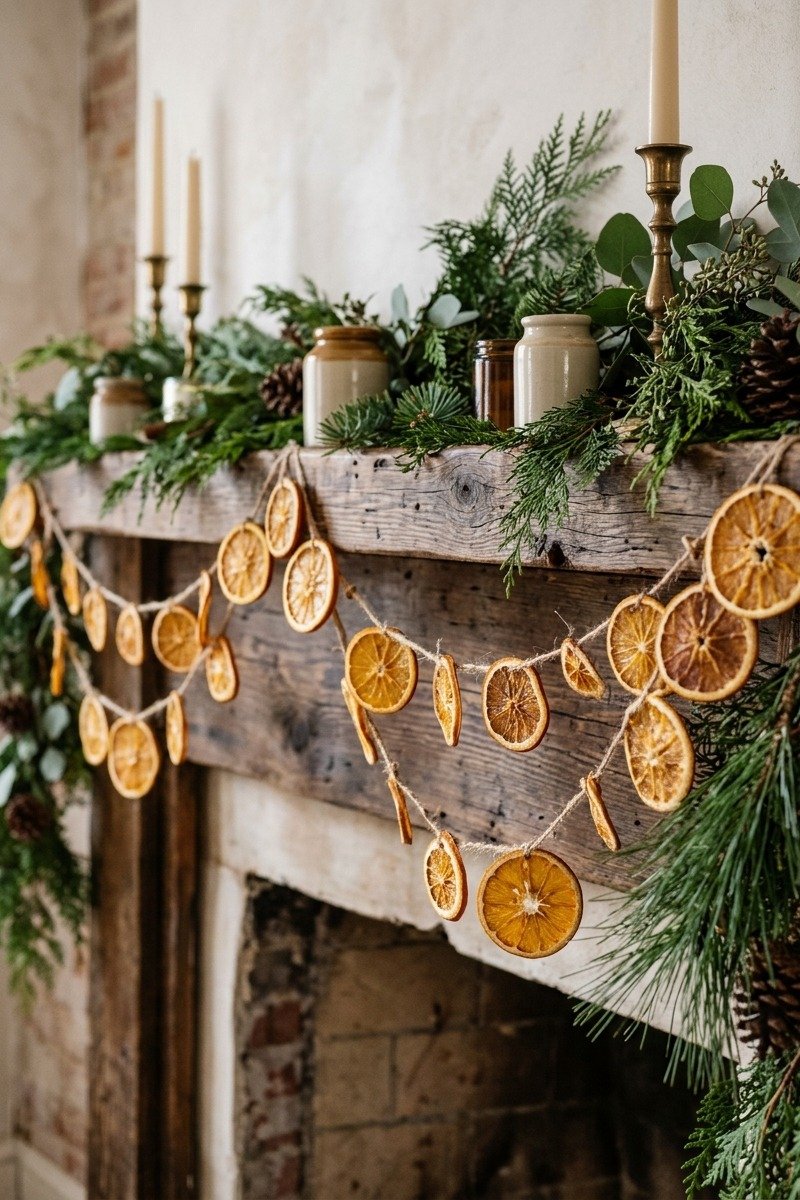
A dried orange garland is one of the most popular Christmas DIY decorations. It smells wonderful, glows when light shines through it and costs only a few dollars to make.
You will need:
- 4 to 6 oranges
- Jute twine
- A sharp knife and baking sheet
- Parchment paper
- A large needle or skewer
How to make it:
- Slice the oranges about 1/4 inch thick and pat them dry with a towel.
- Lay the slices on a parchment-lined baking sheet and bake at 200°F for 3 to 4 hours, turning every hour, until fully dry.
- Let them cool, then poke two small holes near the top of each slice.
- Thread the slices onto jute twine, spacing them a few inches apart, and add cinnamon sticks or wood beads between them if you like.
Pro tip: Blot the slices well before baking; drier slices dry faster and stay brighter.

2. Popcorn and Cranberry Garland

A popcorn and cranberry garland is a nostalgic tradition that kids love to help with. It looks charming on a tree and costs almost nothing.
You will need:
- Plain air-popped popcorn
- Fresh cranberries
- Heavy thread or fishing line
- A large sewing needle
How to make it:
- Pop the popcorn and let it sit for a day so it becomes less brittle.
- Thread the needle with a long length of thread and knot the end.
- String popcorn and cranberries in a simple pattern, such as three popcorn pieces and one cranberry.
- Tie off the end and drape the garland on the tree in loose swoops.
Pro tip: Use day-old popcorn; fresh popcorn breaks easily when you push the needle through.

DIY Ornaments
3. Salt Dough Ornaments
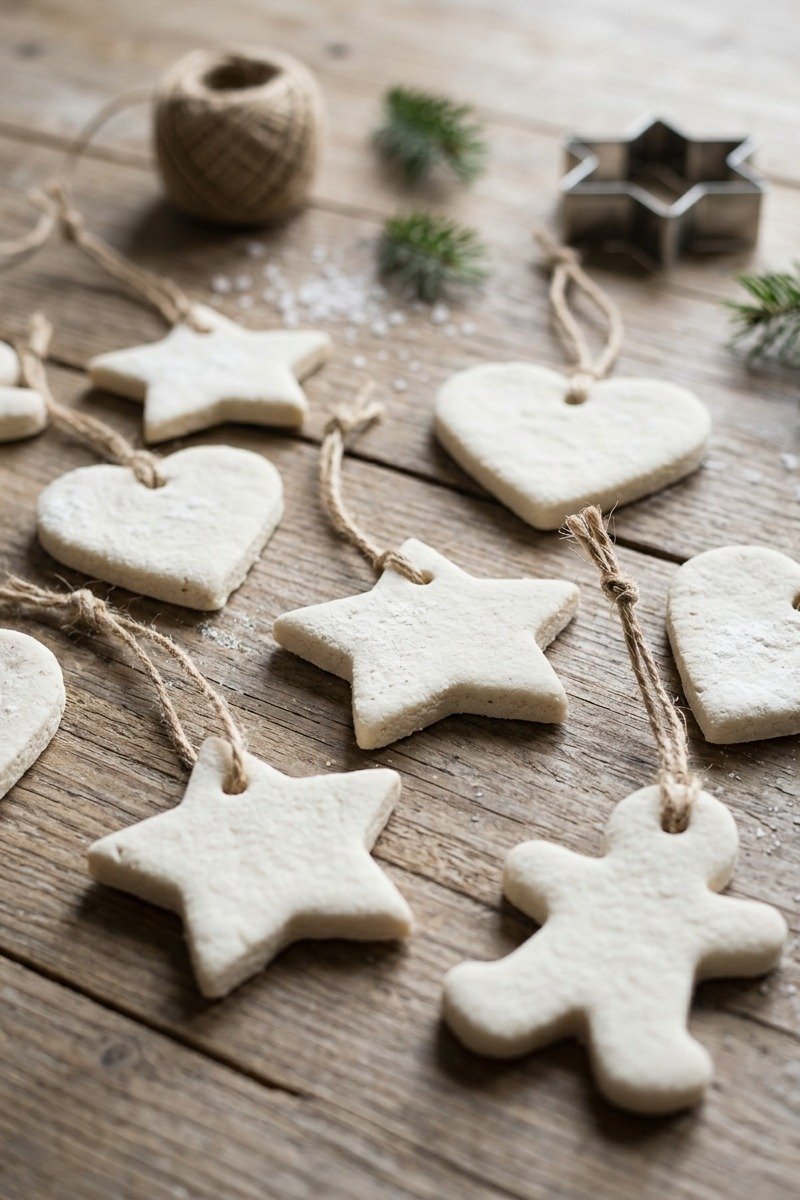
Salt dough ornaments are a classic family craft. They are made from simple pantry ingredients and can be left plain white or painted.
You will need:
- 2 cups flour
- 1 cup salt
- 3/4 cup water
- Cookie cutters
- A straw for holes
- Twine or ribbon
How to make it:
- Mix the flour and salt, then add water slowly and knead into a smooth dough.
- Roll the dough to about 1/4 inch thick and cut out shapes with cookie cutters.
- Use a straw to make a hole near the top of each ornament.
- Bake at 250°F for 2 to 3 hours until hard, then cool and add twine loops.
Pro tip: Press a sprig of greenery or lace into the dough before baking for a pretty texture.

4. Painted Pinecone Ornaments
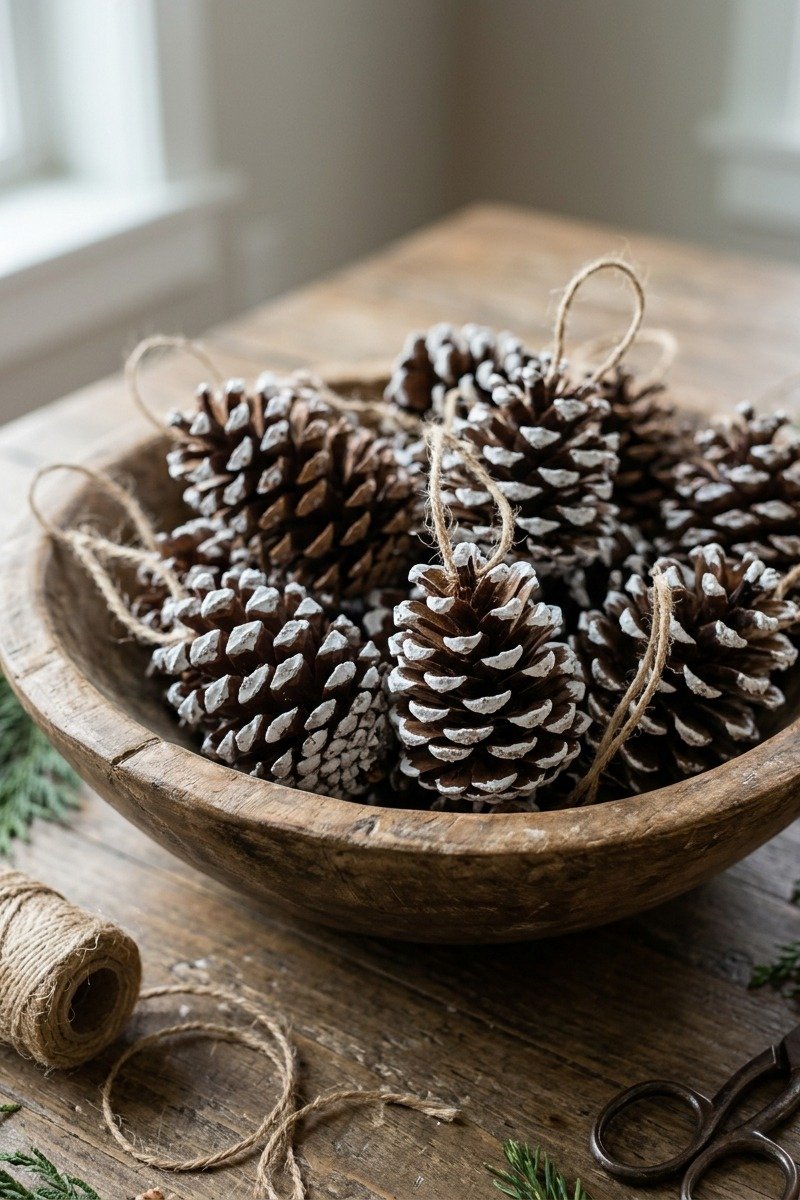
Painted pinecone ornaments look like they are dusted with snow. They are free to make if you gather pinecones outside.
You will need:
- Pinecones
- White acrylic paint
- A small brush or sponge
- Twine
- Hot glue gun
How to make it:
- Clean the pinecones and bake them at 200°F for 30 minutes to remove sap and bugs.
- Brush white paint lightly onto the tips of each scale.
- Let the paint dry completely.
- Hot glue a loop of twine to the top of each pinecone and hang them on the tree.
Pro tip: Add a sprinkle of fine glitter while the paint is wet for extra sparkle.

5. Mason Jar Luminaries
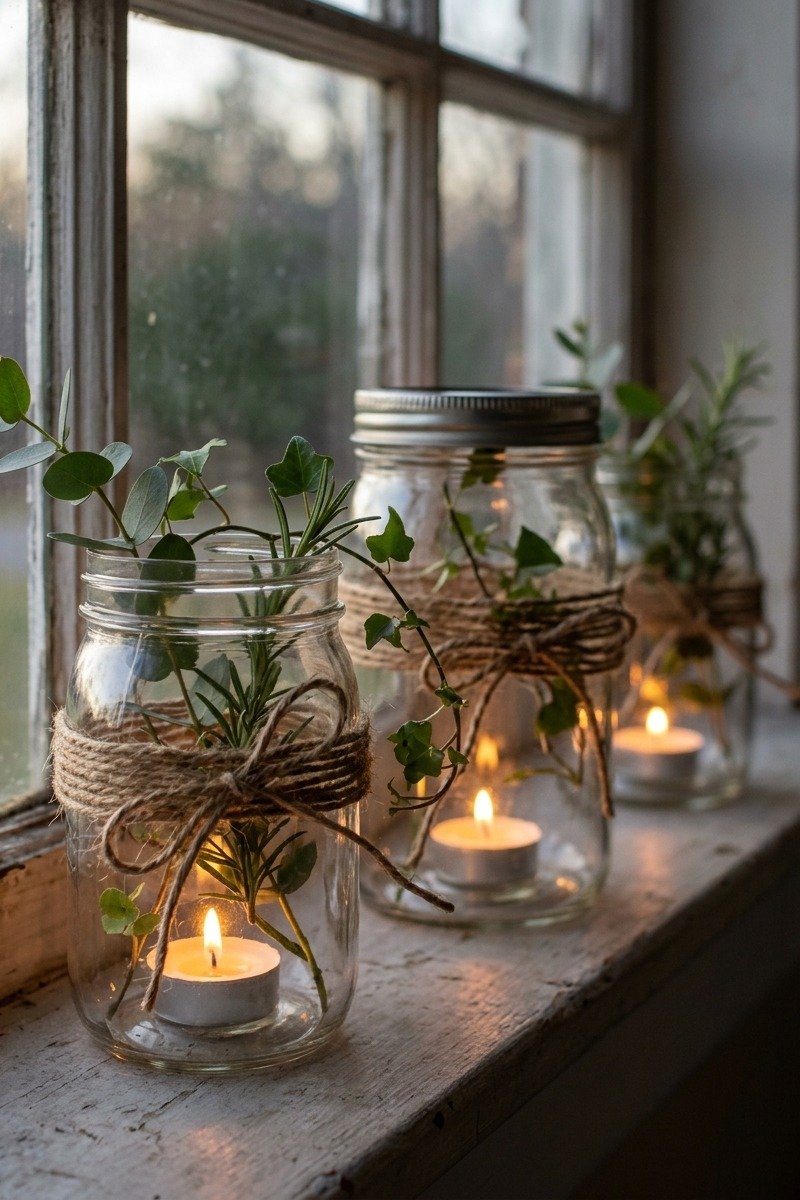
Mason jar luminaries add a warm glow to windowsills, porches and tables. They are quick, cheap and look beautiful in groups.
You will need:
- Mason jars
- Jute twine
- Small evergreen sprigs
- Battery tea lights
- Epsom salt (optional)
How to make it:
- Wrap twine several times around the neck of each jar and tie a bow.
- Tuck a small sprig of greenery under the twine.
- Add a layer of Epsom salt to the bottom for a snowy look.
- Place a tea light inside each jar.
Pro tip: Use battery tea lights for safety, especially around greenery.

6. Wine Cork Reindeer
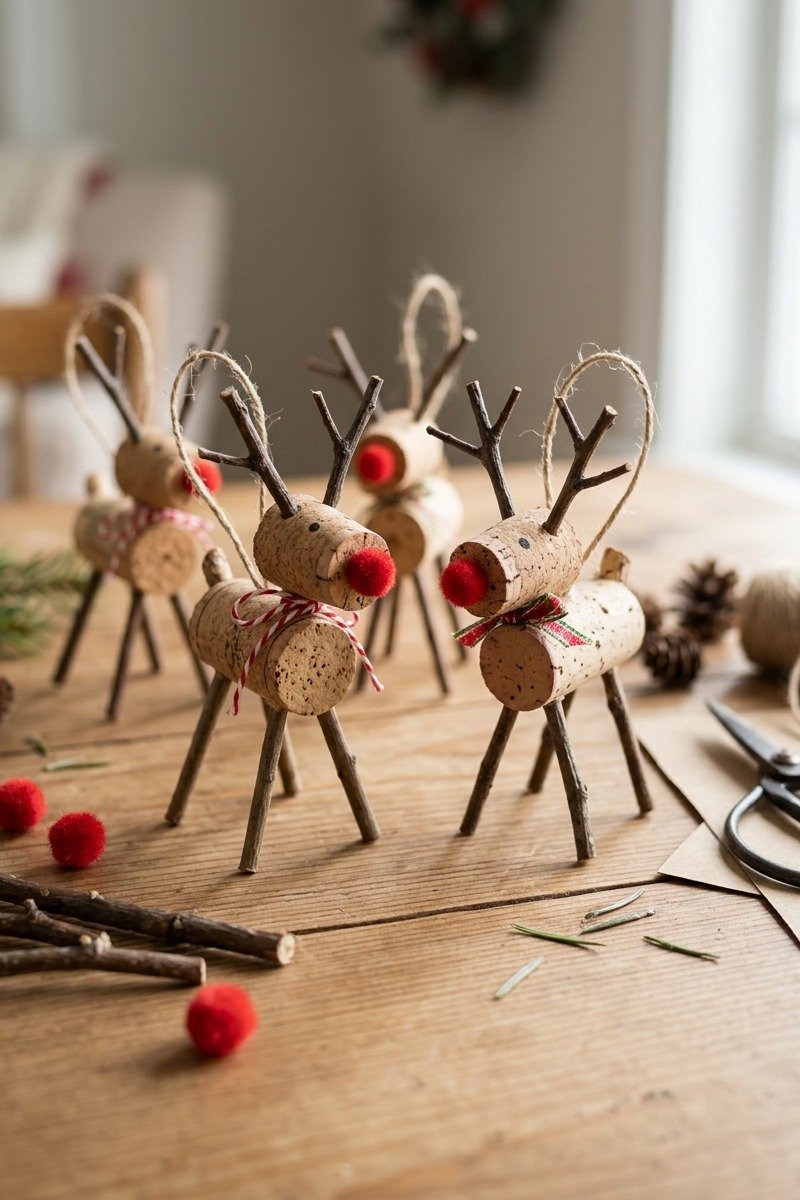
Wine cork reindeer are a cute and clever way to use up saved corks. They make great ornaments and gift toppers.
You will need:
- Wine corks
- Small twigs
- Mini red pom-poms
- Googly eyes
- Hot glue gun
- Twine
How to make it:
- Glue two short corks side by side for the body and one on top for the head.
- Glue small twigs on top of the head for antlers.
- Add googly eyes and a red pom-pom nose.
- Glue a twine loop to the back for hanging.
Pro tip: Cut corks with a serrated knife to make shorter pieces for legs.

7. Paper Snowflakes
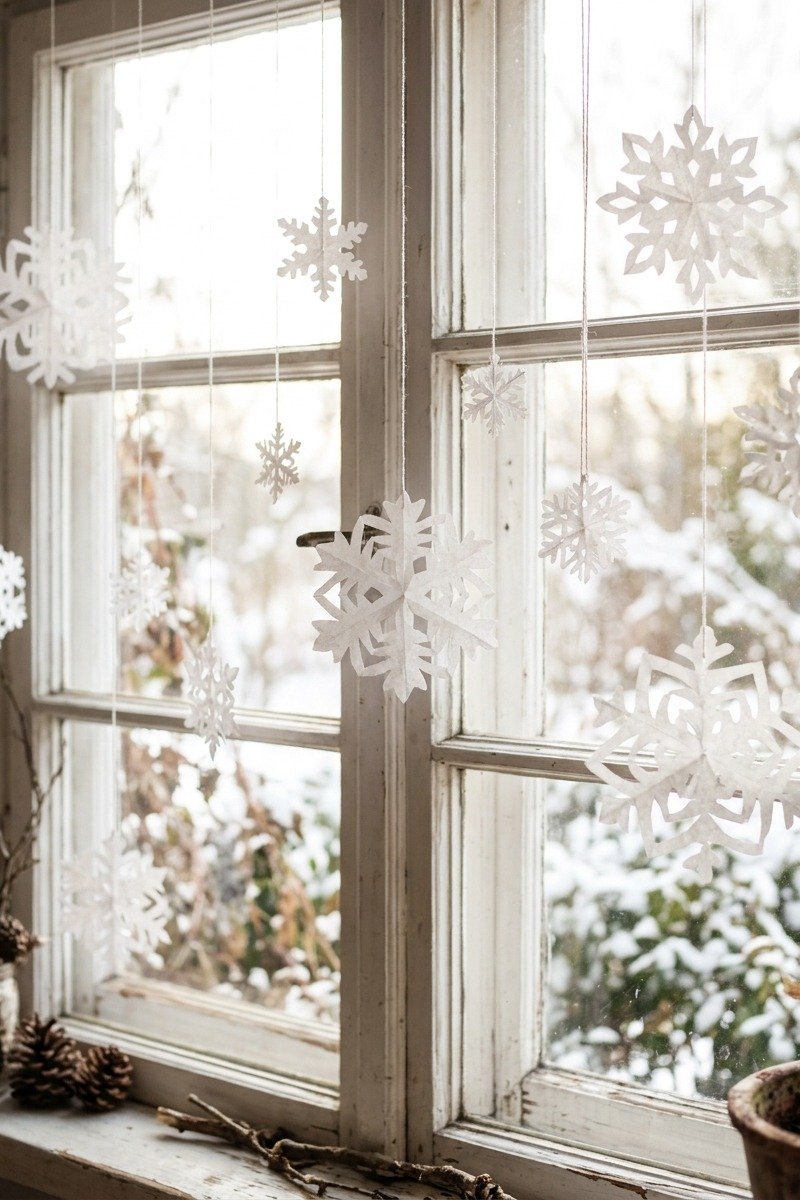
Paper snowflakes are the easiest Christmas DIY decoration of all. They look lovely hanging in windows and are a great activity for kids.
You will need:
- White printer paper
- Sharp scissors
- Clear thread or fishing line
- Tape
How to make it:
- Cut the paper into a square and fold it in half diagonally, then in half again, and then into thirds.
- Cut small shapes along the folded edges.
- Unfold carefully to reveal the snowflake.
- Tape thread to each snowflake and hang them at different heights in a window.
Pro tip: Iron finished snowflakes on low heat between sheets of paper to flatten them.

8. Filled Clear Ornaments
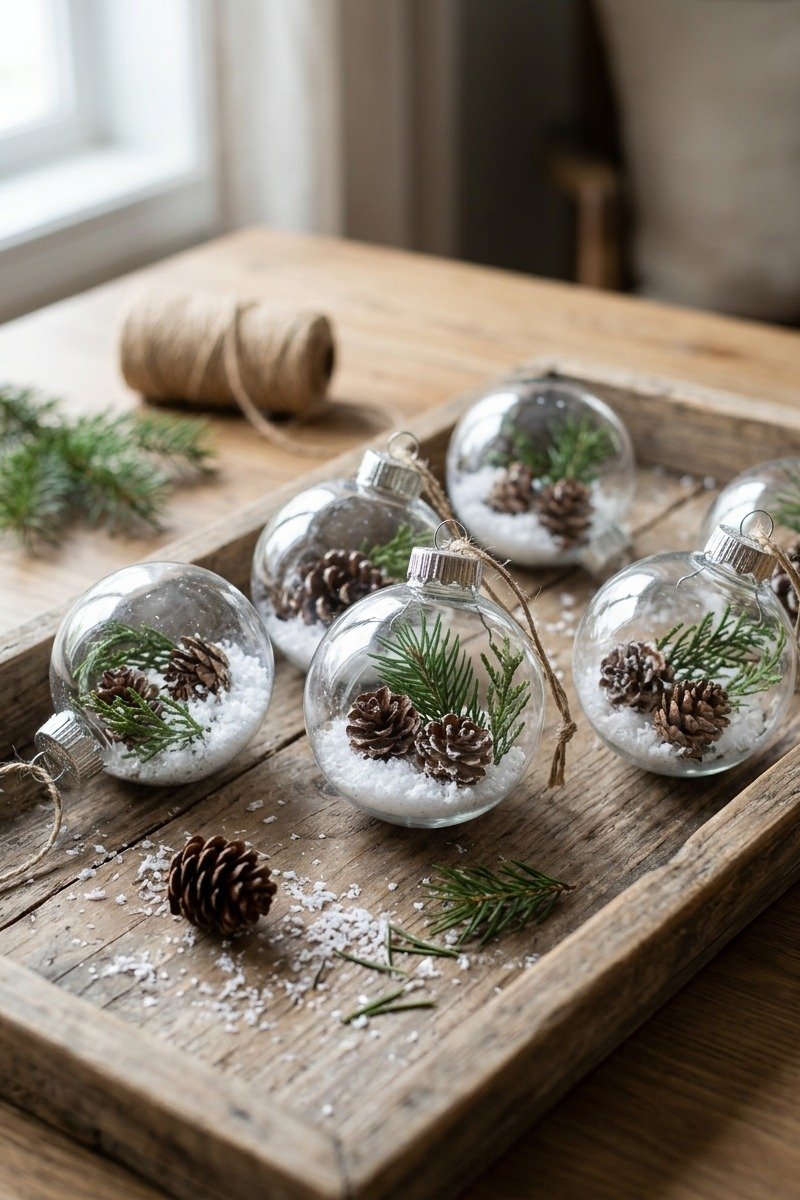
Filled clear ornaments let you create custom designs in minutes. Fill them with anything that matches your decor.
You will need:
- Clear fillable ornaments
- Mini pinecones, faux snow or greenery
- Small funnel
- Ribbon
How to make it:
- Remove the top from each ornament.
- Use a funnel to add faux snow, then mini pinecones or greenery.
- Replace the top securely.
- Tie a ribbon bow to the hanger.
Pro tip: Fill ornaments with a family photo rolled into a tube for a personal keepsake.

9. Cinnamon Stick Bundles
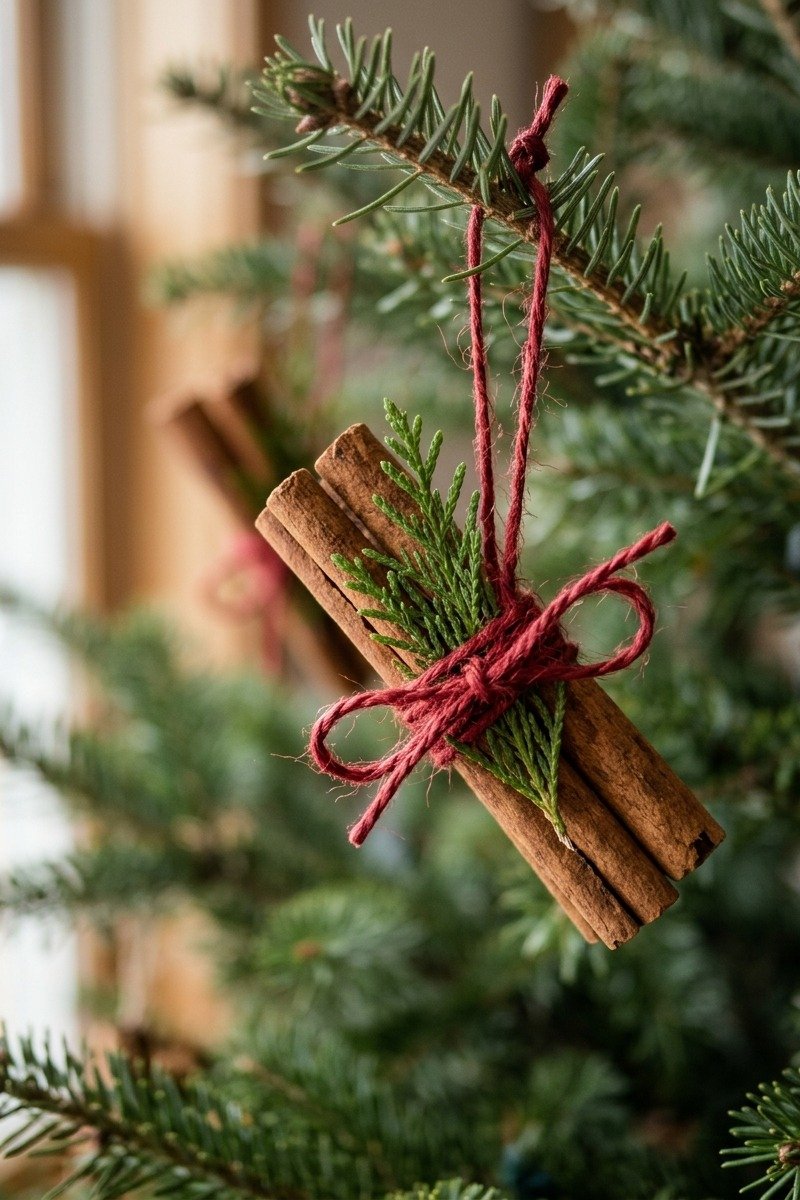
Cinnamon stick bundles smell amazing and add a rustic touch to the tree, gifts and garlands.
You will need:
- Cinnamon sticks
- Red twine or ribbon
- Small greenery sprigs
- Hot glue gun
How to make it:
- Group three to five cinnamon sticks together.
- Wrap them tightly with twine and tie a bow.
- Tuck a small sprig of greenery under the bow and secure with glue.
- Leave a twine loop for hanging.
Pro tip: Add a star anise on top for extra scent and style.

10. Twig Star
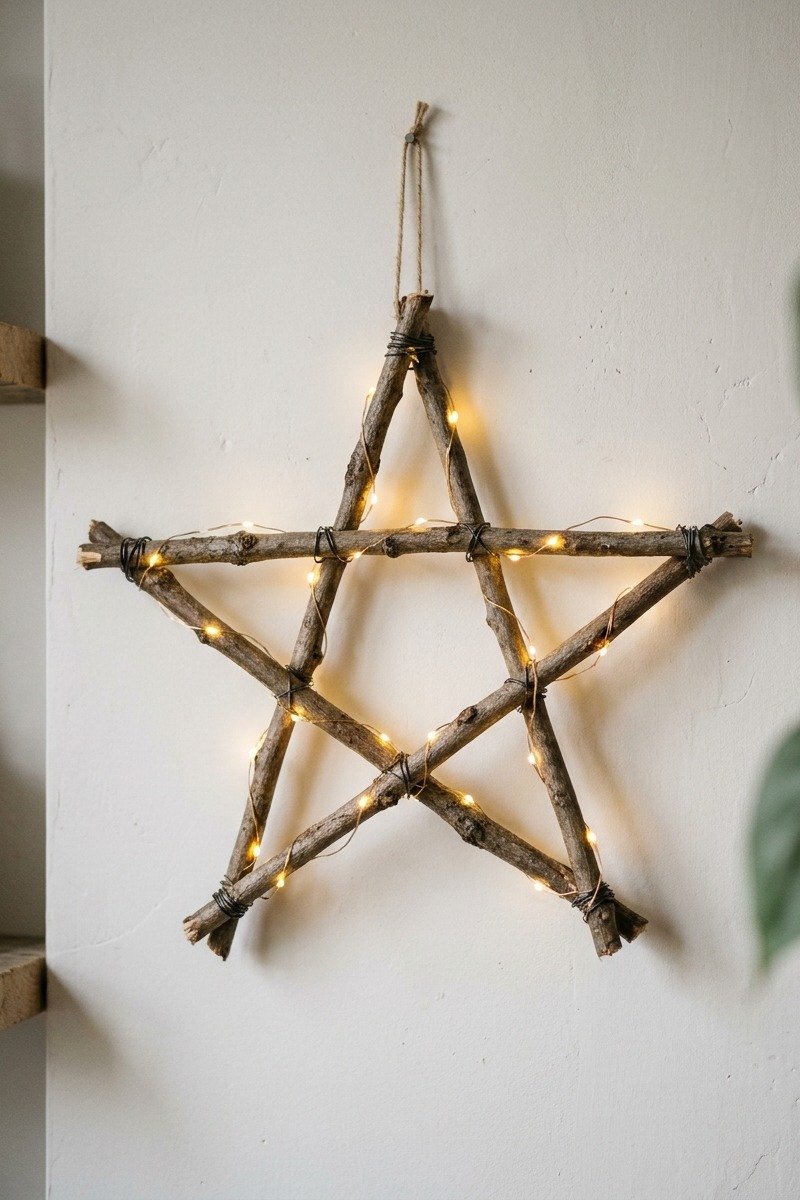
A twig star is a rustic decoration made from sticks you can find in your backyard. Wrapped with fairy lights, it makes a beautiful wall or window piece.
You will need:
- 5 straight twigs of equal length
- Floral wire
- Battery fairy lights
- Twine
How to make it:
- Arrange the twigs in a five-point star shape.
- Wrap floral wire tightly around each point where the twigs cross.
- Wind fairy lights around the star, tucking the battery pack at the back.
- Add a twine loop and hang it on a wall or window.
Pro tip: Use slightly thicker twigs for a larger star so it holds its shape.

11. Felt Ball Garland
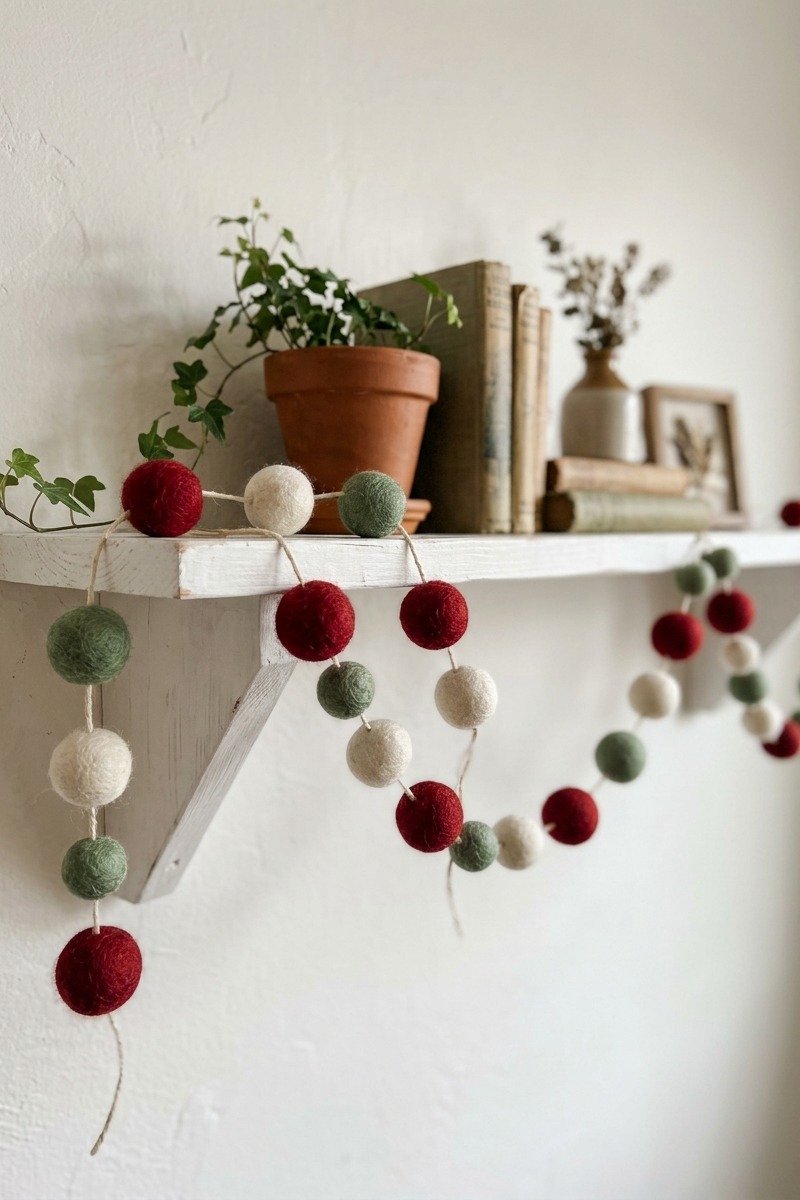
A felt ball garland is colorful, soft and safe for homes with kids and pets. It takes about 30 minutes to make.
You will need:
- Felt balls in your chosen colors
- Embroidery thread
- A large needle
How to make it:
- Thread the needle with a long piece of embroidery thread and knot one end.
- Push the needle through the center of each felt ball.
- Space the balls evenly or push them together for a fuller look.
- Tie loops at both ends for hanging.
Pro tip: Use a thimble when pushing the needle through tightly packed felt.

12. Painted Wood Slice Ornaments
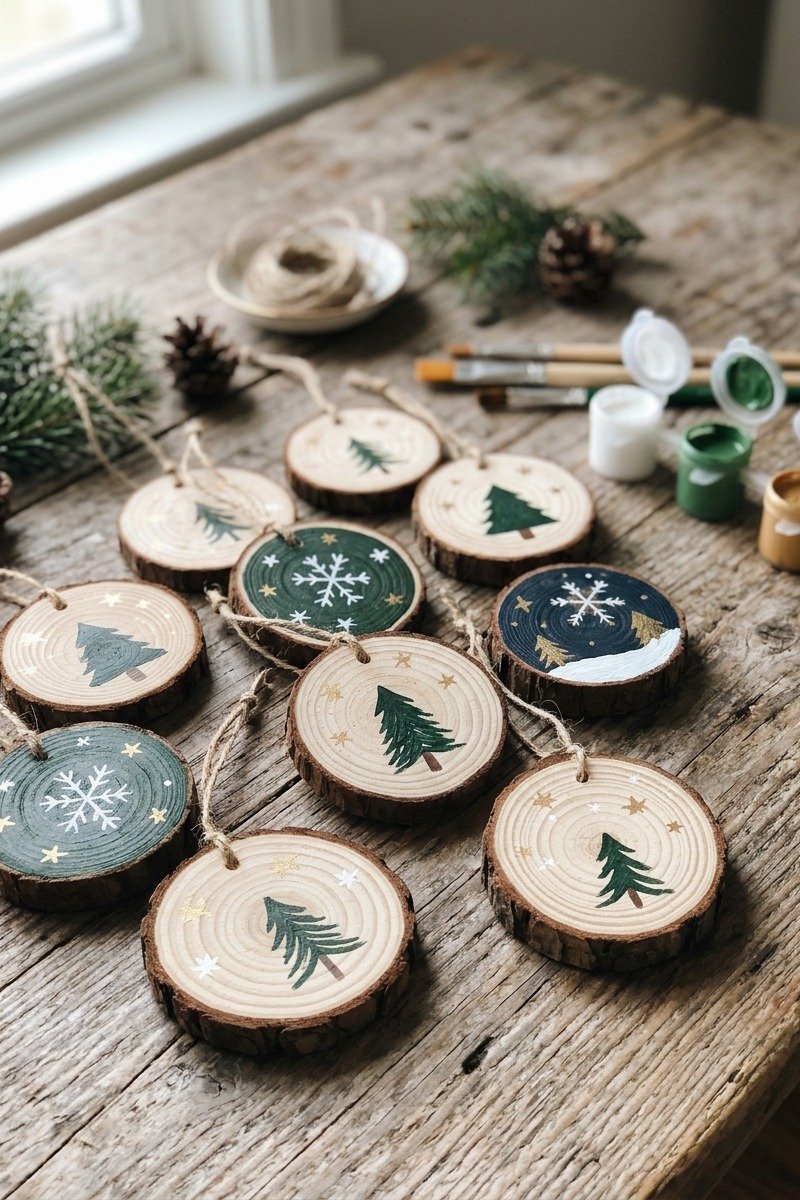
Painted wood slice ornaments are rustic and personal. Paint simple designs or add names and dates for keepsakes.
You will need:
- Wood slices with holes
- Acrylic paint or paint pens
- Small brushes
- Twine
How to make it:
- Wipe the wood slices clean.
- Paint simple designs like trees, stars or snowflakes.
- Let the paint dry completely and seal with clear varnish if desired.
- Thread twine through the hole to hang.
Pro tip: Sketch the design lightly in pencil before painting.

13. Yarn-Wrapped Cone Trees
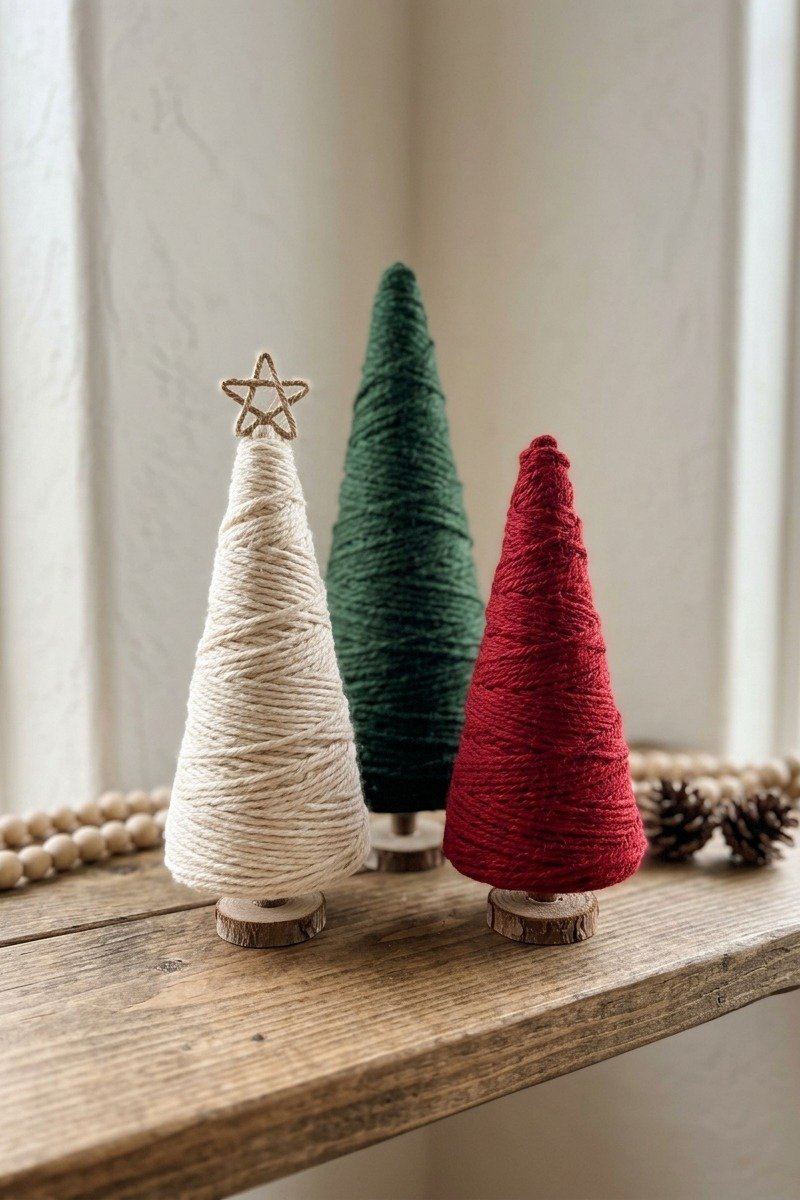
Yarn-wrapped cone trees make a cozy, colorful display on a shelf or mantel.
You will need:
- Foam or cardboard cones
- Chunky yarn in different colors
- Hot glue gun
- Small pom-poms or beads (optional)
How to make it:
- Glue the end of the yarn to the bottom of the cone.
- Wrap the yarn tightly around the cone, working upward, adding glue every few rows.
- Secure the end at the top with glue.
- Decorate with small pom-poms or beads if you like.
Pro tip: Make three trees in different heights for a balanced display.

DIY Wreaths and Bows
14. Big Ribbon Bows
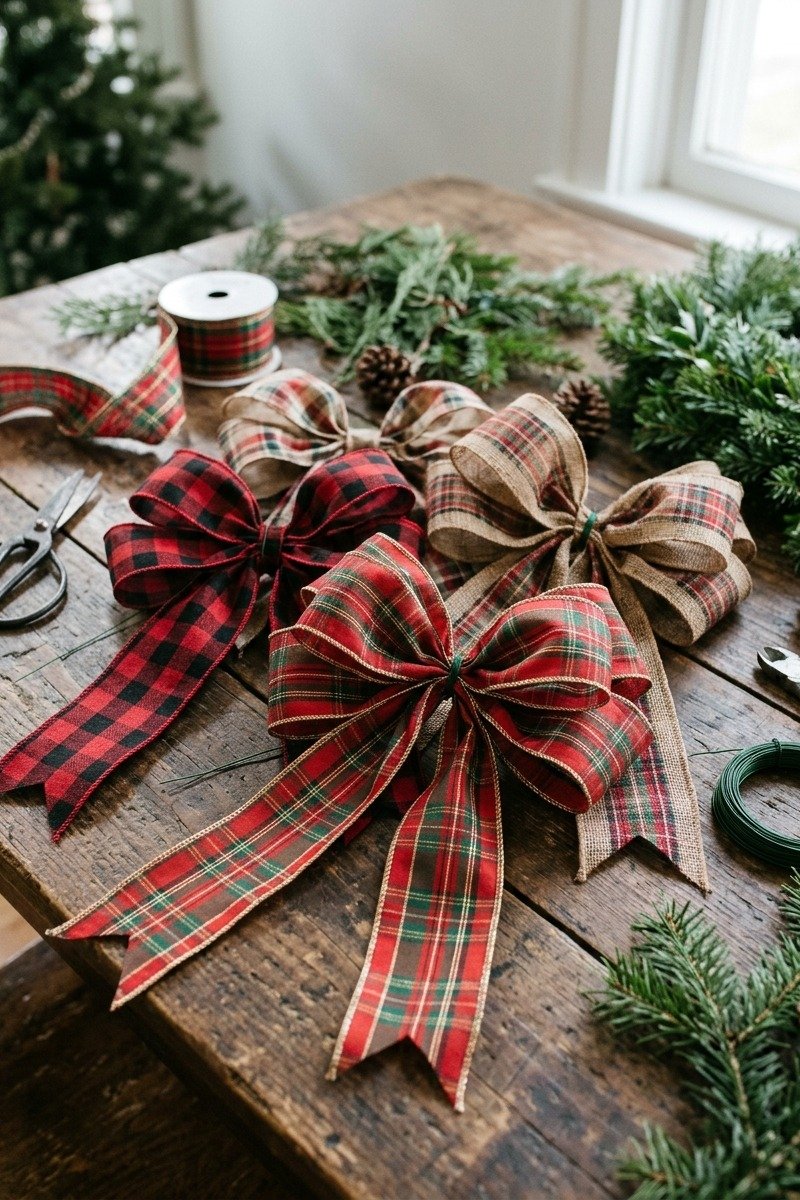
Handmade ribbon bows look expensive but cost very little. Use them on wreaths, trees, gifts and staircases.
You will need:
- Wired ribbon, 2.5 to 4 inches wide
- Floral wire or pipe cleaners
- Scissors
How to make it:
- Make a loop with the ribbon and pinch the center.
- Add more loops on each side, pinching them together at the center.
- Wrap floral wire tightly around the center to hold the loops.
- Cut long tails, fluff the loops and trim the ends in a V-shape.
Pro tip: Wired ribbon holds its shape better than plain ribbon for big bows.

15. Embroidery Hoop Wreath
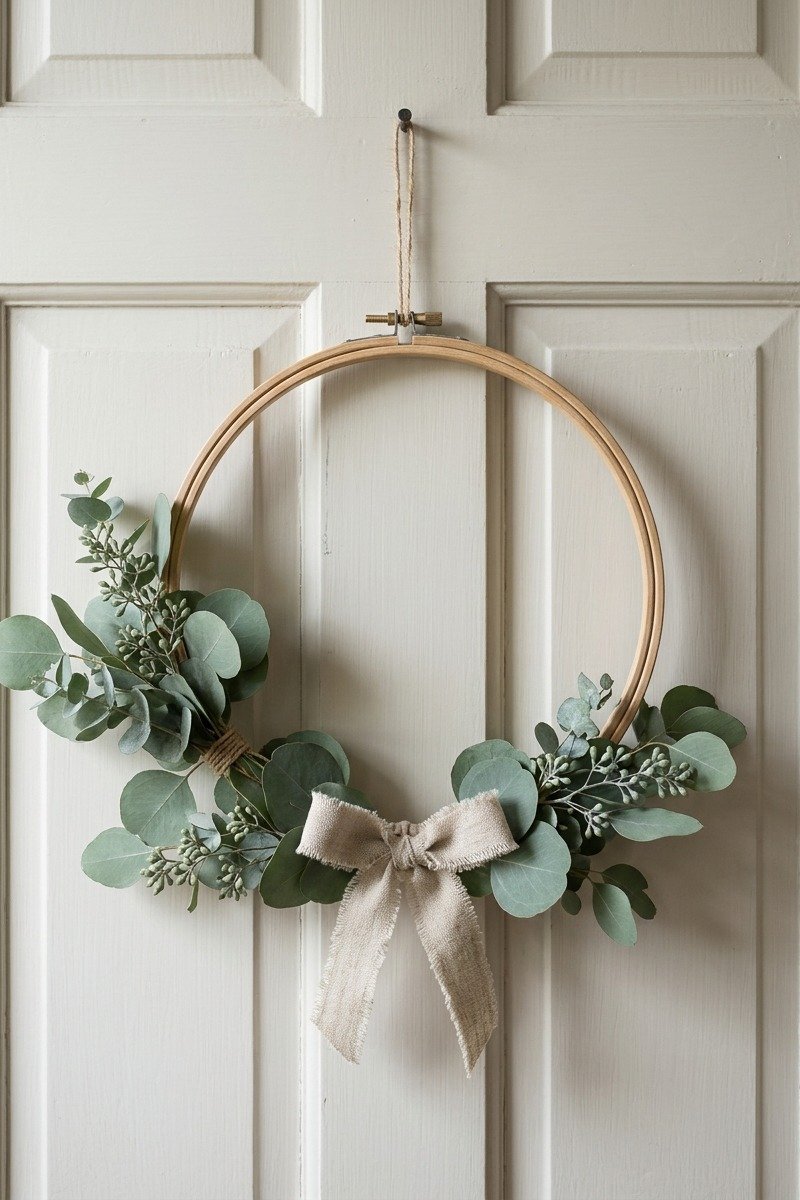
An embroidery hoop wreath is minimalist and modern. It takes only a few minutes to make.
You will need:
- Wooden embroidery hoop
- Eucalyptus or greenery stems
- Floral wire
- Ribbon
How to make it:
- Arrange greenery along one side of the hoop.
- Secure the stems with floral wire.
- Tie a small bow over the wire.
- Hang with a ribbon loop.
Pro tip: Use faux greenery so the wreath lasts for years.

DIY Candles, Stars and Lights
16. Cinnamon-Wrapped Candles
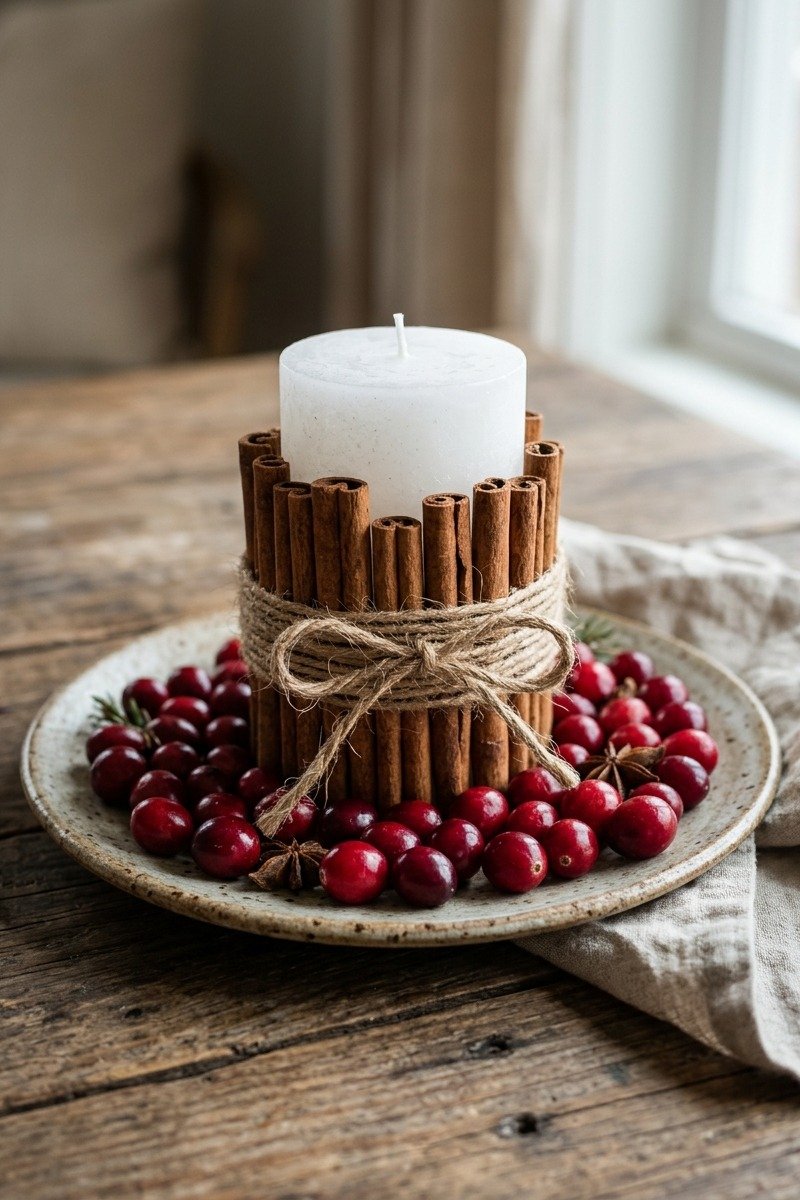
Cinnamon-wrapped candles look elegant and add a subtle spicy scent. They make lovely centerpieces and gifts.
You will need:
- White pillar candles
- Cinnamon sticks
- Hot glue gun or rubber band
- Twine
How to make it:
- Hold the cinnamon sticks around the candle with a rubber band.
- Adjust the sticks so they cover the candle evenly.
- Wrap twine over the rubber band and tie a bow.
- Remove the rubber band if you used glue to secure the sticks.
Pro tip: Use flameless pillar candles if you plan to leave them near greenery.

17. Book Page Wreath
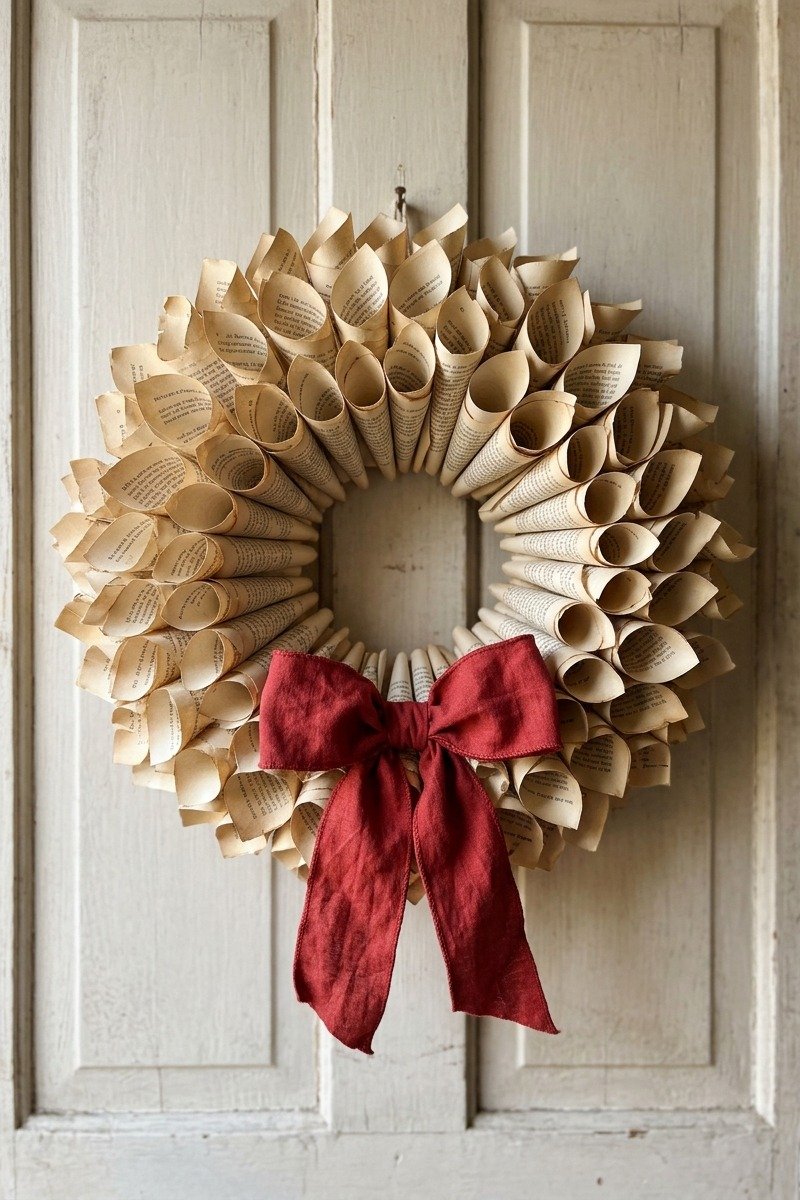
A book page wreath is a beautiful way to reuse old books. It looks elegant and vintage on a door or wall.
You will need:
- Foam or straw wreath form
- Old book pages
- Hot glue gun
- Ribbon
How to make it:
- Roll book pages into cones or tubes.
- Glue the cones closely together around the wreath form.
- Keep adding layers until the form is completely covered.
- Add a red bow at the top or bottom.
Pro tip: Lightly tea-stain the pages for an antique look.

18. Folded Paper Stars
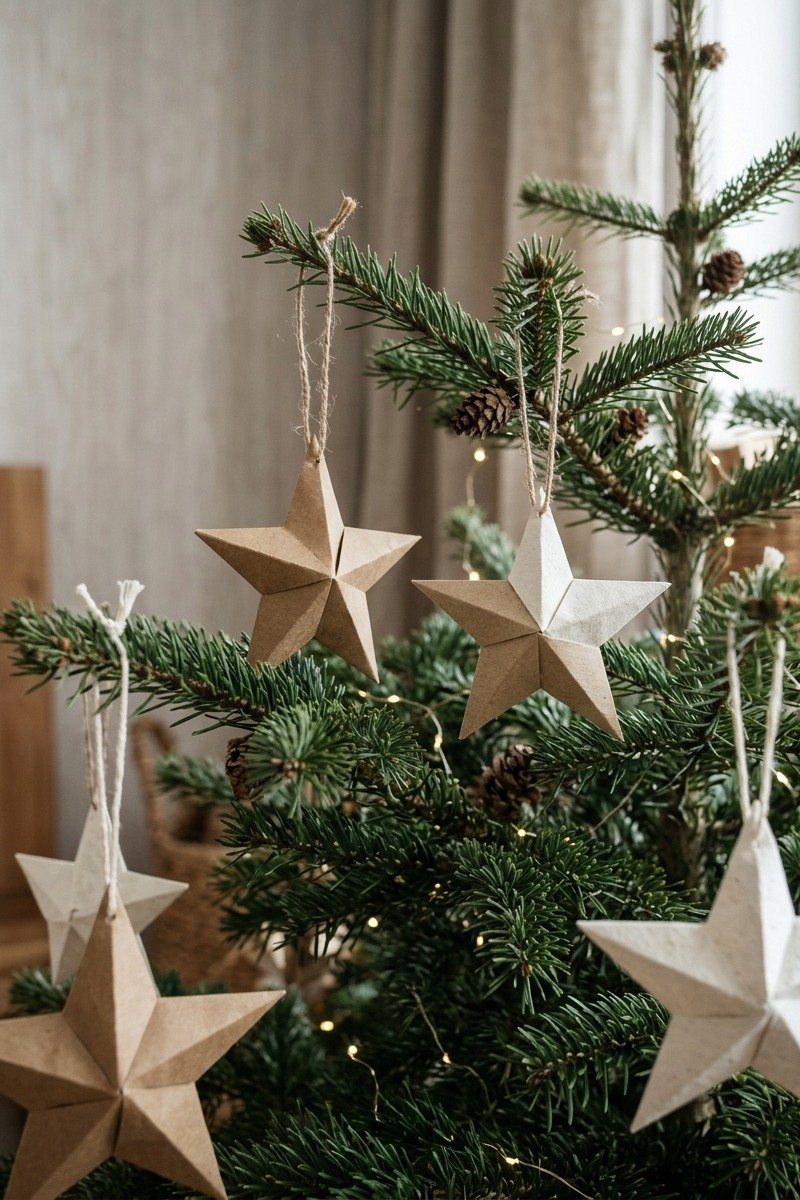
Folded paper stars are simple, elegant and very Scandinavian. Make them in white and kraft paper for a natural look.
You will need:
- White or kraft paper
- Scissors
- Glue
- Twine
How to make it:
- Cut paper into strips or squares, depending on the star pattern.
- Fold each piece into a star shape following a simple template.
- Glue the points together.
- Add a twine loop to hang.
Pro tip: Use thicker paper for larger stars so they hold their shape.

19. Ornament Wreath
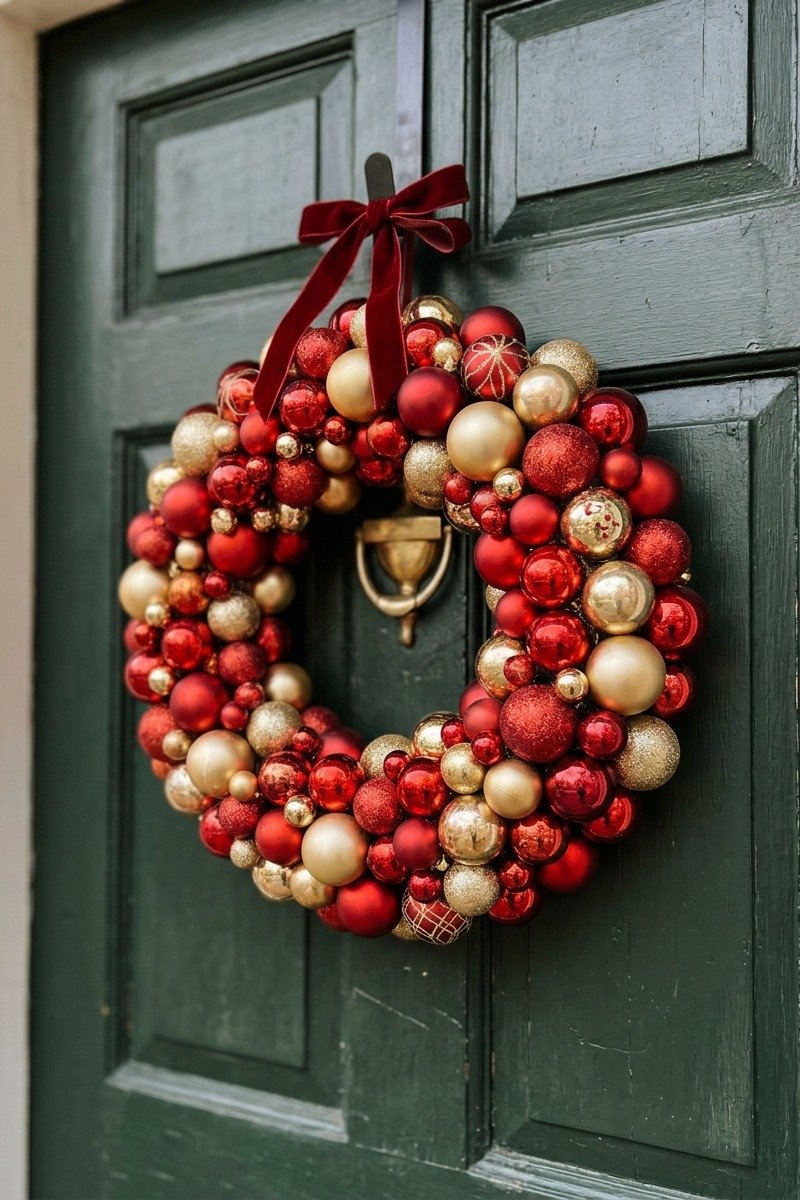
An ornament wreath is colorful and eye-catching. It is a great way to use extra shatterproof ornaments.
You will need:
- Foam or wire wreath form
- Shatterproof ball ornaments in various sizes
- Hot glue gun
- Ribbon
How to make it:
- Remove the ornament caps, add glue and replace them so they do not fall off.
- Glue the largest ornaments around the wreath form first.
- Fill gaps with medium and small ornaments.
- Add a ribbon loop for hanging.
Pro tip: Use shatterproof ornaments so the wreath is safe on a door.

DIY Table and Home Decor
20. Bottle Brush Tree Tray
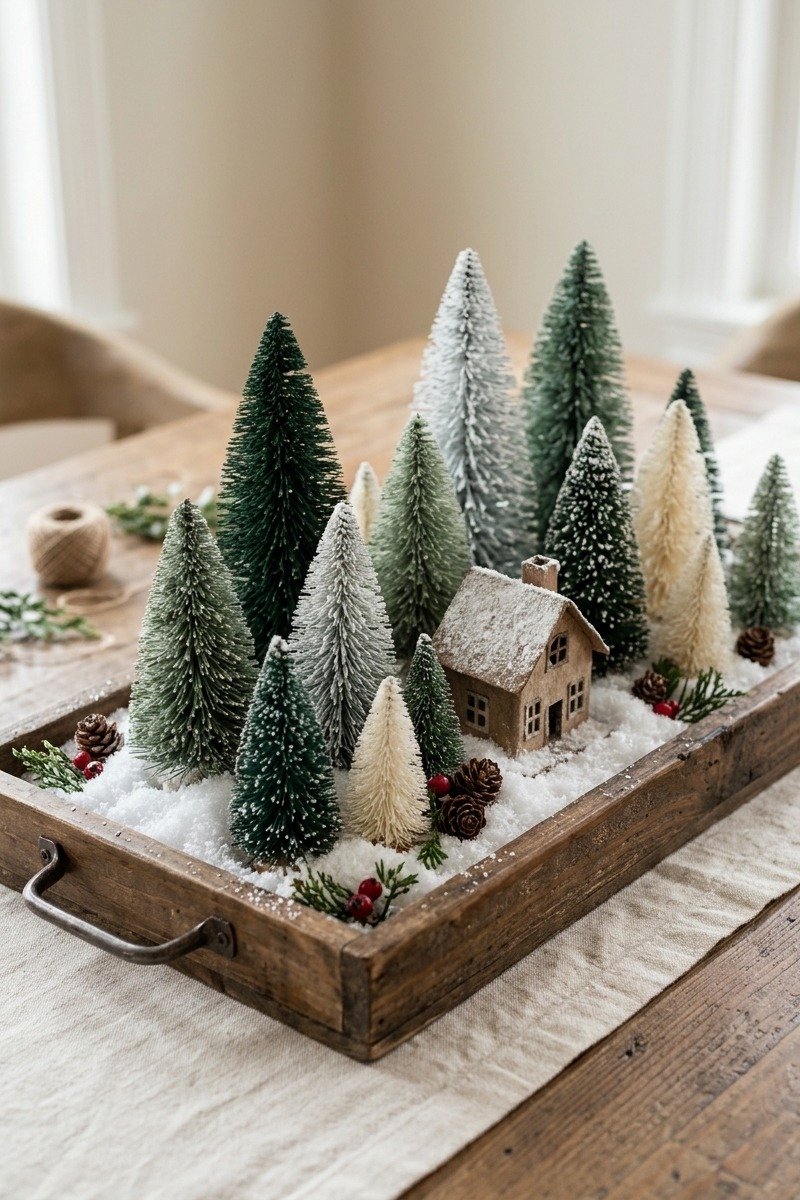
A bottle brush tree tray makes a quick, charming centerpiece for a table or shelf.
You will need:
- A wooden tray
- Bottle brush trees in mixed sizes
- Faux snow
- A small house or figurine
How to make it:
- Spread a layer of faux snow across the tray.
- Arrange the trees in groups of different heights.
- Add a small house or figurine.
- Sprinkle a little more snow on top of the trees.
Pro tip: Dip trees in diluted bleach water to lighten them to a vintage pastel shade.

21. Candy Cane Vase
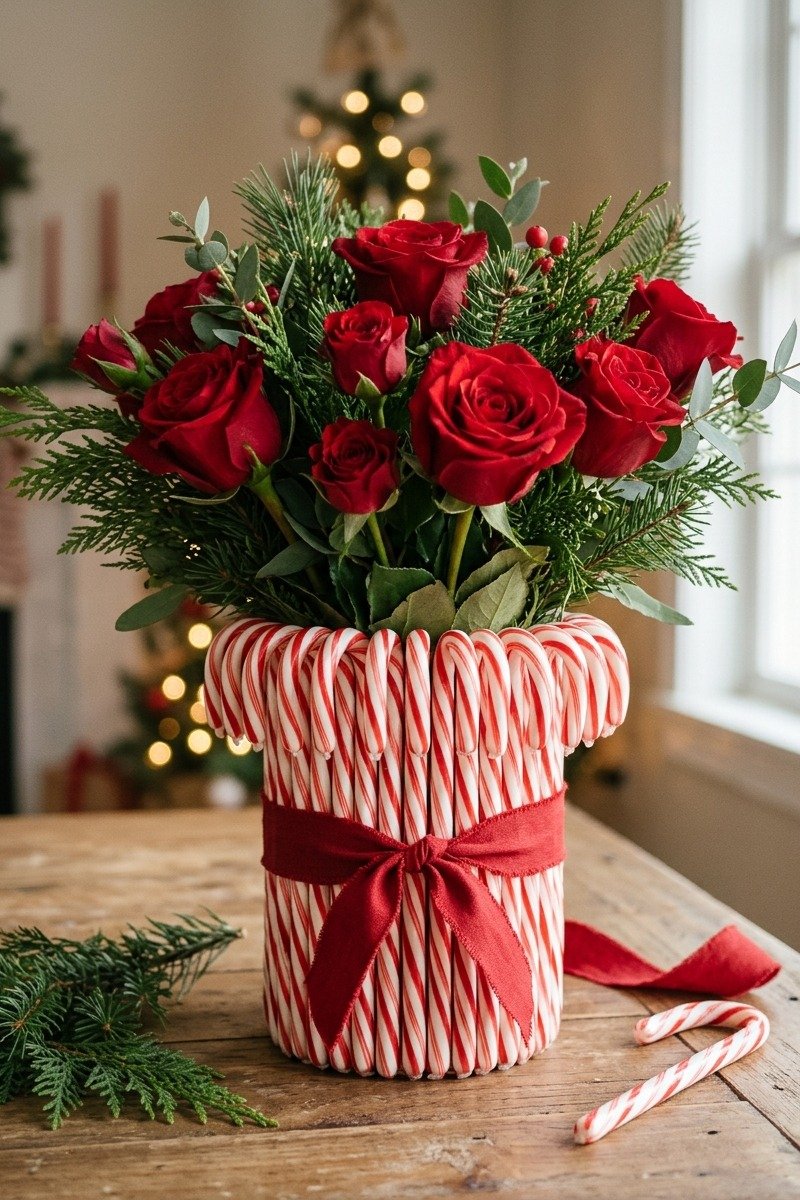
A candy cane vase is fun and festive. Fill it with red roses, carnations or greenery for a cheerful centerpiece.
You will need:
- A straight-sided glass vase or jar
- Candy canes
- Rubber band
- Red ribbon
- Flowers or greenery
How to make it:
- Put a rubber band around the vase.
- Slide candy canes under the band all the way around.
- Cover the rubber band with a red ribbon bow.
- Fill the vase with water and flowers.
Pro tip: Keep the candy canes in their wrappers if the room is warm.

22. Gift Tag Garland
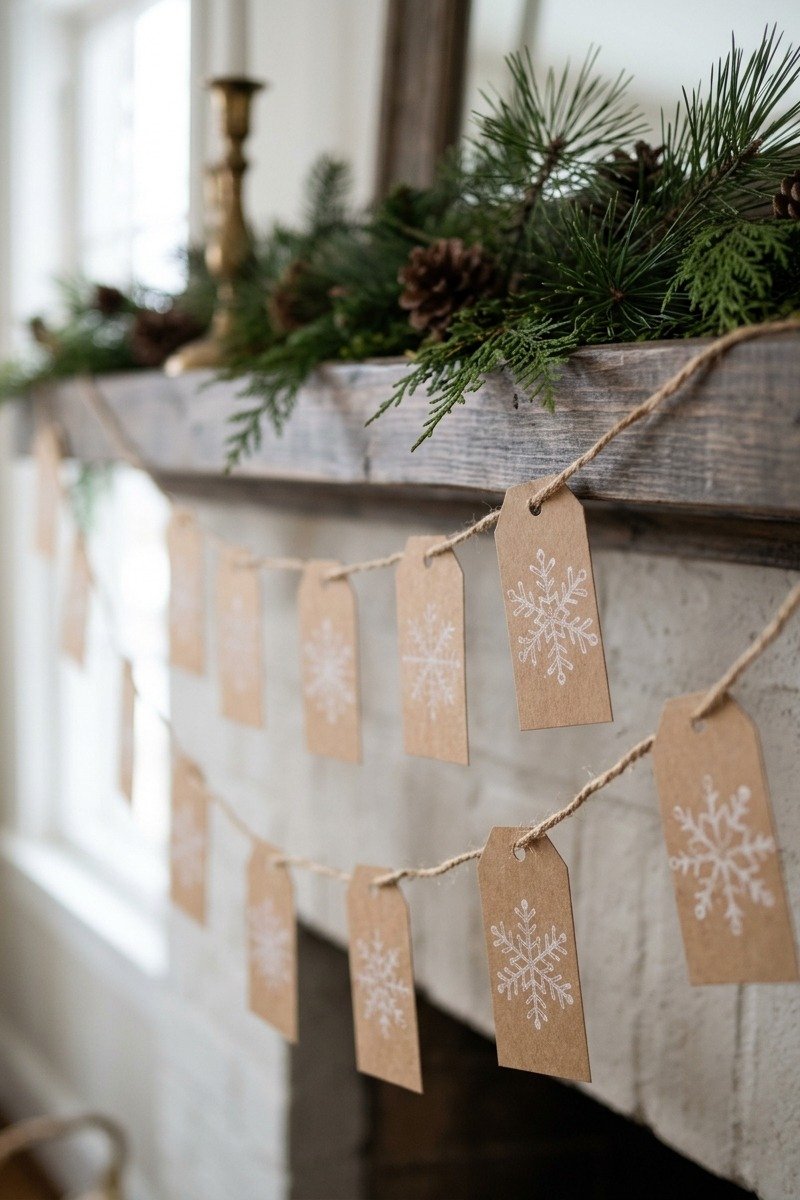
A gift tag garland is easy and inexpensive. Stamp or write festive words on kraft tags and string them across a mantel.
You will need:
- Kraft paper gift tags
- Rubber stamps or markers
- Jute twine
- Mini clothespins
How to make it:
- Stamp snowflakes, stars or letters on each tag.
- Let the ink dry.
- Clip the tags to twine with mini clothespins.
- Hang the garland across a mantel or shelf.
Pro tip: Spell out a word like JOY or NOEL with letter stamps.

23. Clothespin Snowflakes
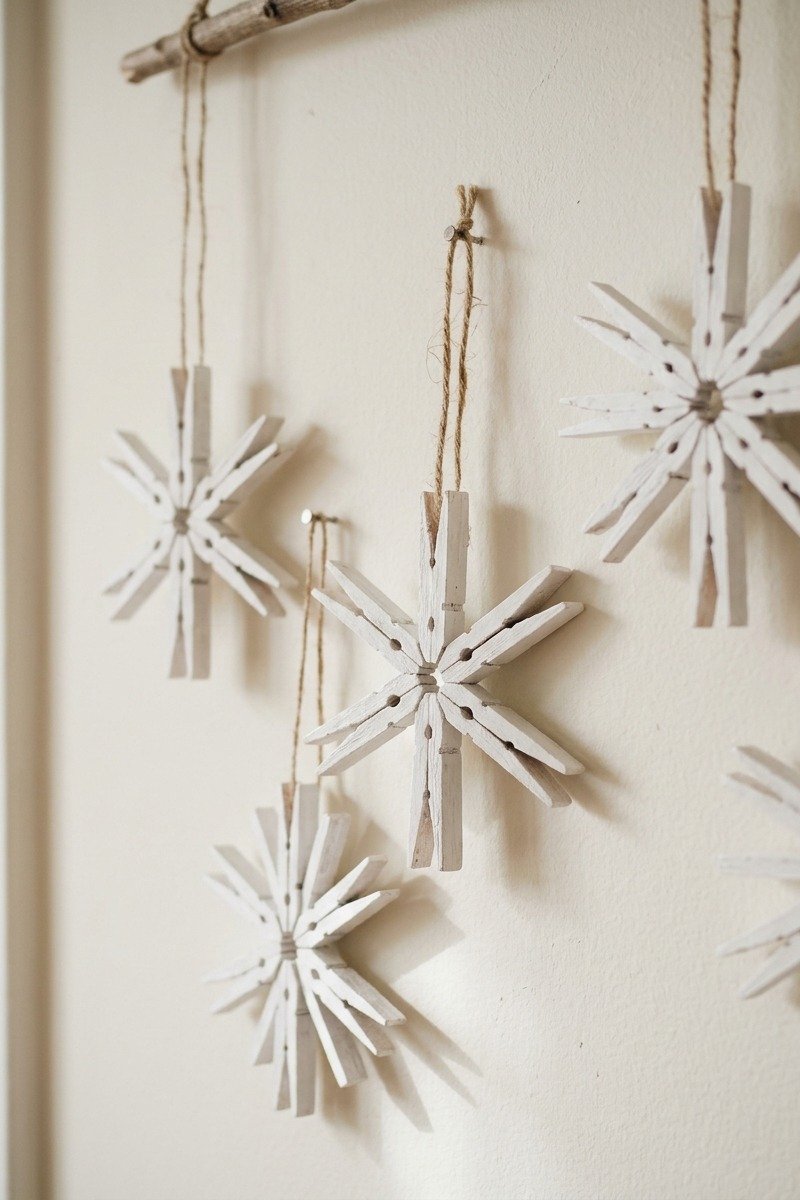
Clothespin snowflakes are a clever craft that kids can help with. They look great on walls, trees and gifts.
You will need:
- Wooden clothespins
- White paint
- Wood glue or hot glue
- Twine
How to make it:
- Separate the clothespins into individual pieces.
- Glue the flat sides together to form a starburst snowflake.
- Paint the snowflakes white and let them dry.
- Add a twine loop to hang.
Pro tip: Add a small button or bead in the center for a finished look.

24. Pom-Pom Wreath
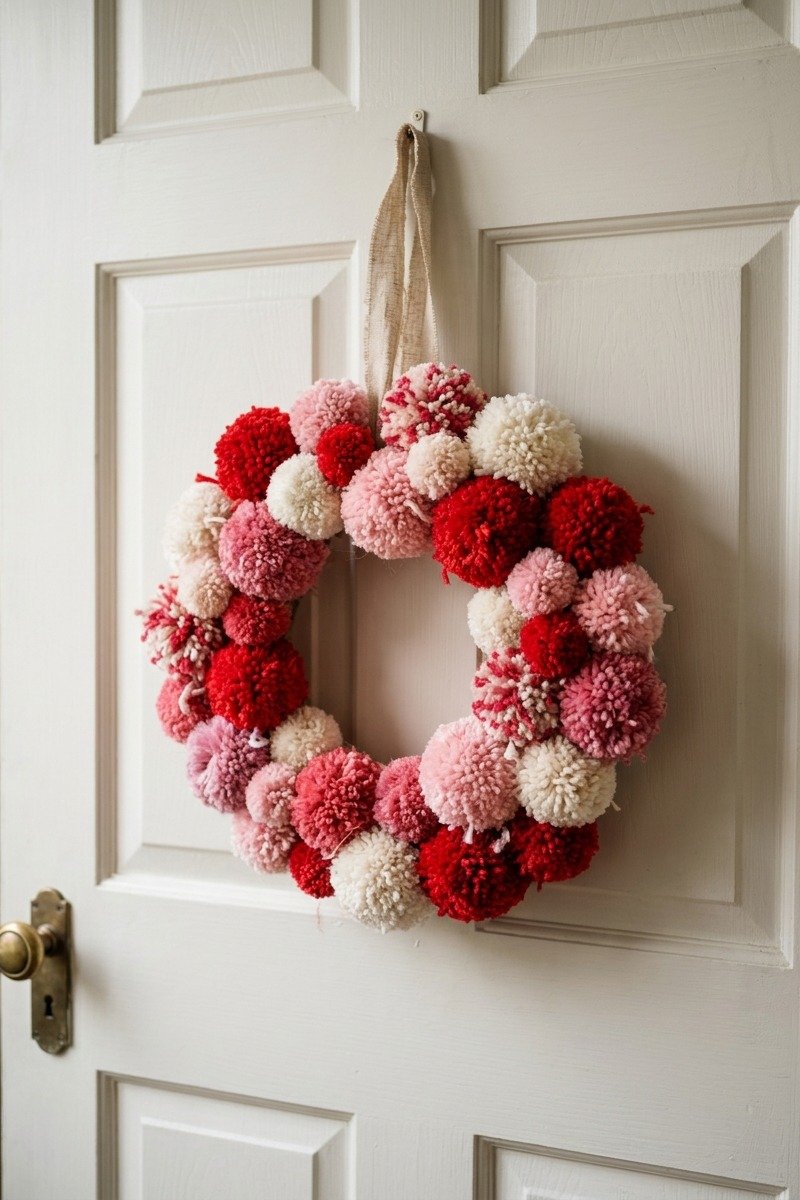
A pom-pom wreath is soft, colorful and cheerful. Make pom-poms in your favorite colors.
You will need:
- Yarn in several colors
- Pom-pom maker or a fork
- Foam wreath form
- Hot glue gun
How to make it:
- Make pom-poms in different sizes using a pom-pom maker.
- Trim them so they are round and fluffy.
- Glue the pom-poms tightly around the wreath form.
- Add a ribbon loop for hanging.
Pro tip: Make pom-poms while watching a holiday movie; you will need about 40 to 60.

25. Mason Jar Snow Globes
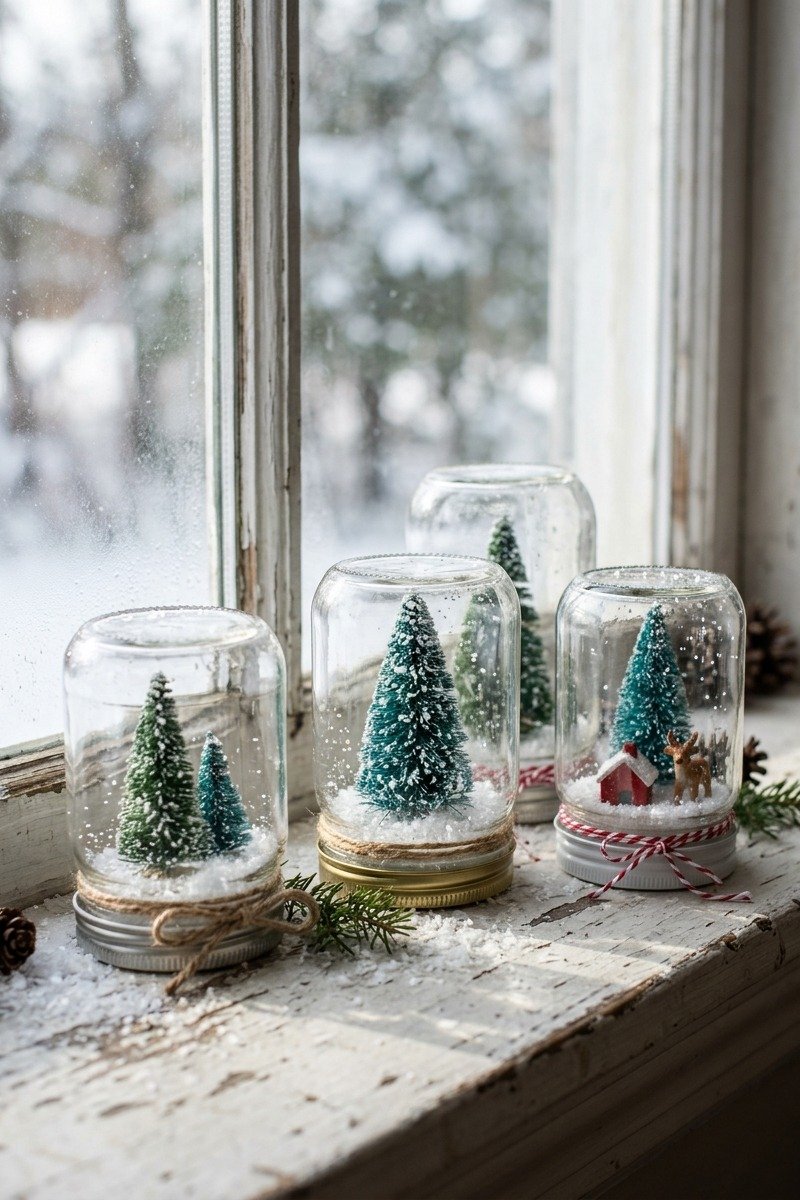
Mason jar snow globes are magical and make wonderful gifts. No water is needed.
You will need:
- Small mason jars
- Mini bottle brush trees
- Faux snow
- Hot glue gun
How to make it:
- Glue a small tree to the inside of the jar lid.
- Pour faux snow into the jar.
- Screw the lid on tightly and turn the jar upside down.
- Tie ribbon around the lid if you like.
Pro tip: Add a tiny figurine or house for a more detailed scene.

26. Paint Pen Ornaments
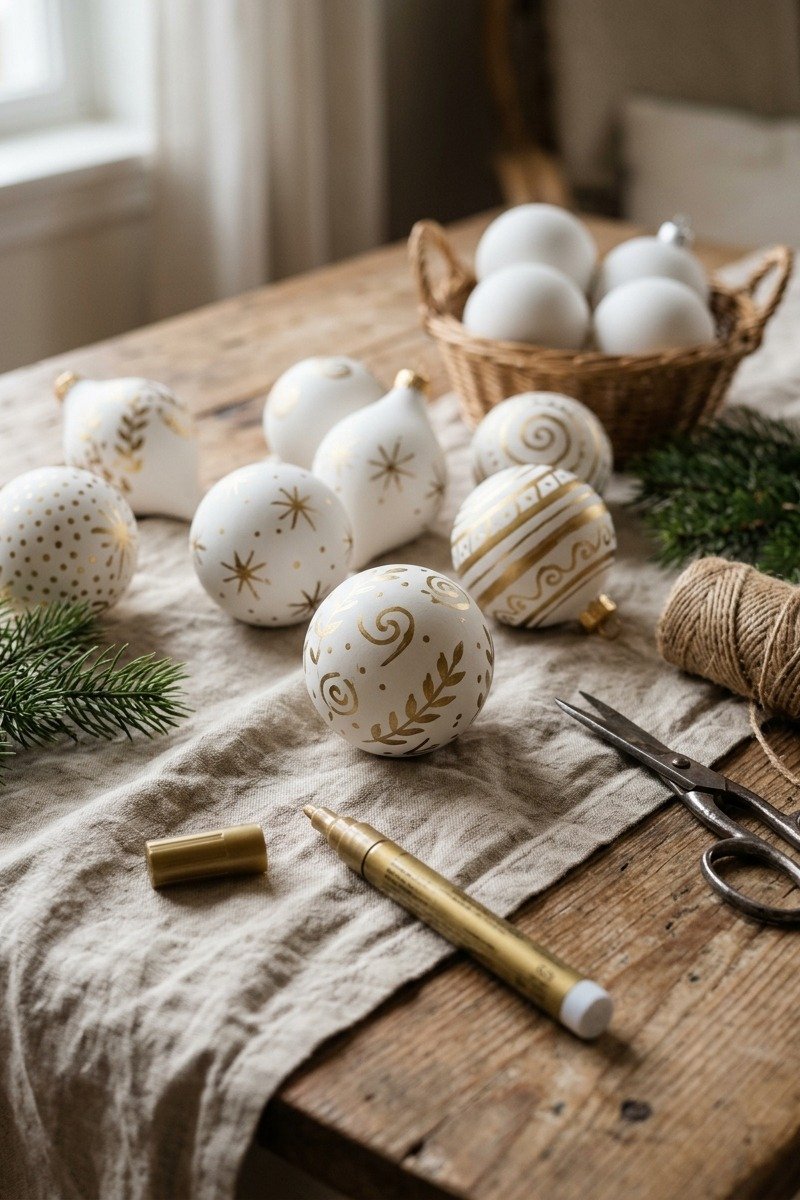
Paint pen ornaments are an easy way to personalize plain ornaments with patterns, names or dates.
You will need:
- Plain white or clear ornaments
- Metallic paint pens
- Ornament stand or cup
How to make it:
- Clean the ornaments with rubbing alcohol.
- Draw dots, lines, stars or names with paint pens.
- Let the paint dry completely.
- Hang them on the tree.
Pro tip: Rest ornaments on a cup while painting so they do not roll.

27. Felt Stockings

Felt stockings are simple to make and easy to personalize.
You will need:
- Felt sheets in red and white
- Scissors
- Fabric glue or needle and thread
- Ribbon
How to make it:
- Cut two stocking shapes from red felt.
- Glue or sew the edges together, leaving the top open.
- Add a white felt cuff and a ribbon loop.
- Add names or initials with felt letters.
Pro tip: Use a blanket stitch with white thread for a classic handmade look.

28. Lighted Branch Centerpiece
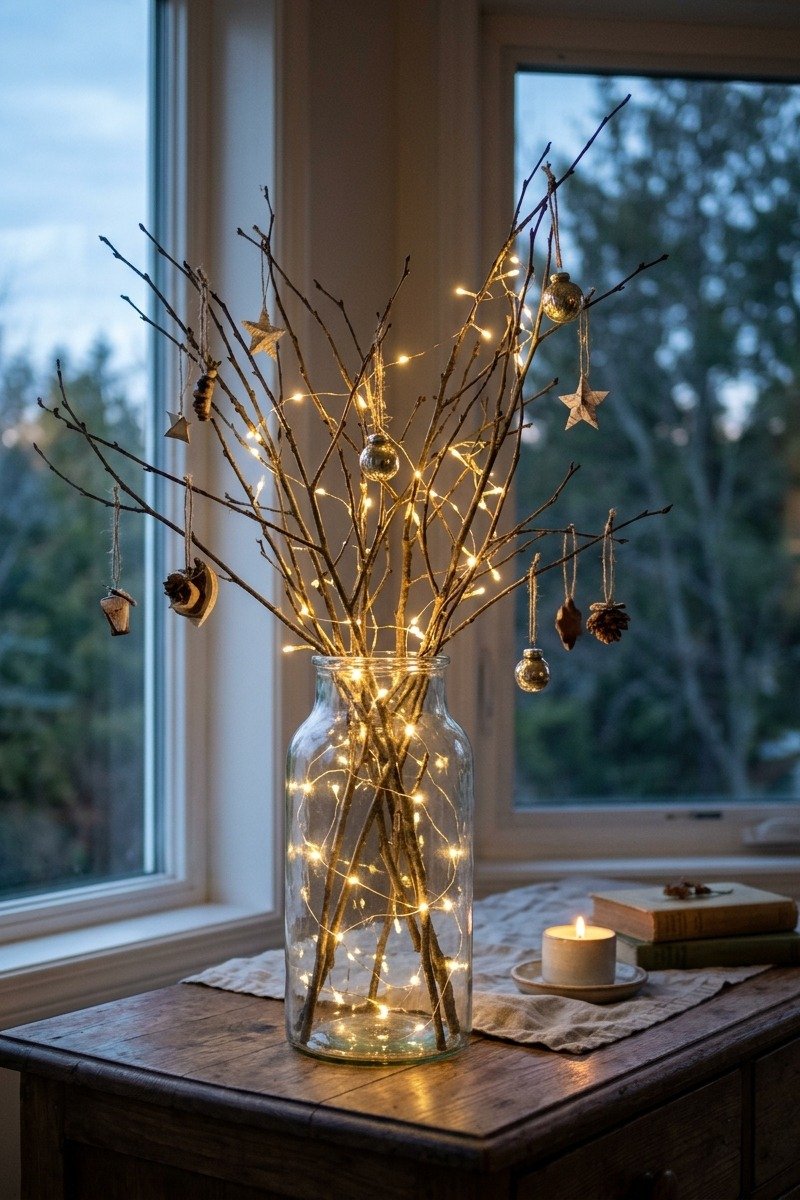
A lighted branch centerpiece is elegant and costs almost nothing if you use branches from your yard.
You will need:
- Bare branches
- A tall glass vase
- Battery fairy lights
- Small ornaments
How to make it:
- Arrange the branches in the vase.
- Wrap fairy lights around the branches.
- Hang a few small ornaments from the branches.
- Hide the battery pack inside the vase.
Pro tip: Spray branches white or gold for a more festive look.

29. Kraft Bag Advent Calendar
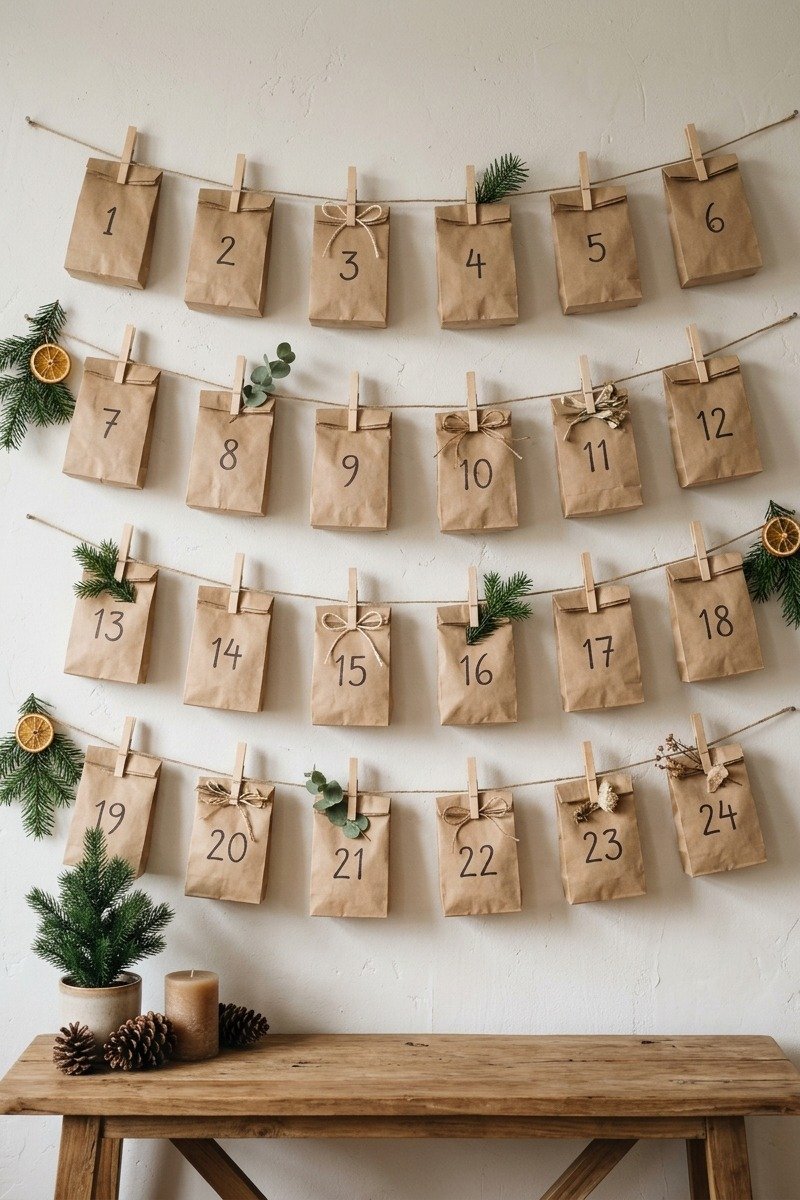
A kraft bag advent calendar is easy to make and fun to fill with small treats.
You will need:
- 24 small kraft paper bags
- Number stickers or stamps
- Mini clothespins
- Jute twine
How to make it:
- Number the bags 1 to 24.
- Fill each bag with a small treat or note.
- Fold the tops over and clip them to twine with clothespins.
- Hang the twine on a wall or across a mantel.
Pro tip: Add a small activity to some bags, such as baking cookies or watching a holiday movie.

30. Greenery Door Swag
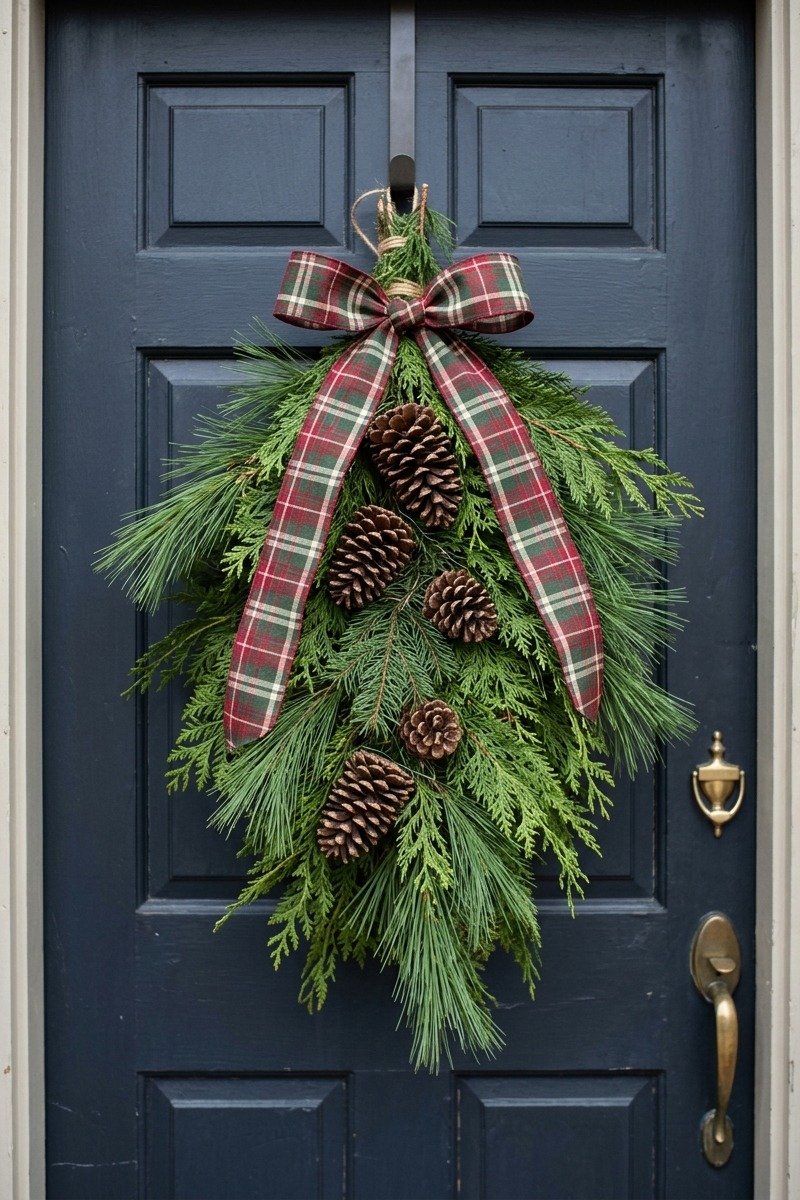
A greenery door swag is a simple alternative to a wreath. Use clippings from your yard or faux stems.
You will need:
- Pine, cedar or fir branches
- Floral wire
- Pinecones
- Plaid ribbon
How to make it:
- Layer branches from largest to smallest, stems together.
- Wrap floral wire tightly around the stems.
- Wire pinecones to the front.
- Tie a large plaid bow over the wire and hang the swag on the door.
Pro tip: Mist fresh greenery with water every few days to keep it fresh.

How to Store Handmade Christmas Decorations
Wrap delicate ornaments in tissue paper and store them in egg cartons or divided boxes.
Keep natural decorations like dried oranges and pinecones in a cool, dry place, and toss any that show mold.
Label boxes by room or type so it is easy to find everything next year.
Frequently Asked Questions
What are the easiest Christmas DIY decorations?
Paper snowflakes, mason jar luminaries, filled clear ornaments, cinnamon stick bundles and gift tag garlands are some of the easiest. Most take under 30 minutes.
How can I decorate for Christmas on a budget?
Make your own decorations using natural materials like pinecones and branches, reuse jars and old books, and buy craft supplies in bulk.
What Christmas crafts can kids make?
Salt dough ornaments, paper snowflakes, popcorn garland, clothespin snowflakes and wine cork reindeer are all great projects for kids.
How long do dried orange slices last?
Properly dried orange slices can last for a year or more if stored in a cool, dry place.
Final Thoughts
Christmas DIY decorations add warmth, personality and a handmade touch to your home, and they do not have to cost much. With a few simple supplies, you can create garlands, ornaments, wreaths and centerpieces that look beautiful and mean so much more than store-bought decor.
Pick a few projects to start with, invite your family or friends to join in, and make crafting part of your holiday tradition. Your handmade decorations will become treasured pieces you bring out every year.

