
My side gate dragged a groove into the gravel for two summers before I finally dealt with it. I’d been lifting it with my knee every time I went through, which is the kind of thing you stop noticing you’re doing.
The fix took about ninety minutes and cost me thirty-eight dollars. Most of that was screws.
Here’s the part that matters, up front, because you probably came here for a number.
What it costs and what you need
Total: $38 (about $22 if you already have exterior screws)
| Item | Size | Cost |
|---|---|---|
| Diagonal brace | 2x4x8 cedar or pressure-treated | $12 |
| Two corner gussets | 1×6 scrap, or a 2ft square of 3/4″ exterior ply | $9 |
| Structural screws | #10 x 2-1/2″, exterior rated, box of 50 | $12 |
| Lag screws for hinges | 1/4″ x 3″ with washers, qty 6 | $5 |
Tools: drill/driver, circular saw or a handsaw, 4-foot level, tape measure, pencil, a couple of scrap blocks for shimming. A sliding T-bevel helps but you can work around not having one.
Time: 45 minutes if it’s just the gate. Two hours if you have to deal with hinges too.
First: is it actually the gate?
Don’t skip this. I’ve watched a neighbor build a beautiful brace into a gate that was hanging off a post leaning six degrees out of plumb. The gate was fine. The post was the problem.

Wedge-shaped gap, tight at the top and wide at the bottom (or the latch corner dragging while the top still lines up) means the gate frame has racked. A rectangle with four fastened corners wants to fold into a parallelogram, and gravity at the latch corner is what folds it. This is the brace fix.
Even gap all the way down, but the whole gate sits low or swings open on its own means the post moved. Put a level on the hinge post. Then grab it at chest height and rock it. If it moves in the ground, or it’s plumb but the gate still hangs wrong, no amount of bracing will help you.
Quick confirmation test: grab the latch corner and lift. If the gate visibly squares itself up and the gap evens out, it’s a racked frame. If the whole assembly rises together and the post flexes, it’s the post.
There’s a third possibility, and it’s the most common one of all.
Check the hinge screws before you build anything
A huge share of “sagging” gates aren’t sagging. The hinge screws have pulled out of the post.
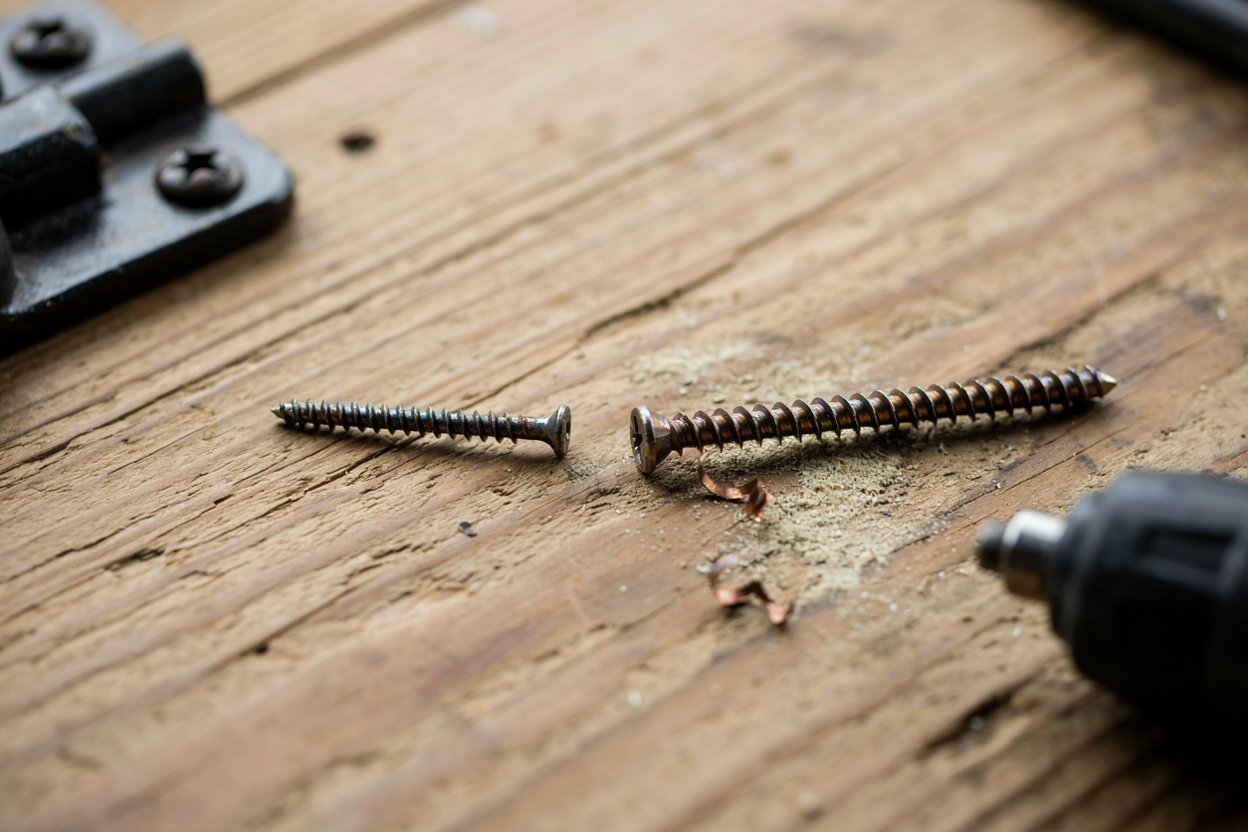
Back one out and look at it. If the threads are shiny or the hole is oval, that’s your answer. Swap every hinge screw for #10 x 2-1/2″ exterior structural screws, or 1/4″ x 3″ lag screws with washers. Predrill: 1/8″ for the #10s, 5/32″ for the lags. If the old holes are chewed out, move the hinge up or down half an inch so the new screws bite fresh wood, or glue a hardwood dowel into the old hole and redrill.
While you’re there, count your hinges. Two hinges is fine for a lightweight gate under four feet tall. Anything taller or heavier than about fifty pounds wants three.
I’ve fixed gates where this alone solved it. Twenty minutes, five dollars. Try it before you cut lumber.
The brace direction almost everyone gets backwards
This is the whole article, honestly. If you take one thing away, take this.
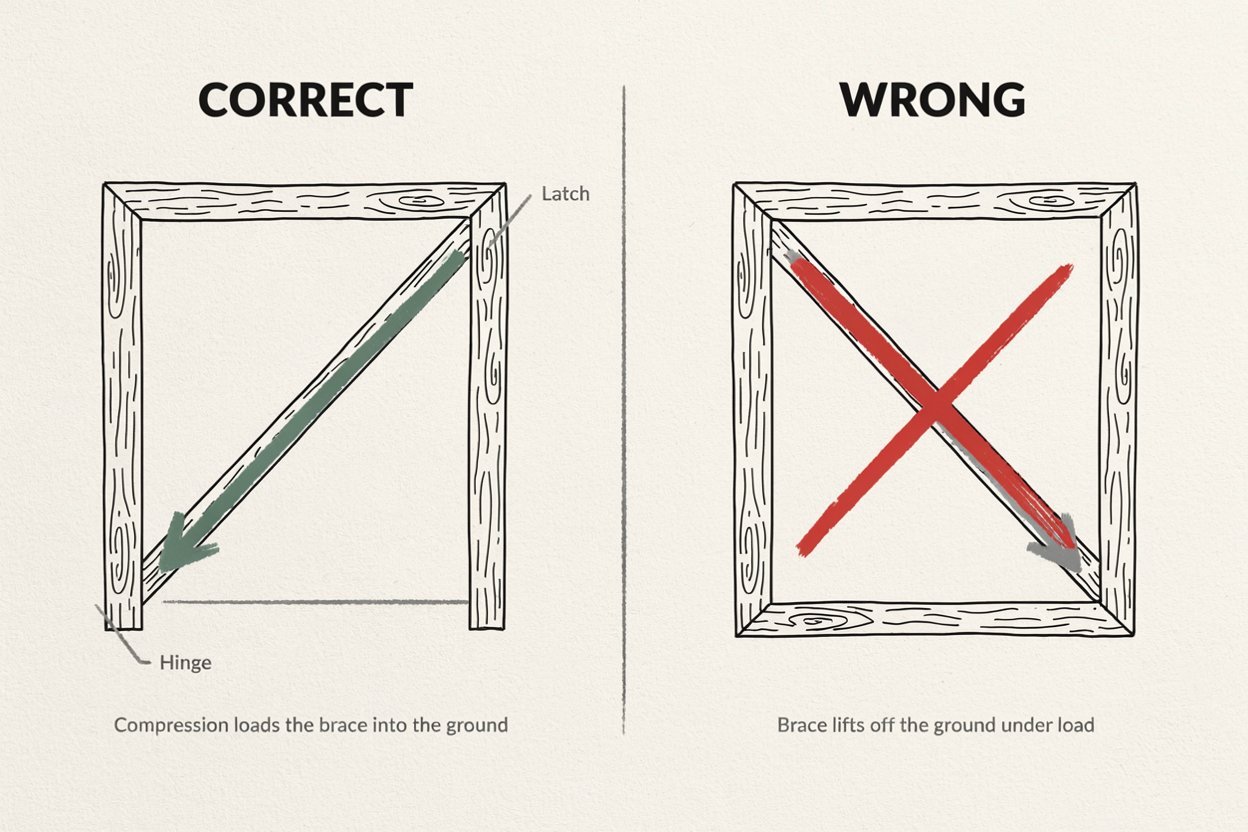
A wooden brace runs from the BOTTOM of the hinge side UP to the TOP of the latch side.
The wood works in compression. It pushes. When the latch corner tries to drop, that diagonal gets squeezed shorter, and the brace refuses to shorten, so the corner stays up. The load travels down the brace and into the hinge post at ground level, which is the strongest place it can land.
Install it the other way, running from the top hinge corner down to the bottom latch corner, and you’ve put the wood in tension across two screwed joints. Wood is decent in tension. Screws pulling out of end grain are not. That gate will sag again by August.
Now the confusing part: a steel cable anti-sag kit goes on the opposite diagonal. Cable pulls instead of pushes, so it runs from the TOP hinge corner DOWN to the BOTTOM latch corner, and you shorten it with the turnbuckle to lift the far side.
Here’s how I keep it straight: wood’s low end goes on the hinge side, cable’s low end goes on the latch side. They’re mirror images, and mixing them up is why so many gates have a brace that does nothing.
If your gate already has a diagonal running the wrong way, take it off. It’s not helping and it’s in your way.
Cutting and installing the brace
Square the gate first. This is the step people skip and then wonder why the sag came back. If you fasten the brace while the gate is still racked, you’ve just made the sag permanent and rigid.
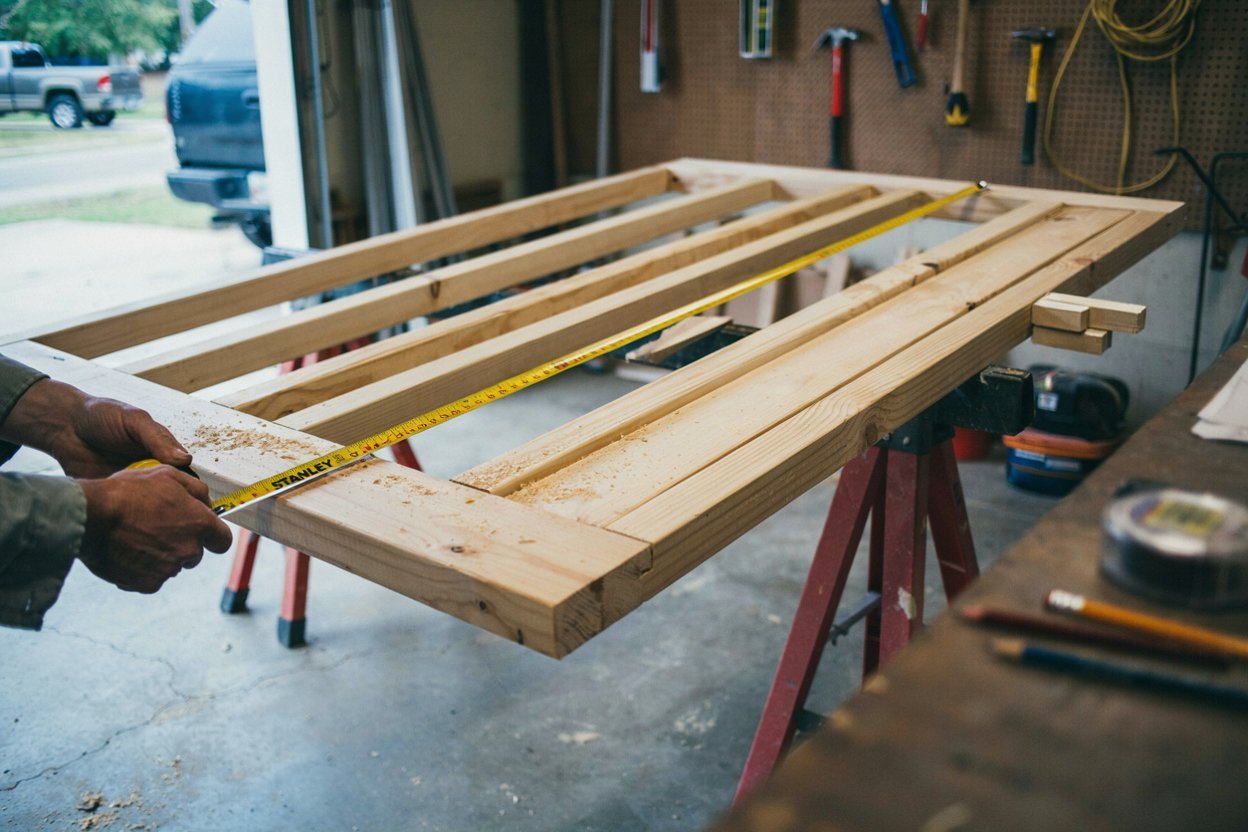
Prop the gate open. Slide scrap blocks or a shim under the latch corner and lift it until the gate reads square. Check it by measuring both diagonals corner to corner. When those two numbers match, the frame is square. Get them within an eighth of an inch and stop fussing.
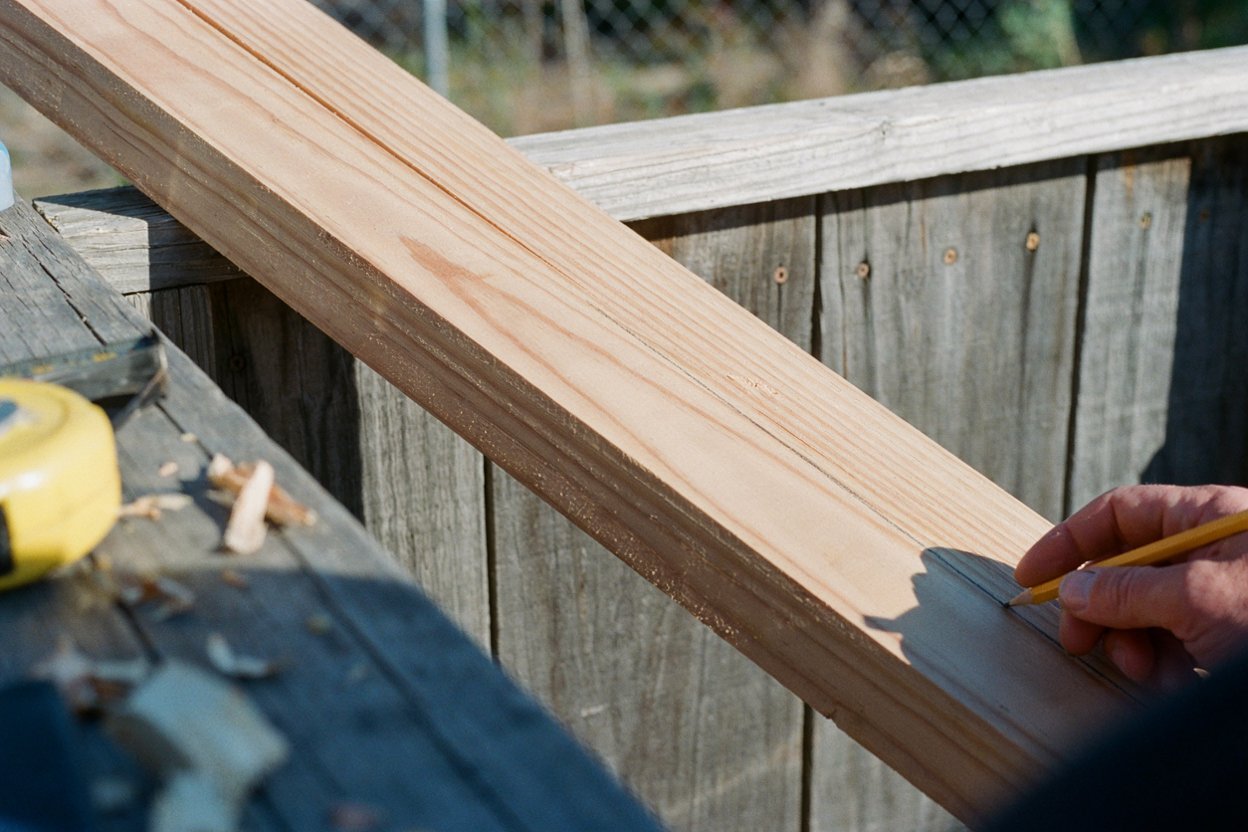
Get your brace length by scribing, not by math. Lay the 2×4 across the back of the gate on the correct diagonal, resting it against the inside faces of the top and bottom rails. Trace along the rails onto the board with a pencil. Those two pencil lines are your cut lines, and they’re already at the right angle. Cut just outside them so the brace fits snug and you have to tap it in.
A tight brace is doing its job before you’ve driven a single screw. If it drops in loose, cut a new one.
Fasten to the frame, not the pickets. Screw the brace into the top and bottom rails, three screws at each end, angled slightly so they bite into meat rather than skimming the edge. Pickets are decoration. They’ll split and they carry nothing.
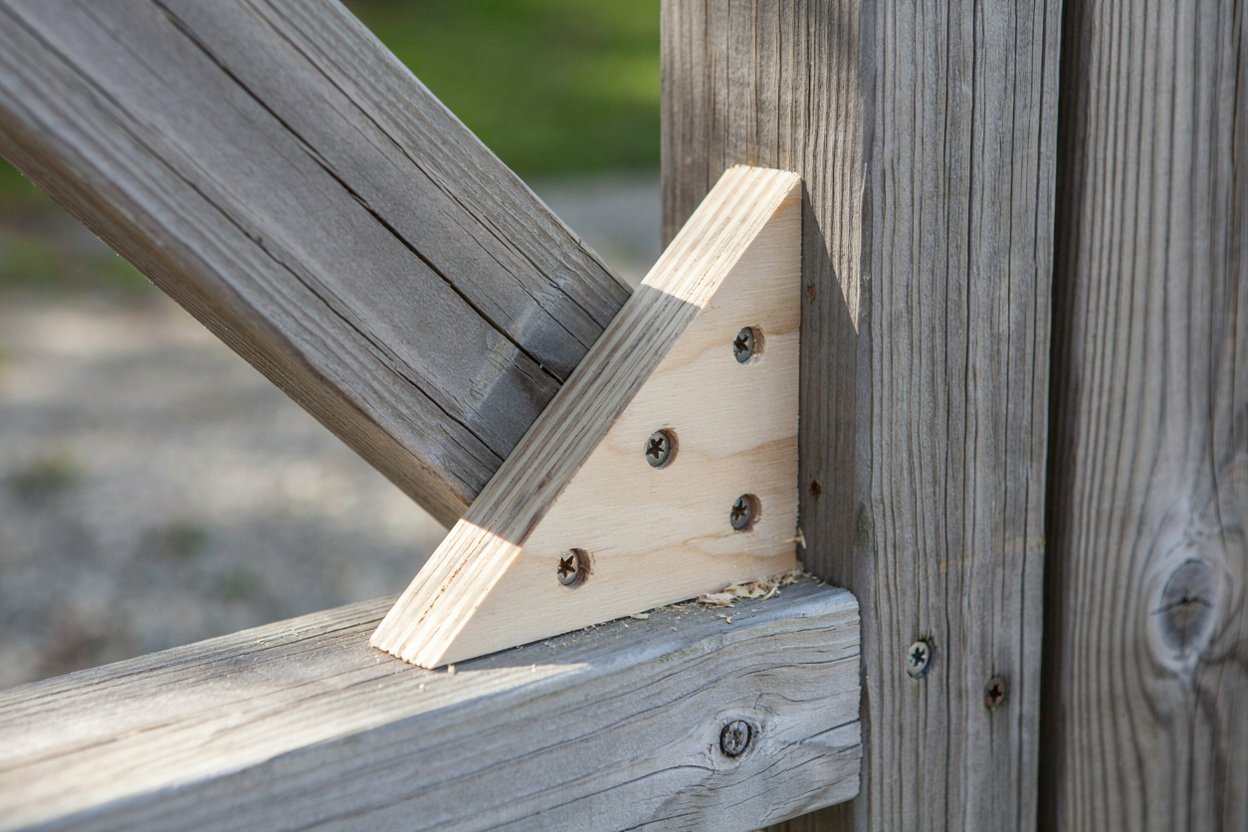
Add the gussets. Cut two triangles from your 1×6 or plywood, roughly 6 inches on each leg, and screw one into each hinge-side corner on the back face. The hinge-side corners are the pivot points the whole frame racks around. Locking those two corners is what keeps the geometry honest. Four screws per gusset, staggered so they don’t split the grain.
Pull your shims. The gate should hold its position.
Gaps worth checking while it’s apart
- Latch side: 1/2 inch
- Hinge side: 1/4 to 3/8 inch
- Bottom: 2 inches minimum, more if you get snow or the ground heaves
If your bottom clearance is under an inch, you’ll be back here next spring. Wood swells. Ground moves. Give it room.
If it turns out to be the post
Bracing a good gate onto a bad post is wasted effort, so I’ll say what’s actually involved.
A gate post needs a third of its total length in the ground. A 6-foot-tall post is a 9-foot post with 3 feet buried, and that depth needs to clear your frost line. Hole diameter should be about three times the post width, so 12 inches for a 4×4. Four to six inches of gravel in the bottom for drainage, post plumbed in both directions, then concrete crowned above grade so water runs away from the wood instead of pooling against it.
If the post is soft at ground level, poke it with a screwdriver. If it sinks in, that post is done and no repair will hold. Replace it.
Keeping it from coming back
Don’t hang things on the gate. Not a hose, not a planter, not a kid. Every pound at the latch corner is multiplied by the width of the gate as leverage against the hinges.
Check the hinge screws each spring. Ten seconds with a driver. That single habit would have saved my gate two years of dragging.
Cedar and pressure-treated lumber both move seasonally. A quarter inch of swing between February and August is normal and doesn’t mean the fix failed.