Cheap-looking fences usually aren’t cheap. Somebody spent a whole weekend and a hundred dollars getting there. The problem is almost never budget, it’s three decisions made without thinking: the sheen, the undertone, and whether the fence and gate are fighting each other.
Six combinations below, each with codes. First, the reasoning, because if you understand why these work you can build your own.
Why cheap looks cheap
Sheen, mostly. Rough sawn fence boards have grain, mill marks, knots, and nail holes. Gloss and semi-gloss catch light off every one of them and the fence reads as plastic. Flat and matte absorb that light and the texture becomes an asset. Use exterior flat on the fence and, if you want the gate to feel like a designed object, satin on the gate only.
Mid-tone undertones. The colors that age badly are the mid-range ones with a strong cast: colonial blue, sage that goes minty, taupe that goes pink in afternoon light. Very dark and very light colors are far more forgiving. Almost every fence I’ve looked at and thought “that’s expensive” was either near-black, off-white, or bare wood.
Two colors of the same weight. If the fence and the gate are both mid-tone, they compete and the eye can’t tell what matters. One of them has to recede. Usually it’s the fence, since there’s a lot more of it.
Ignoring the roof. Your roof is the largest color surface on the property and it has an undertone. Warm brown shingles beside a cool grey fence will look wrong forever and nobody will be able to say why.
Paint or solid stain? Not the same decision.
This matters more than the color.
Paint sits on the surface as a film. On a vertical fence face it can last eight to twelve years. On horizontal surfaces, fence tops, and end grain, it fails by peeling, and peeling paint means scraping before you can recoat. Scraping a hundred feet of fence is a punishment.
Solid color stain penetrates instead of filming. It gives you nearly the same opacity, it fails by fading rather than peeling, and recoating means washing and rolling. Five to eight years, but the recoat is a Saturday instead of a project.
I’d use solid stain on the fence and paint on the gate. The fence is about maintenance math. The gate is small enough that the crisper finish of paint is worth the eventual scrape.
Never use interior paint outside, and don’t let anyone tell you a coat of exterior clear over it solves that.
Combo 1: Charcoal fence, black gate
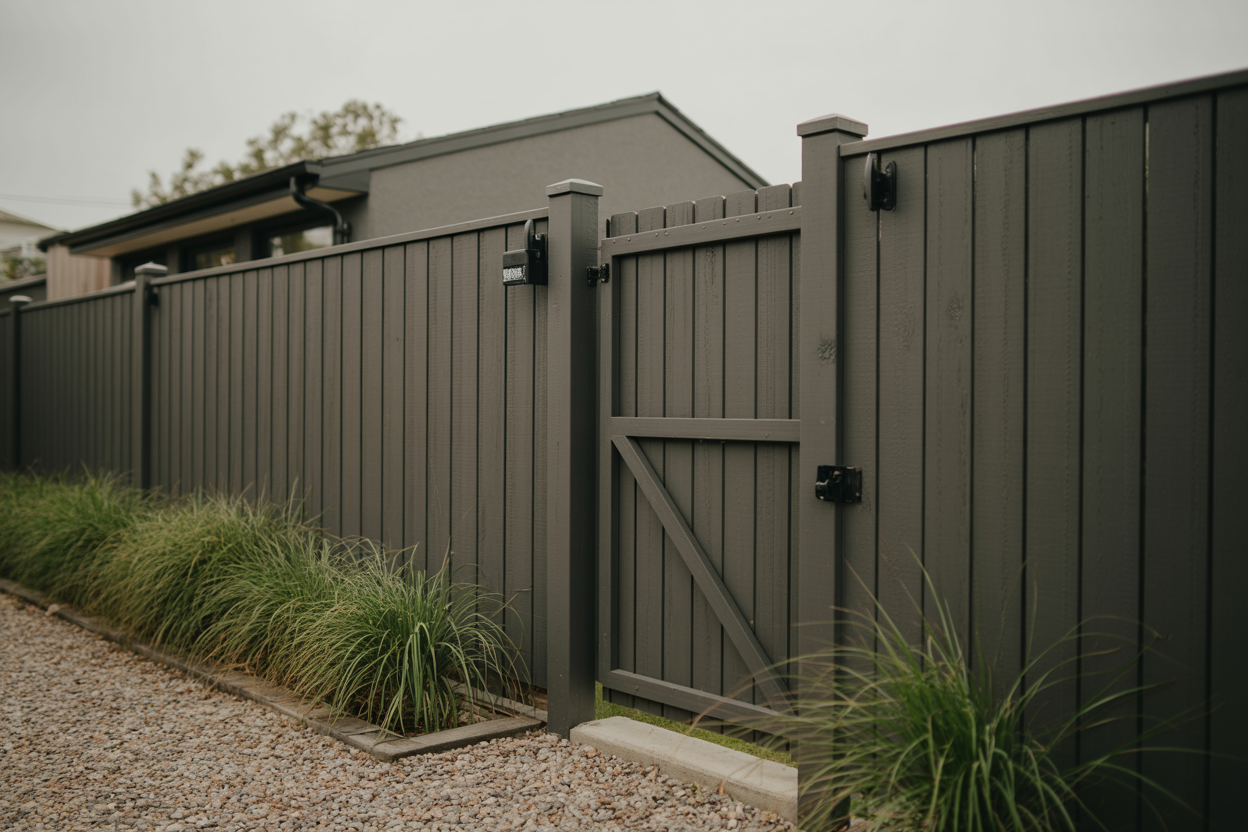
- Fence: Sherwin-Williams Iron Ore, SW 7069
- Gate: Sherwin-Williams Tricorn Black, SW 6258
- Hardware: matte black
The safest expensive-looking option on this list. Iron Ore is a soft near-black that reads as charcoal in daylight, so the true black gate registers as a deliberate step darker rather than a mismatch. Plants look better against it than against anything else.
Works with: grey or black roofs, white or black window trim, brick.
Combo 2: Natural cedar fence, deep green gate
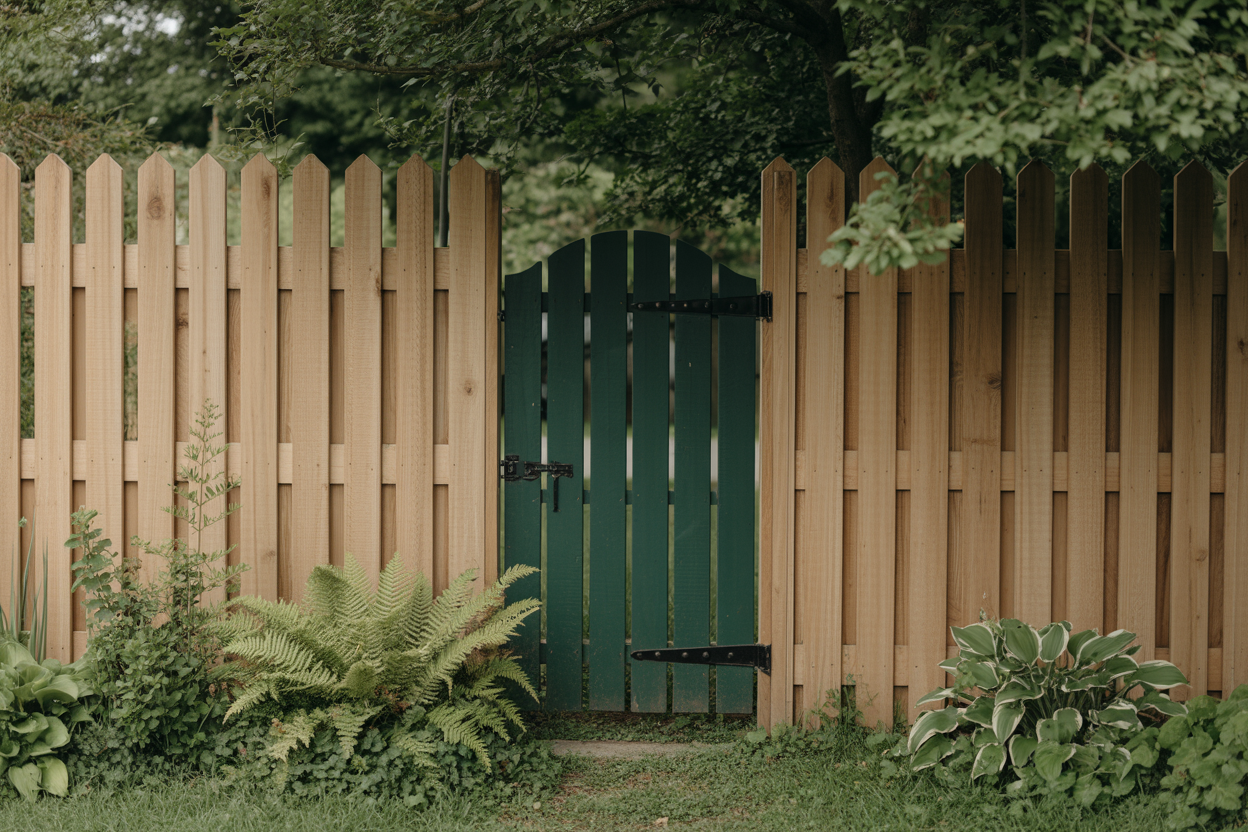
- Fence: clear or lightly tinted cedar sealer, no pigment
- Gate: Farrow & Ball Studio Green, No. 93, or Sherwin-Williams Pewter Green, SW 6208
- Hardware: matte black
Leaving the fence bare and painting only the gate is the highest ratio of effect to effort here. One quart of paint changes the whole yard.
Studio Green is nearly black until sun hits it, then it’s unmistakably green. Pewter Green is greyer and cheaper to source in the US. Both sit beside raw cedar without arguing with the orange in it, which most greens cannot do.
The catch: bare cedar greys out in eighteen months unless you re-seal, and the silvered look either delights you or doesn’t. Decide before you commit.
Combo 3: Warm white fence, charcoal gate
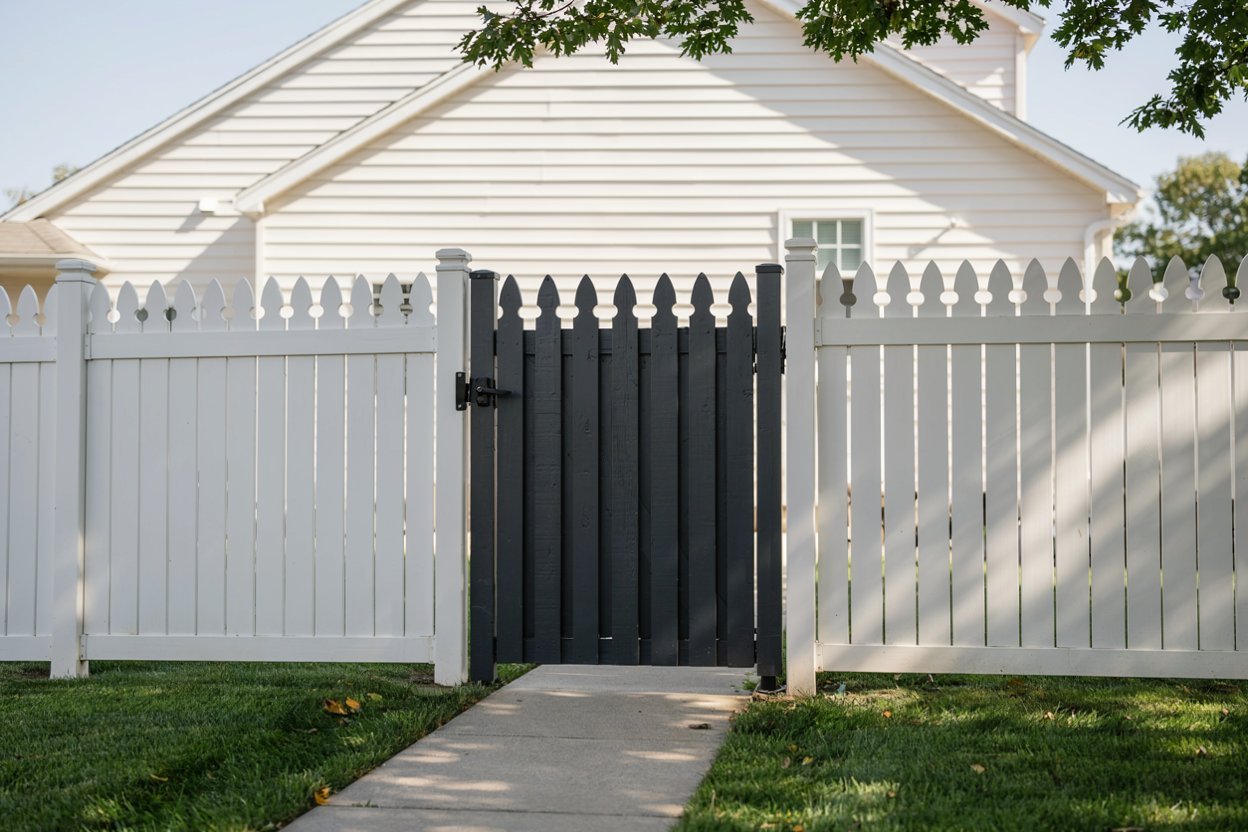
- Fence: Sherwin-Williams Alabaster, SW 7008
- Gate: Benjamin Moore Kendall Charcoal, HC-166
- Hardware: matte black or aged brass
The inverse of Combo 1 and the right answer beside a light-colored house. Alabaster is warm enough to avoid the dead flat look of a pure white, and it doesn’t go blue in shade the way cool whites do.
Fair warning: white fences show everything. Splash-back from the ground, algae on the north face, lawn mower rub. This is a two-year wash cycle, not a five-year one.
Combo 4: Everything one dark color
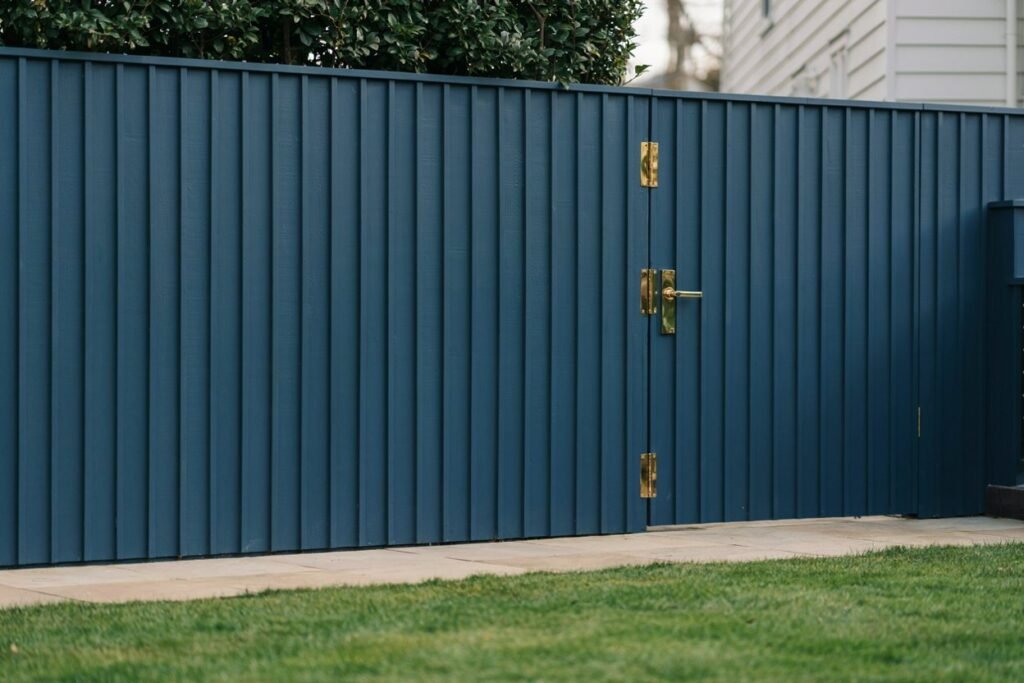
- Both: Farrow & Ball Railings, No. 31, or Sherwin-Williams Tricorn Black, SW 6258
- Hardware: aged brass or unlacquered brass
Fence and gate the same color, so the whole boundary reads as one architectural line and the gate disappears until you’re looking for it. Brass hardware is what keeps it from feeling severe, and unlacquered brass will patina to something better than it started.
Railings is a blue-black rather than a brown-black, which is worth knowing if your house has cool grey stone or a slate roof.
This is the combination that photographs best, and it’s why you keep seeing it.
Combo 5: Grey-brown fence, navy gate
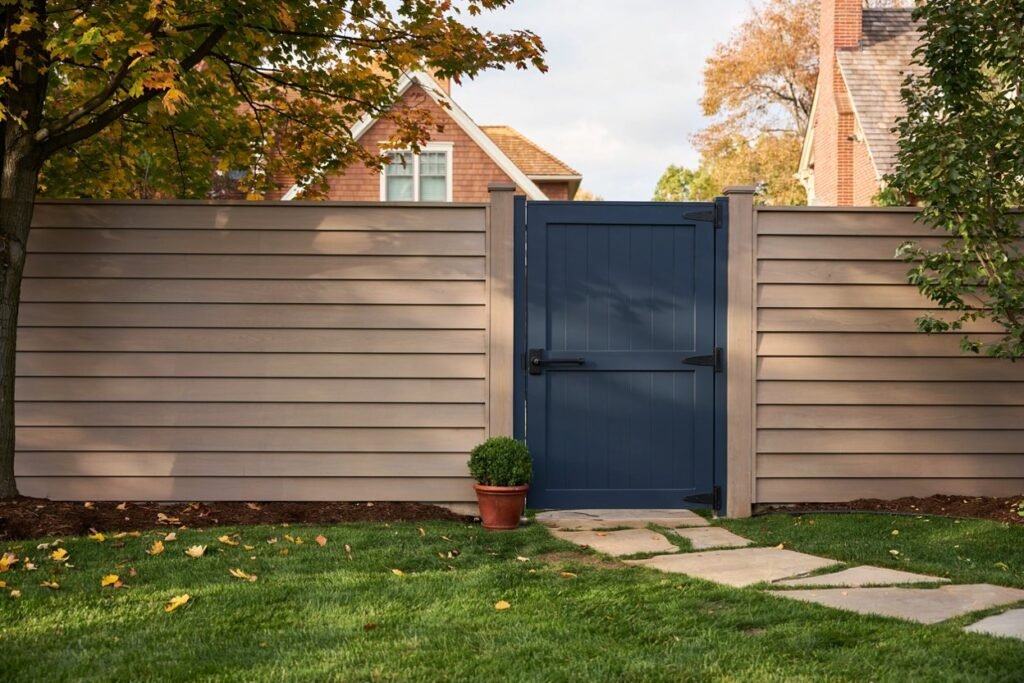
- Fence: Sherwin-Williams Urbane Bronze, SW 7048
- Gate: Benjamin Moore Hale Navy, HC-154
- Hardware: matte black
For warm-toned houses where charcoal goes cold. Urbane Bronze is a grey with brown in it, so it sits comfortably next to brick, cedar shingle, and warm stone. Hale Navy is dark enough to hold its own against it without shifting toward the nautical.
The trickiest pairing here. Sample both on a scrap board and look at them at 9am and 5pm before committing, because the brown in the fence and the blue in the gate can go muddy in flat light.
Combo 6: Black fence, bare wood gate
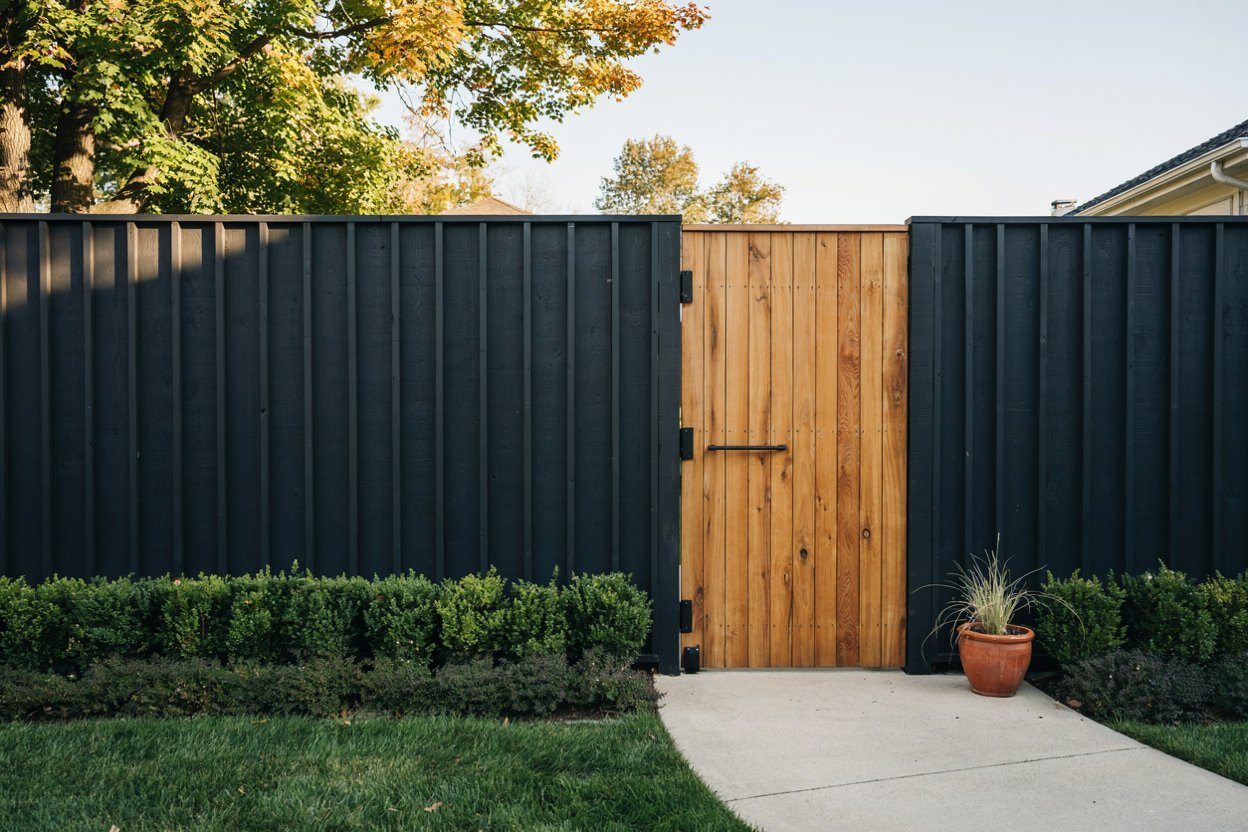
- Fence: Sherwin-Williams Tricorn Black, SW 6258, or Farrow & Ball Off-Black, No. 57
- Gate: clear-sealed cedar or white oak, no pigment
- Hardware: matte black
The reversal. Painting the large surface dark and leaving the small one natural makes the wood grain the focal point, and it costs less than doing it the other way around.
Use a UV-blocking clear sealer on the gate, not a plain water repellent, or the wood will silver within two years and the contrast collapses. Plan on resealing the gate annually. It’s a small gate. It’s twenty minutes.
Sampling, which you should not skip
Buy sample pots. Paint two coats onto a scrap of the same fence board, not onto poster board or the existing fence.
The board matters because rough sawn cedar drinks paint and reads three shades darker than the chip. I have watched people pick a colour from a fan deck, roll a whole fence, and get something they didn’t order.
Prop the sample against the fence in the actual location. Look at it in the morning, at noon, and at dusk, and look at it in rain if you can wait for some. Dark colors in particular shift enormously between wet and dry.
Order of operations
- Wash the fence and let it dry fully. Three dry days minimum, longer for pressure-treated.
- New pressure-treated lumber needs to weather before it takes finish. Anywhere from a few weeks to six months depending on how wet it was when you bought it. The splash test: flick water on it, and if it beads, wait longer.
- Spot prime knots and any bare cedar with a stain-blocking primer, or tannin will bleed through pale colors within a season.
- Fence first, gate second. Overspray goes one direction and it’s easier to cut the gate in clean.
- Take the hardware off. Taping around a hinge takes longer than removing it and never looks as good.
That last one is the difference between a fence that looks painted and a fence that looks finished, and it’s free.